

Quick guide: plan the recording chain before choosing resolution
Match the exact webcam to your computer, recording application and delivery format. Check framing and mount stability, improve lighting, select the microphone separately and review an exported sample. Advertised resolution does not prove low-light quality, sound quality or your application’s final output.

- Large 1/1.3 inch sensor improves detailed low light capture.
- 4K video provides sharp footage for professional podcast production.
- AI tracking automatically keeps moving presenters properly framed.
- Directional noise canceling microphones improve voice pickup during recording.
- - HDR helps maintain detail across difficult mixed lighting conditions.


- 4K video capture provides detailed footage for podcast production.
- AI powered tracking helps keep presenters properly framed automatically.
- PTZ movement provides flexible framing without manually repositioning camera.
- USB connectivity supports straightforward use with PC and Mac.
- - Streaming focused design works well for podcasts and live content.
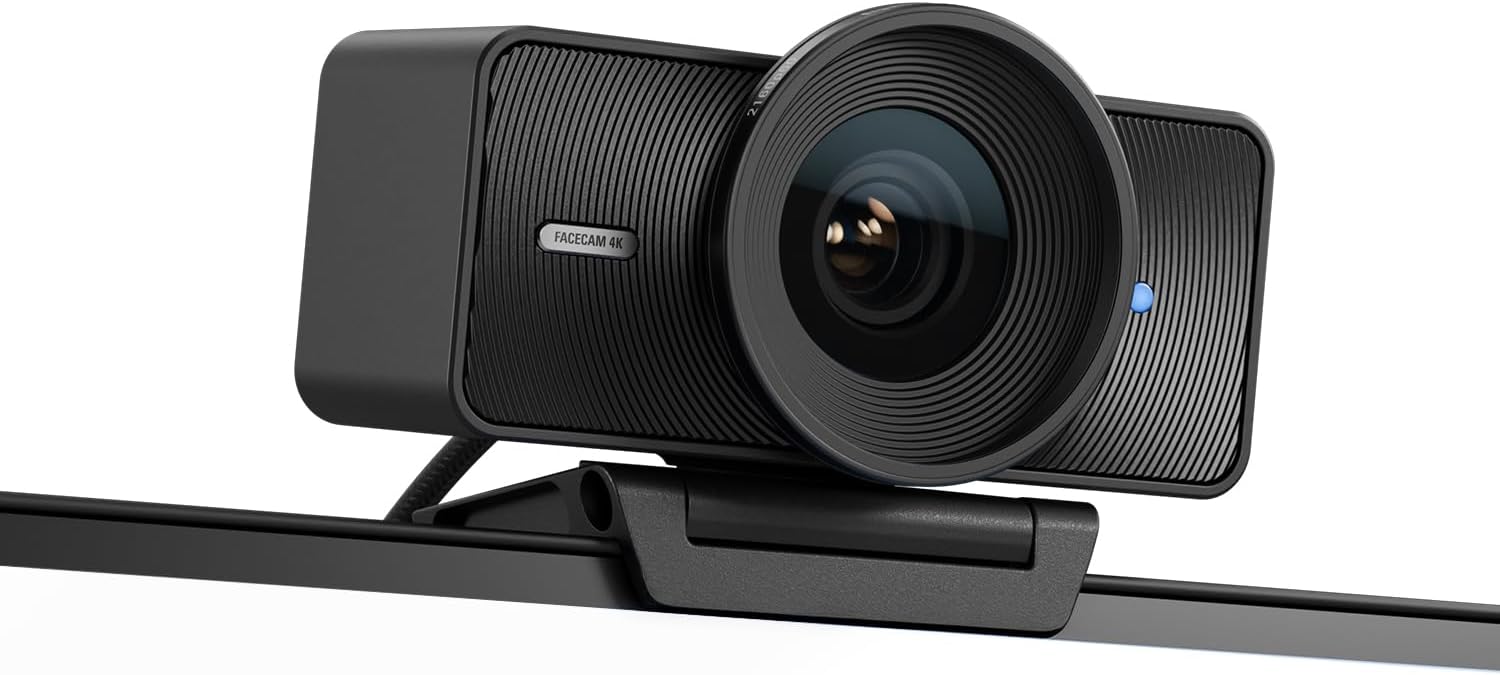
- 4K video capture provides detailed footage for podcast production.
- DSLR-like manual controls allow more deliberate image adjustments.
- Uncompressed video output preserves detail during computer based recording.
- Camera Hub software provides extensive exposure and image customization.
- - Stream Deck integration simplifies controls during live podcast production.

- 4K video capture provides sharp detail for podcast recordings.
- AI tracking automatically keeps moving presenters properly framed.
- Two axis gimbal provides smooth physical camera movement.
- Phase detection autofocus keeps subjects sharp during position changes.
- - Noise canceling microphone modes improve voice pickup during recording.

- 4K 30fps capture provides detailed video for podcast recording.
- 1080p 60fps mode delivers smoother motion when needed.
- Half inch CMOS sensor improves overall webcam image quality.
- AI auto framing keeps podcast hosts centered automatically.
- - Dual microphone system provides four selectable audio pickup modes.

- 4K video capture provides detailed footage for podcast production.
- Large image sensor supports clearer video in challenging lighting.
- Advanced autofocus helps maintain sharp facial detail during movement.
- AI powered framing keeps presenters positioned within the shot.
- - Built in microphones provide convenient audio for simple recording setups.

- Full HD 1080p recording provides clear everyday podcast video.
- 30fps capture works well for seated interview recordings.
- Autofocus keeps faces sharp during normal presenter movement.
- Dual stereo microphones provide convenient built in audio capture.
- - Automatic light correction helps balance changing room illumination.
Begin with the podcast format, not the resolution badge
A webcam for a podcast has to fit the way you produce the episode. A solo presenter at a desk, a remote interview and a two-person conversation each create different framing and monitoring problems. Before comparing the seven options above, decide whether video is the main product, a companion to audio or material you will edit into shorter clips. That choice influences how much flexibility you need from the camera and recording software.
Write down the computer, operating system and application you intend to use. Include whether you record locally, stream live, join a browser-based interview or combine several sources in production software. The supported modes of the exact webcam must work through that chain. A resolution advertised on a box does not establish the resolution your chosen application will capture, transmit or export.
Set a practical goal: a consistent, readable view of the speaker with stable sound and a manageable setup routine. Do not treat a specification as evidence of tested low-light performance, color accuracy or reliability. The useful comparison is how a candidate behaves in your room, with your lighting and your actual software. The buying guide here explains that decision process; the generated illustrations are conceptual setups, not test results for the ranked products.
Choose framing and placement before extra features
Place the camera where it can show the intended composition without competing with the microphone. For a desk-based presenter, an eye-level position is a sensible starting point to test. Check the background, headroom and space needed for ordinary movement. A camera mounted too low may create a view you dislike even when its technical specifications look strong.
Field of view changes how much of the room enters the frame. A wider view can include two speakers or a demonstration area, but it can also reveal clutter or make a single speaker appear smaller. Verify whether the model offers adjustable framing and how that adjustment works in your software. Digital cropping may alter the available image detail; do not assume every zoom control behaves like an optical lens.
Check the mount as carefully as the camera. A monitor clip must suit the screen’s shape and stay stable without pressing on fragile parts. If you intend to use a tripod, verify the actual mounting provision and any adapter requirement. Leave room for the laptop lid or monitor to move without pulling the cable. For a room with multiple speakers rather than a single desktop presenter, our conference camera and microphone guide covers another set of placement and audio questions; those systems should not be assumed interchangeable with a webcam.

Understand the full video path
Resolution and frame rate describe supported modes, but their usefulness depends on the whole workflow. Check the manufacturer’s documentation for the exact mode, connection and software requirements. Then check your recording application’s settings and the delivery platform’s limits. A camera that supports a particular capture mode may still be limited by an application setting, adapter, hub or processing load.
Choose a mode that matches your output rather than maximizing every number. A talking-head podcast and a fast-moving demonstration can need different settings. Larger files also affect storage, transfer and editing time. Record a short sample, export it through the planned workflow and review that exported file; watching only the camera preview does not show the final viewer experience.
Keep comparisons precise. Do not equate advertised resolution with measured sharpness or assume a higher frame-rate option proves better image quality. Lighting, focus, exposure, compression and composition all contribute. Check whether controls are available in the operating system, manufacturer utility or application, and whether those settings persist. If two modes require different software or connection conditions, write those conditions down so a future recording does not silently use the wrong setup.
Improve lighting and background before blaming the camera
Begin with the room you already have. A bright window behind the speaker can make exposure difficult, while a light placed directly in front may create distracting reflections. Test a softer source positioned to one side of the camera and inspect the result in the application you will actually use. Lighting choices are adjustments to evaluate, not a guarantee that any webcam will produce a particular look.
Watch for changing conditions. Daylight can vary during a long episode, and a lamp that looks acceptable to your eyes may behave differently on camera. Record a sample that includes normal head movement, glasses if worn and the background you plan to keep. Review for distracting brightness changes or visible flicker. If a problem appears, check the relevant light and camera settings against the manufacturers’ instructions before changing several variables at once.
Use stable stands, suitable power arrangements and sensible cable routing. Keep lights clear of materials and locations the manufacturer warns against, and do not balance equipment on the monitor merely for convenience. Remove background details you do not want shared publicly. A clean visual composition is often more useful than adding decorative equipment. Compare results after each change using the same framing; otherwise a better-looking sample may reflect the new room arrangement rather than a difference between cameras.
Select the microphone as a separate production decision
A webcam’s microphone and its video function are different parts of the setup. Confirm whether the exact model includes a microphone and what controls your application provides. Do not assume an integrated microphone is sufficient for your room or that buying a higher-resolution camera improves audio. A separate microphone may be useful, but its placement, input selection and gain still need testing.
In the recording application, choose the intended camera and microphone explicitly. Check whether another application can change the default input, and verify settings again after reconnecting devices. Make a short spoken recording at your normal distance, then listen on headphones at a sensible volume. Include a brief pause so you can hear room sound and unintended background noise. This is a practical setup check, not a measured microphone benchmark.
For remote interviews, consider whether speakers create unwanted pickup by the microphone. Headphones can be part of a useful trial, but the result depends on your equipment and software. Our portable laptop speaker guide explains playback-output selection and echo checks when planning a shared desk. Record a brief clap or another clear visible and audible event to inspect synchronization in the final file. If timing is off, investigate the software and connection path before assuming the camera alone is responsible.

Check ports, software and monitoring before recording day
Map every device in the setup: webcam, microphone, headphones, lights that need power, external storage and any second display. Identify which computer ports handle each job and whether an adapter or hub is required. Confirm the webcam’s connection requirements using exact model documentation. A USB connector’s shape alone does not establish available data bandwidth or all supported video modes.
Test the complete arrangement rather than testing each device separately and assuming they will work together. Run the actual recording application with the microphone and any screen-sharing or presentation features you plan to use. Check for permission prompts, device-selection changes and interruptions when reconnecting equipment. On a managed computer, ask whether optional manufacturer software is permitted before relying on its controls.
A second display can help separate notes from the camera preview, but placement matters. Keep the material you need to read near enough to the camera that looking at it does not constantly pull your attention far out of frame. If you are considering a travel display, the portable external monitor guide helps identify connection and power questions to verify. It does not establish compatibility with your computer. Keep a simple connection map so another recording session can reproduce the same arrangement without guesswork.
Run a sample episode before the return window closes
Read the current seller’s return terms and confirm the exact webcam variant, included mount, cable and any required accessories. Keep packaging while you evaluate the device. Check the manufacturer’s setup instructions and update requirements without assuming that every optional download is necessary for basic operation. Avoid using your first important interview as the trial.
Record a sample that represents the real episode. Use the intended lighting, microphone, framing, background and application. Speak normally, turn your head, show an object if demonstrations are part of the format, and let the recording run long enough to reveal ordinary workflow interruptions. Watch the exported recording, not only the live preview. Note focus behavior, exposure changes, framing, sound selection and synchronization without inventing numerical performance scores.
If the result is unsatisfactory, change one variable at a time. Try a placement or lighting correction, then repeat the same sample. Confirm that the application is using the intended capture mode and device. Keep notes distinguishing software limitations from physical mount issues or image preferences. A candidate is worth keeping when it meets your production needs with a routine you can repeat. If it does not, make the decision while your actual return terms still allow the appropriate next step.

Build a repeatable pre-episode checklist
Once the setup works, write a checklist that begins with device selection and ends with reviewing a short recording. Check camera position, cable security, microphone input, recording location and available storage. Confirm permissions and close applications that might compete for the camera. For a remote guest, agree on the platform and a brief sound-and-picture check before the formal conversation begins.
Include privacy and housekeeping. Use a lens cover if the exact device provides one, or follow its documented privacy procedure. Do not assume a software preview being closed means the camera cannot be accessed by another application. Remove sensitive items from the frame and check what screen sharing will reveal. Keep the computer and camera stable during the session, and route cables so normal chair movement cannot tug on them.
Clean and store equipment according to the manufacturer’s instructions. Avoid touching the lens unnecessarily or using unapproved cleaning materials. Save the settings that worked and keep a known-good sample as a reference for later troubleshooting. The final choice is not merely a webcam with an impressive badge: it is a camera, mount, light, microphone and software workflow that supports your episodes without avoidable surprises. Recheck the routine whenever a computer update, room change or new accessory alters that chain.
Podcast webcam FAQs
Do I need a 4K webcam for a podcast?
Not necessarily. Choose a supported mode that fits your recording application, editing workflow and delivery platform, then review an exported sample rather than judging only the preview.
Will a higher-resolution webcam improve my audio?
No such improvement should be assumed. Camera resolution and microphone capture are separate decisions; select and test the intended microphone in your recording application.
Why does my recording look different from the preview?
The capture mode, application processing, export settings and delivery platform can change the result. Check the complete recording and export chain using a representative sample.
Can a webcam work through any USB hub?
Do not assume that. Verify the webcam’s connection requirements and the hub, adapter and computer specifications, then test the complete setup with your other devices connected.
Where should I place a webcam for a solo podcast?
An eye-level position is a useful starting point to test. Check headroom, background, microphone clearance and mount stability in the intended recording application.
What should I test before keeping the webcam?
Record with your actual framing, lighting, microphone and software. Review the exported file for focus and exposure behavior, sound selection and synchronization while the seller’s current return window remains open.