

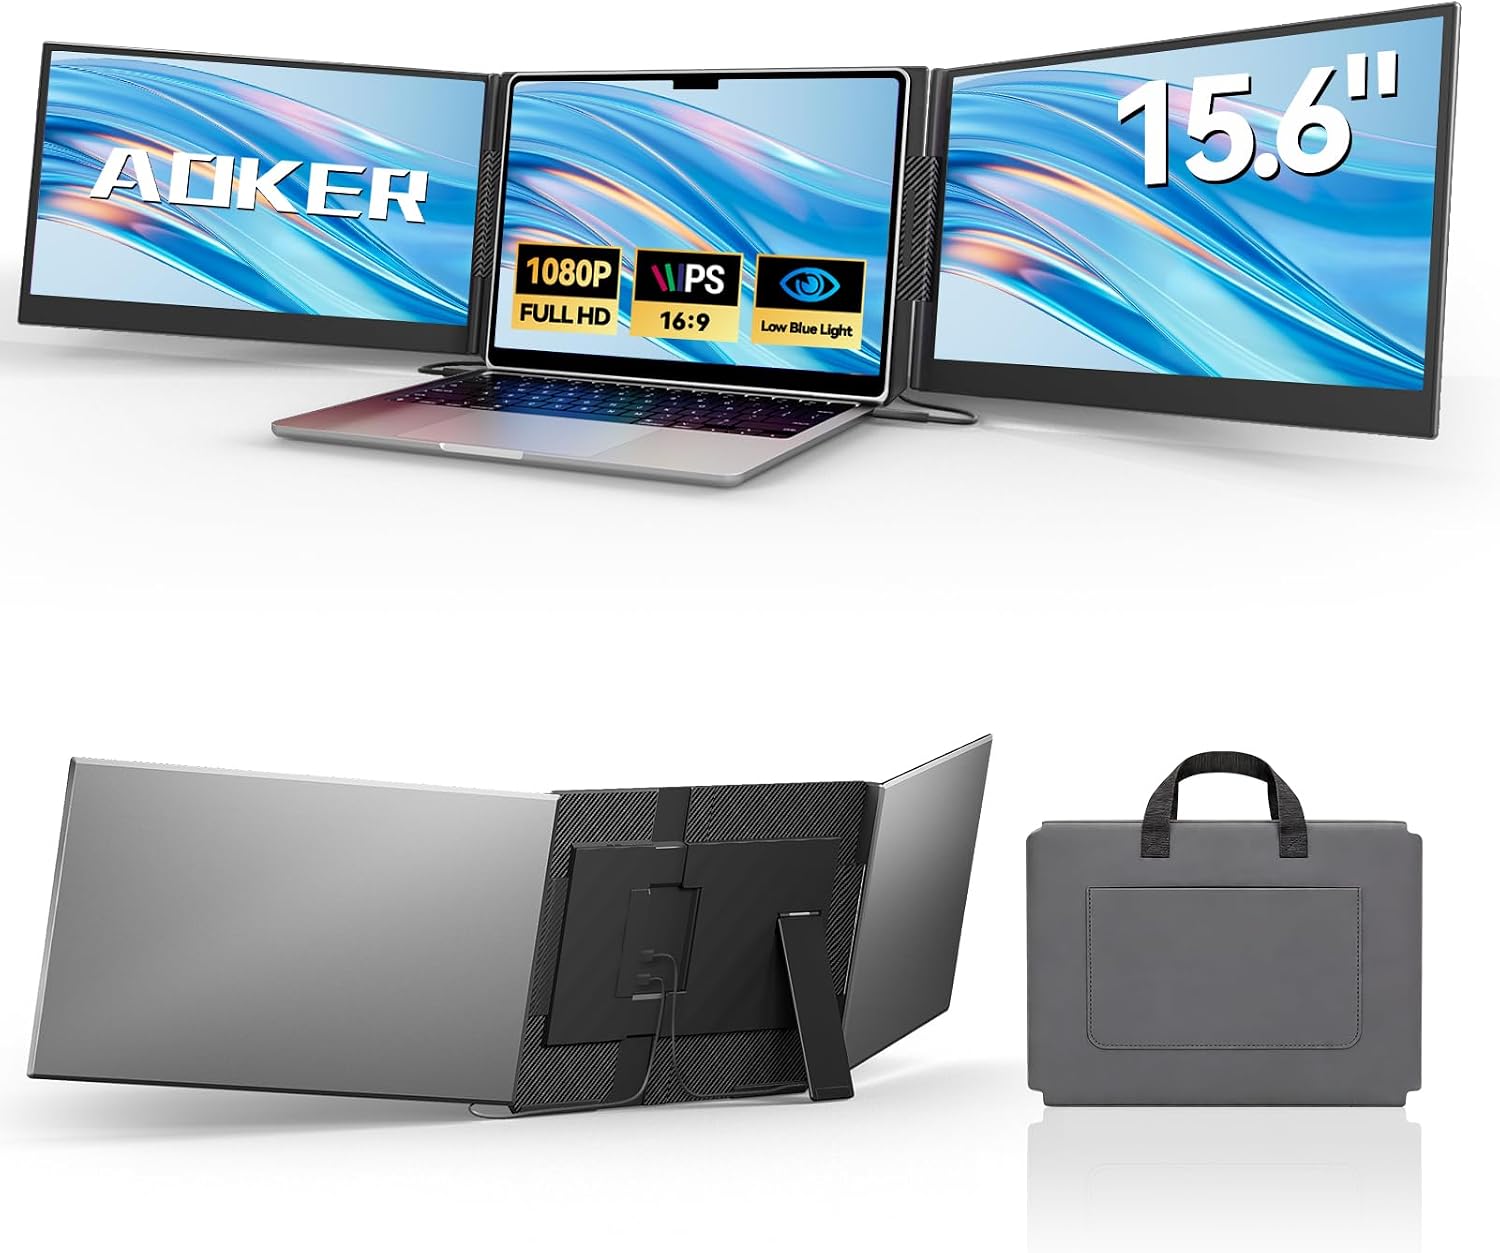
- Dual 15.6-inch displays create a portable triple-screen workspace.
- Full HD 1080p resolution keeps everyday content sharp.
- IPS panels provide wider viewing angles and consistent visuals.
- Plug-and-play connectivity simplifies setup for compatible computers.
- Foldable ultra-slim design makes multi-screen work more portable.

The two-screen design gives a Mac mini a lot more working room
The FlexView 15.6-inch Triple Monitor Extender takes our number one position for Best Portable Monitor For Mac Mini because it gives you two additional Full HD displays in one folding portable setup. Each side panel measures 15.6 inches and uses a 1920 x 1080 IPS display, creating a surprisingly large amount of screen space without requiring two conventional desktop monitors.
That is particularly useful with a Mac mini because the computer itself is already compact. Instead of pairing that small desktop with two bulky monitors, this setup can create a multi-display workstation that is much easier to pack away or move between locations.
The main appeal is productivity. Two extra 15.6-inch screens give you room to separate applications instead of constantly stacking windows on one display.
A video editor could keep the timeline on the main display, project files on one side, and communication or reference material on the other. Someone working with spreadsheets could keep source data visible while another screen holds email or a browser.
For coding, the arrangement is equally useful. One display can hold the editor, another can show documentation, and the third can run a browser, terminal, or application preview.
The panels use Full HD 1920 x 1080 resolution. At 15.6 inches, that resolution gives you a sensible balance between usable desktop space and readable interface elements without demanding the same graphics bandwidth as two additional 4K portable displays.
1080p works well at 15.6 inches, especially for office applications, browser windows, communication software, documents, and secondary editing panels. Text remains reasonably sharp while macOS still has enough working area for useful side-by-side applications.
The IPS panel technology is another advantage for a multi-monitor arrangement. Side displays are naturally viewed at a slight angle, so maintaining reasonable color and contrast away from the exact center matters.
This is particularly noticeable when the two portable screens are angled inward around the user. A panel with weak viewing angles can change appearance as soon as it moves away from a straight-on position.
Mac mini compatibility needs to be checked before assuming plug and play
The product is advertised around plug-and-play connectivity, but Mac mini users need to understand what that means for their specific computer. This is originally a laptop screen extender, so the physical design and included connections are built primarily around portable computers.
A Mac mini does not have a laptop display for the extender to attach around. You need to treat it as external displays and make sure the unit can be positioned securely on the desk while receiving the required video signals.
The exact Mac mini generation matters too. Different Apple silicon models support different numbers of external displays and different combinations of Thunderbolt, USB-C, and HDMI output.
This is one of the most important checks to make before purchasing any dual-screen portable monitor. Two physical panels do not automatically mean every computer can drive both as independent extended displays.
If the extender requires two independent video signals, the Mac needs to provide them in a supported configuration. If the product relies on a particular USB display technology, driver requirements and macOS compatibility also need to be checked for the exact version being purchased.
Do not confuse mirroring with true extension. Mirroring simply shows the same desktop on multiple screens, while extended mode gives each panel its own usable workspace.
For the Best Portable Monitor For Mac Mini category, extended mode is what creates the real productivity advantage. You want three independent work areas, not three copies of the same image.
Once connected, open macOS display settings and confirm that each screen is recognized individually. Arrange the displays digitally to match their physical positions on the desk.
If the left portable panel is physically on your left, place it on the left side of the arrangement in macOS. Otherwise the pointer may need to move in the wrong direction before reaching that display.
Correct display arrangement saves daily frustration. It takes less than a minute to configure but makes a three-screen workspace feel much more natural.
Resolution should also be checked. Use the native 1920 x 1080 mode where practical rather than feeding the display an unnecessarily low resolution.
macOS scaling can then be adjusted around viewing distance and personal preference. If text feels too small, use an appropriate scaled setting rather than moving the monitor uncomfortably close.
The same applies to brightness. Two additional displays do not need to run at maximum brightness just because the option is available.
Match brightness across all three screens as closely as practical. Moving a document from a very bright main monitor onto a noticeably darker portable panel can be distracting during long sessions.
Color-sensitive users should be realistic as well. A portable IPS monitor can be perfectly useful for editing controls, timelines, file management, and reference windows without necessarily replacing a calibrated professional display for final color decisions.
That is how I would use this setup for video editing. Keep the color-critical preview on the strongest calibrated monitor and use the portable screens for supporting application panels.
Why we believe this deserves the number one position
Portability is where this product becomes particularly interesting compared with conventional desktop monitors. The two 15.6-inch panels fold into a much more compact package than carrying two separate full-size monitors.
That works nicely with the Mac mini concept. The computer itself is small enough to move between work locations, so pairing it with a foldable multi-screen display setup creates a workstation that can be dismantled far more easily than a traditional three-monitor desk.
For business travel, temporary offices, classrooms, presentations, or hybrid work, that flexibility can matter. You can build a larger workspace when needed and reduce the footprint again afterward.
The ultra-slim construction also helps on smaller desks. Full-size 24 or 27-inch monitors need considerably more width and usually require separate stands.
Two 15.6-inch panels can sit closer to the central display while still providing enough area for secondary applications. The resulting workspace feels more concentrated rather than spreading across an enormous desk.
The side screens are best for supporting tasks. Email, Slack, browser research, Finder windows, documents, music controls, monitoring tools, and application palettes are ideal examples.
For video editing, put bins or media management on one panel and scopes, notes, or communication on the other. The main display can remain dedicated to the timeline and preview.
For financial or analytical work, one screen could display a spreadsheet while another holds source information. This reduces repeated window switching and makes comparison easier.
Students can keep lecture material on one display, notes on another, and research on the third. The benefit is not simply having more pixels.
Separate screens create clearer task organization, particularly when several applications need to remain visible simultaneously.
There are practical setup considerations. Portable displays can require more cabling than a conventional monitor, particularly when video and power cannot both travel through one compatible USB-C connection.
Before setting up the desk, identify which cable powers each panel and which carries video. Route them together rather than letting several cables cross the keyboard area.
If USB-C is being used for video, the port and cable need to support the required display signal. A USB-C connector shape alone does not guarantee video capability.
USB-C cables are not all equivalent. A cable intended only for charging may not carry the video signal required by a portable monitor.
This is a common source of confusion. Someone connects a USB-C cable, sees that the display receives power, and assumes the monitor is faulty because no image appears.
Try the supplied video-capable cable first. If adapters are required for the Mac mini, make sure they support the required resolution and display configuration.
Power demand also matters when operating two portable panels. A Mac mini has its own mains power, so there is less reason to make the computer itself supply every accessory if the monitor can use an appropriate external power source.
This can create a more stable desk setup. It also avoids placing unnecessary expectations on one USB-C connection to provide power and video for multiple panels.
Plan power and video separately when necessary, especially if both displays are being used for full working days rather than short portable sessions.
The folding design should also be handled carefully. Open and close the panels using the intended hinges rather than pulling from the outer corners aggressively.
Portable monitor extenders are designed to move, but repeated travel means hinges, cables, and display surfaces experience more handling than a monitor that remains permanently on a desk.
Use a protective case or padded compartment during transport. Do not pack heavy chargers or hard accessories directly against the screen surfaces.
Protect the panels during travel, because portability only remains useful if the displays survive repeated packing and unpacking.
The 15.6-inch size is a good compromise here. It is large enough to provide a genuinely useful application window but still compact enough to remain portable.
A much smaller screen can feel restrictive for spreadsheets or editing panels. A larger portable display becomes harder to carry and consumes more desk width.
Full HD also keeps the hardware requirements sensible. Driving two extra 1080p panels is generally less demanding than driving two additional 4K screens, although actual display support still depends on the specific Mac mini.
Check your Mac mini model first, because Apple has changed external display capabilities across different generations and chip configurations.
This point is important enough that I would verify it before ordering. Find the exact Mac mini model and confirm how many independent external displays it officially supports.
Do not assume that because another Mac mini user runs three screens, every Mac mini can do the same thing through the same connection method. The processor generation and adapter technology can change the answer.
If the computer supports the required display arrangement, setup becomes much easier. Connect each display using the appropriate video path, provide power where necessary, then configure the arrangement in macOS.
Once configured, daily use should be simple. macOS remembers display arrangements in many normal setups, so you should not need to rebuild the workspace manually every time.
The portable format also makes this useful as a temporary workstation. Someone might normally use one large monitor at home but take the Mac mini and this extender to another location where full-size monitors are unavailable.
That is an unusual but genuinely useful scenario. The Mac mini is compact enough to travel, but without a monitor it cannot function as a complete visual workstation.
A folding dual-screen unit solves much of that problem without requiring two separate monitor boxes. Add a compact keyboard and mouse and you have a much more substantial temporary workspace.
The portability matches the Mac mini well, particularly for users who move the computer between studios, offices, classrooms, or temporary workspaces.
There are still compromises. A laptop screen extender is physically designed around laptops, so a Mac mini desk installation may not look as clean as a dedicated pair of portable monitors with independent stands.
You need to make sure the panels are properly supported rather than relying on a mounting arrangement that assumes a laptop lid is present. Do not place unnecessary strain on hinges or cables just to force the product into a configuration it was not physically designed around.
A small stand or stable desk support may be useful depending on the supplied design. The important thing is that both panels remain at a comfortable viewing height and angle.
Viewing position matters during long sessions. Portable should not mean placing two screens so low that you spend eight hours looking downward.
Position the main display directly ahead and angle the portable screens inward. This reduces the amount of head movement required to view content near the outside edges.
Do not spread the screens completely flat across the desk unless that viewing geometry actually feels comfortable. A slight inward angle normally makes more sense for a single user.
The IPS panels help here because viewing angles remain more forgiving than on lower-quality panel technologies. Still, direct viewing gives the most consistent result.
Use the side panels for secondary content rather than putting your most color-critical or detail-sensitive work permanently at an extreme viewing angle.
Another advantage of this configuration is focus. A full-screen application can stay visible on each display instead of repeatedly disappearing behind another window.
For remote work, keep the video meeting on one side while continuing to work on the main screen. Reference documents can remain open on the other side without covering the meeting or primary application.
This is the kind of workflow where three displays stop feeling excessive. Each screen has a specific job.
Assigning one task per screen works well, and it reduces the constant clicking between overlapping windows that happens on a single display.
For travel, remember that the Mac mini still requires mains power and separate input devices. This setup is portable in the sense that it is much easier to move than a desktop tower with several conventional monitors, not in the sense that it becomes a battery-powered laptop.
That distinction matters when planning a mobile workstation. You still need access to appropriate power and enough desk space to open the screens safely.
For hotel-room or temporary-office use, the setup can work particularly well because those environments often provide a desk but no useful external monitor. The folding displays provide the missing screen space.
It turns temporary desks into larger workstations without requiring permanent monitor installations at every location.
We gave this product the number one position because the dual-screen configuration offers more usable workspace than a conventional single portable monitor. For a Mac mini user specifically seeking portability, that can be a significant advantage.
The two 15.6-inch Full HD IPS panels provide enough space for real productivity, while the folding design keeps the system much easier to move than a pair of conventional desktop displays. Plug-and-play connectivity can also keep setup straightforward when the host computer provides the correct video outputs.
There is one important condition behind that ranking. Mac mini compatibility must be verified first, particularly the number of independent displays supported by your exact Apple silicon generation and the connections required by this extender.
If the specific Mac mini cannot natively drive the complete configuration, additional compatible display technology may be necessary, or another portable monitor may make more sense. This is not something to discover after building the workstation.
For a compatible setup, though, the advantages are strong. You get three working areas, portable 1080p IPS displays, a folding form factor, and considerably more application space without committing to a permanent multi-monitor desk.
That is why we believe this FlexView 15.6-inch extender deserves the number one ranking out of seven for Best Portable Monitor For Mac Mini. It provides the broadest productivity potential in a travel-friendly format while keeping the individual panels at a practical 15.6-inch Full HD size.
Confirm your Mac mini's display support, use video-capable cables, arrange the screens correctly in macOS, and support the extender securely on the desk rather than assuming the laptop-oriented mounting system will work identically. Set up correctly, this creates a genuinely useful portable multi-screen workspace for business, study, editing, coding, research, and everyday Mac mini productivity.

- 14-inch Full HD IPS panel provides crisp 1080p visuals.
- HDMI and USB-C connectivity supports flexible display setups.
- Lightweight portable construction works well for mobile workstations.
- Adjustable stand supports flexible viewing angles and positioning.
- Plug-and-play design reduces setup time with compatible devices.
The 14-inch size feels much more practical when portability actually matters
The AOKER S1 takes the number two position in our Best Portable Monitor For Mac Mini comparison because it gives you a useful 14-inch Full HD workspace without turning a compact Mac mini setup into another large desktop installation. The IPS panel runs at 1920 x 1080, while HDMI and USB-C connectivity give you several ways to bring a video signal into the display.
At around 2 pounds, this is also a genuinely portable screen. The lightweight 14-inch design is easier to move between desks, pack with other computer equipment, or store away when you do not need a second display.
That fits the Mac mini rather well. The computer itself is compact, so pairing it with a monitor that can disappear into a bag or drawer keeps the whole workstation flexible.
The Full HD resolution is sensible at this screen size. On a 14-inch panel, 1920 x 1080 gives text, browser windows, spreadsheets, editing controls, and other desktop content enough pixel density to look reasonably sharp without requiring the bandwidth of a portable 4K display.
1080p works comfortably at 14 inches, especially when this screen is being used as a secondary monitor rather than the main display for an entire workstation. You can leave email, Finder, notes, reference documents, messaging, or editing tools on the AOKER while keeping the main task on a larger monitor.
That is where a portable monitor becomes useful rather than merely adding another screen. The point is to reduce constant window switching.
A writer could keep research on the AOKER while drafting on the primary display. A video editor could move media bins, scopes, notes, or communication tools onto the portable screen and leave the main monitor available for the timeline and preview.
Secondary applications fit this screen particularly well. You do not need a massive second display just to keep reference material visible throughout the day.
USB-C and HDMI give a Mac mini user several sensible connection options
The AOKER supports Type-C and HDMI connectivity, which is important for a Mac mini setup. Depending on the exact Mac mini generation, you may be working with Thunderbolt or USB-C ports plus HDMI, so having more than one input route gives you flexibility when arranging the workstation.
USB-C is especially convenient when the computer and cable support video output correctly. A compatible connection can reduce the number of adapters sitting around the desk.
There is one common mistake here. Not every USB-C cable carries video, even though the connectors physically look identical.
A cable intended primarily for charging may power a device while failing to deliver the display signal you expected. If the screen powers on but macOS does not recognize it properly, check the cable specification and port capability before assuming the monitor is faulty.
HDMI provides another straightforward route. This can be useful when the Mac mini's HDMI output is available and your primary monitor is connected through Thunderbolt or USB-C.
The exact arrangement depends on the Mac mini model and the other displays already connected. Apple has changed external display support across different generations, so verify the display limits of your exact machine rather than assuming every Mac mini behaves identically.
Mac mini display support varies by model, and that becomes especially important when you are already using one or more external monitors.
Once the AOKER is connected, open the Displays section in macOS. Confirm that the portable monitor is being treated as an extended display rather than simply mirroring the primary screen.
Extended mode is normally the useful choice for productivity. It gives the portable panel its own desktop space rather than displaying an identical copy of what is already visible elsewhere.
Then arrange the screen position in macOS so it matches the physical desk. If the AOKER sits to the right of the main monitor, place it to the right in the software arrangement too.
Correct display arrangement makes movement natural. Your pointer should travel directly from one physical screen to the next without unexpectedly appearing on the opposite side.
The IPS panel is useful when the monitor sits beside the main display because you rarely view a secondary screen perfectly straight on. Wider viewing angles help preserve a more consistent image when the panel is turned slightly toward you.
The adjustable stand adds another layer of flexibility. Instead of being fixed at one angle, the display can be positioned around the seating position and available desk depth.
The product also supports up to 180-degree screen rotation. That is useful when the display needs to be repositioned for sharing content or adapted to an unusual temporary workstation.
Flexible positioning matters on smaller desks, where there may not be enough room to place every display in a perfectly symmetrical arrangement.
For a Mac mini workstation, I would place the main monitor directly ahead and angle the AOKER slightly inward from one side. That reduces repeated head movement and makes secondary information easier to glance at.
Do not place the portable monitor extremely low simply because its stand allows it. A secondary display used for several hours should still sit at a comfortable viewing height.
If necessary, use a small monitor riser or another stable support. The screen should not force you to repeatedly bend your neck downward throughout the working day.
Portable should still mean comfortable, particularly when the monitor becomes part of a permanent home-office setup.
Why the AOKER S1 earns second place rather than taking our top spot
The biggest advantage of this AOKER is that it remains simple. You get one 14-inch Full HD screen rather than a complicated multi-panel system, so it is easier to carry, easier to position, and generally easier to integrate beside a Mac mini.
That makes it particularly good for somebody who needs one secondary workspace. Email, browser research, a document, terminal window, music controls, or a communication application can remain open without consuming the main monitor.
One extra screen solves a lot without creating the cable management and desk-width issues associated with a three-monitor arrangement.
For coding, keep documentation or the application preview on the AOKER while the editor remains on the primary screen. For financial work, use it for source data while the main spreadsheet stays larger and easier to read.
For remote meetings, the portable display can hold the call while the main screen remains available for the actual work being discussed. This is one of those simple arrangements that becomes difficult to give up once you use it regularly.
The lightweight construction also gives it an advantage over conventional monitors. A normal 24 or 27-inch desktop display is technically movable, but nobody really wants to carry one between offices every week.
The roughly two-pound weight is travel friendly, especially alongside a Mac mini, compact keyboard, mouse, and the necessary cables.
This creates an interesting portable desktop setup. It will never be as self-contained as a laptop because the Mac mini still requires external power, a keyboard, a pointing device, and a display.
But for someone who regularly moves between established work locations, that may be perfectly acceptable. A compact computer and 14-inch monitor occupy far less luggage space than a conventional desktop workstation.
The screen can also be useful in hotel rooms or temporary offices. Those environments usually provide a desk and power outlet but not a good external monitor.
The AOKER can turn a temporary desk into a proper workspace without requiring permanent equipment at every location.
Power management deserves some attention when using portable displays. Depending on the connection arrangement, the monitor may draw power from USB-C or require a separate power connection.
If the screen behaves inconsistently, disconnects, or changes brightness unexpectedly, check whether it is receiving adequate power. Video and power requirements should be considered separately when troubleshooting.
This is particularly important when hubs and adapters are involved. A small USB-C hub may be trying to handle video, storage, networking, peripherals, and power simultaneously.
A direct connection is useful for troubleshooting. If the monitor behaves strangely through a hub, connect it more directly to determine whether the display or the intermediate hardware is causing the issue.
Brightness should be adjusted to roughly match the main monitor. A portable display running much brighter or darker than the primary screen becomes tiring when your eyes constantly move between them.
Color settings deserve similar attention. IPS technology provides good viewing characteristics, but a portable monitor should not automatically be assumed to match a calibrated professional display.
If you are doing color-sensitive photo or video work, keep final color judgments on a properly calibrated primary monitor. Use the AOKER for tools, bins, reference material, communication, or other supporting content.
Use the strongest display for color-critical work, and let the portable screen handle the interface elements that do not require perfect color matching.
The 14-inch size is part of the reason this works. It is large enough for a useful secondary application but small enough that it does not dominate the desk.
A larger 17-inch portable display gives you more visual space but also consumes more width and is less convenient to carry. A smaller panel can become cramped for spreadsheets or editing interfaces.
Fourteen inches sits in a useful middle ground. It is close to a typical laptop display size, so most people already have a reasonable idea of how much information fits comfortably on it.
The screen size balances workspace and portability, which is exactly what we want in this category.
The stand can also be adjusted rather than forcing the monitor into one fixed position. This becomes useful when the desk depth changes from one location to another.
At home, the screen might sit farther back beside a large monitor. In a hotel room, it might need to sit closer because the desk is shallow.
The ability to change its angle helps accommodate both situations. IPS viewing angles make those adjustments less restrictive.
Adjust the stand around your actual desk, not around how the product happens to look in promotional photographs.
For travel, protect the panel properly. Portable monitors are designed to move, but the LCD surface remains vulnerable to pressure and impact.
Do not pack a heavy charger directly against the display. Use a padded compartment or protective sleeve and keep hard accessories away from the panel surface.
Cables deserve the same attention. Repeatedly bending USB-C or HDMI connectors sharply during packing can eventually cause connection problems.
Protect the cables as well as the screen, because a damaged video cable can make a perfectly functional portable monitor appear defective.
The product is also advertised for use with devices beyond laptops, including tablets and game consoles. That versatility can be useful if the monitor is not permanently assigned to the Mac mini.
A Nintendo Switch, compatible tablet, or other HDMI or USB-C device can potentially use the same display when the connection requirements are met. This gives the monitor more utility than a permanently installed desktop panel.
For the Mac mini specifically, though, productivity is where it makes the most sense. The computer is powerful enough for demanding work but often benefits from additional screen space.
More workspace helps Mac mini multitasking, particularly with editing, coding, research, administration, and remote work.
Imagine working in Final Cut Pro or another editing application. The main monitor can remain dedicated to the larger interface while the portable display holds reference material, notes, file management, or communication.
For Photoshop or design work, secondary palettes and reference images can move away from the main canvas. Again, keep critical color decisions on the better calibrated display if accuracy matters.
Writers can keep source documents visible instead of repeatedly moving between browser tabs. Researchers can keep a PDF open while taking notes on the main monitor.
The practical improvement is not difficult to understand. Visible information reduces constant window switching, and that can make longer tasks feel less fragmented.
The AOKER is also useful when the main monitor is very large. A 32-inch primary display plus another full-size monitor can consume an enormous amount of desk width.
A 14-inch side display gives you the utility of a second monitor without making the workstation excessively wide. That is particularly useful in apartments and smaller home offices.
Cable management is easier too. One portable monitor needs fewer connections than the dual-panel extender we placed first.
Fewer cables make the desk easier to manage, especially if the workstation is frequently dismantled and rebuilt.
There are still reasons the AOKER does not take our number-one position. Our top-ranked product provides two additional 15.6-inch Full HD screens, giving the Mac mini considerably more total working space.
That dual-screen arrangement can support three distinct application areas at once when paired with a main display and a compatible Mac mini configuration. For heavy multitasking, the productivity ceiling is simply higher.
The AOKER gives you one 14-inch secondary display. It is lighter and simpler, but it cannot provide the same amount of desktop area.
One screen is the main limitation compared with our first-place dual-screen option.
On the other hand, that limitation is also part of its appeal. Not everyone wants a three-monitor setup.
A single portable display requires less desk space, less cabling, and less graphics-output planning. It is easier to pack and quicker to deploy.
For some Mac mini users, this may actually be the more sensible configuration even though it ranks second overall. The product ranking reflects total capability, not the needs of every individual desk.
Simplicity can be more practical than maximum screen count, particularly for frequent travelers and users working in compact spaces.
The S1 also supports a broad range of host systems, including macOS, Windows, Linux, and Android according to matching product information. That can be useful in a mixed-device environment.
If the monitor is shared between a Mac mini and a work laptop, you do not necessarily need a separate portable display for each computer. Swap the appropriate connection and configure the display settings on the host device.
Always eject or disconnect devices sensibly and avoid repeatedly pulling cables sideways from the ports. Portable hardware tends to experience more connection cycles than equipment permanently installed on a desk.
Frequent travel increases connector wear, so handle the USB-C and HDMI ports with reasonable care.
The product supports up to 180-degree screen rotation, which can help when sharing the display with someone sitting across or beside the desk. It also gives more flexibility when adapting the screen to a temporary workspace.
For normal Mac mini use, I would keep the panel angled toward the main seating position. Extreme angles are rarely necessary when one person is working.
The IPS panel means the picture remains more consistent when viewed somewhat off-axis. That is particularly useful because a side monitor naturally sits at an angle.
IPS suits a secondary display position, where the screen is rarely viewed as directly as the main monitor.
For a permanent home setup, consider putting the portable monitor on a small riser so its vertical position aligns more closely with the main screen. Matching the top edges is not mandatory, but minimizing large height differences can make cursor movement and visual transitions feel more natural.
In macOS, arrange the digital displays to reflect that vertical offset. If the AOKER sits lower physically, position it slightly lower in the display arrangement.
This determines where the pointer crosses from one screen to another. Correct alignment makes the setup feel far more polished.
Software arrangement should match physical placement, including both horizontal position and approximate vertical height.
We believe the AOKER S1 deserves the number two ranking out of seven for Best Portable Monitor For Mac Mini because it combines a practical 14-inch Full HD IPS display with HDMI and USB-C connectivity, lightweight construction, adjustable positioning, 180-degree rotation, and a form factor that is genuinely easy to move.
It falls just short of our number-one choice because that product provides two 15.6-inch displays and therefore substantially more potential workspace for a compatible multi-monitor Mac mini configuration. The AOKER is also originally designed as a laptop screen extender, so Mac mini users should plan how the screen will be supported independently on the desk.
Those compromises are fairly minor for someone who only needs one additional display. Verify the external-display capabilities of your exact Mac mini, use a video-capable USB-C connection or HDMI where appropriate, give the monitor adequate power, and configure it as an extended display in macOS.
Set up correctly, the AOKER S1 is an excellent portable second screen for coding, business work, research, editing, study, travel, and everyday Mac mini multitasking, which is why it earns a strong second-place position in our seven-monitor comparison.

- 14-inch Full HD IPS panel delivers sharp 1080p visuals.
- 300-nit brightness provides useful visibility for indoor work.
- USB-C and HDMI connections support flexible Mac setups.
- Built-in speakers provide convenient audio without extra hardware.
- Lightweight 2.5-pound design remains practical for frequent travel.
The S1 gets the basic portable monitor formula right
The BOSII S1 takes the number three position in our Best Portable Monitor For Mac Mini comparison because it gives you a practical 14-inch Full HD IPS display in a compact format that is much easier to move than a normal desktop monitor. It runs at 1920 x 1080 with a 60Hz refresh rate, 300-nit brightness, and a listed 1000:1 contrast ratio.
Those specifications make sense for a secondary Mac mini screen. Full HD works nicely at 14 inches, giving text and interface elements enough detail without requiring the graphics bandwidth or power demands of a portable 4K panel.
The size is useful too. Fourteen inches is large enough for a browser, Finder window, spreadsheet, messaging application, editing tools, or reference document without consuming the desk width of another 24 or 27-inch monitor.
That is where the S1 fits particularly well with a Mac mini. The computer itself is compact, so pairing it with a portable monitor keeps the workstation relatively easy to move, reorganize, or pack away.
The IPS panel is also important for a side display. A portable monitor normally sits slightly off-center from the user's main viewing position, so wider viewing angles help maintain consistency when the screen is angled inward beside the primary monitor.
The 300-nit listed brightness is sensible for normal indoor use. In an office, bedroom, hotel room, or studio, you should have enough brightness without needing to run the backlight at maximum all day.
There is also a 1000:1 contrast ratio and a listed 2ms response time. This is still fundamentally a productivity-oriented 60Hz portable monitor, but ordinary cursor movement, video playback, office applications, and casual gaming should fit comfortably within that specification.
The USB-C and HDMI options make Mac mini setup much easier
The BOSII S1 supports USB-C and HDMI connectivity, and the supplied connection options are one of its more useful features. The product information lists USB-C to USB-C, USB-A to USB-C, and HDMI to USB-C cabling for different host configurations.
A full-featured USB-C connection is the cleanest setup when the host port supports video output. One compatible USB-C connection can simplify the desk compared with routing separate video adapters around a compact workstation.
Mac mini users still need to pay attention to their exact model. Apple has changed external display support between different Mac mini generations and chip configurations, so the number and type of monitors you can run simultaneously depends on the computer.
This matters if the BOSII is being added beside an existing primary display. Before purchasing, check how many external displays your exact Mac mini officially supports and which Thunderbolt, USB-C, or HDMI combinations can be used.
Do not assume every USB-C cable supports video either. The connector can look identical while the cable itself only handles charging or basic data.
Use a video-capable USB-C cable when connecting directly. If the monitor receives power but macOS does not detect a display signal, the cable and port capabilities are among the first things worth checking.
HDMI gives you another route. According to the product connection guidance, an HDMI configuration also requires USB power, so both connections need to be accounted for when planning the desk.
This is useful when the Mac mini's USB-C or Thunderbolt ports are already occupied by fast storage, docks, audio equipment, or other peripherals. HDMI can handle the video path while USB supplies the required power.
Once connected, open macOS display settings and make sure the BOSII is configured as an extended display. Mirroring duplicates the main screen, while extended mode gives you an entirely separate working area.
Extended mode is where productivity improves. You can move one application onto the portable display and keep the primary screen clear for the task that needs the most room.
For example, someone editing video could leave Final Cut Pro or another editing application on the main monitor while Finder, notes, project files, or communication tools remain visible on the BOSII.
A writer can keep research material on the S1 while drafting on the main display. Someone working with spreadsheets can keep source information visible rather than repeatedly moving between windows.
After enabling extended mode, arrange the displays in macOS to match their physical locations. If the BOSII sits to the left of the main monitor, position it to the left in the software arrangement too.
Match software position to physical position so the cursor moves naturally between the two screens. You can also account for height differences if the portable display sits lower on the desk.
The 14-inch panel works particularly well for supporting applications because it does not need to replace the main monitor. A large primary display can handle the detailed work while the BOSII keeps secondary information visible.
This matters for color-sensitive work too. The IPS panel is useful, but a portable display should not automatically replace a calibrated professional monitor for final color decisions.
For photography or video production, keep the color-critical image on the strongest calibrated screen. Use the portable display for supporting tools, timelines, folders, scopes, notes, or reference information where perfect panel matching matters less.
The S1 also includes built-in speakers. That can be useful if the main Mac mini monitor does not contain speakers and you do not want another pair of desktop speakers taking up space.
Built-in monitor audio is mainly about convenience. It works for system sounds, online videos, meetings, tutorials, and basic media playback without requiring additional hardware.
For music production or critical listening, dedicated speakers or headphones remain the better choice. The small enclosure of a portable monitor naturally limits how much low-frequency output its speakers can produce.
The speakers are useful for everyday audio, particularly in a travel setup where carrying separate desktop speakers makes little sense.
Why the BOSII S1 lands at number three instead of taking the top spot
Portability is one of the S1's strongest arguments. The monitor weighs roughly 2.5 pounds, so carrying it with a Mac mini is considerably easier than transporting a conventional desktop monitor.
That opens up an interesting use case. A Mac mini can become a workstation that moves between an office, studio, classroom, temporary workspace, or another location where a permanent monitor is not available.
The lightweight design suits mobile work, although it is worth remembering that a Mac mini still requires mains power, keyboard, mouse, and the necessary display connections. This is portable desktop computing rather than a replacement for a battery-powered laptop.
For hotel-room work, the arrangement can still be very useful. A desk and power outlet are usually available, but a decent external computer display often is not.
Set the BOSII on the desk, connect the Mac mini, add compact input devices, and you have a functional workspace without transporting a large monitor. The 14-inch size makes that much more realistic.
The screen measures roughly 13.9 inches wide, 8.15 inches high, and 0.91 inches deep according to matching specifications. Those dimensions keep the footprint manageable inside a bag or compact workstation.
Small physical dimensions reduce desk clutter, which is particularly helpful when the main monitor is already large or the desk itself is shallow.
The 60Hz refresh rate is adequate for productivity, streaming, and general computer use. It is not intended to compete with high-refresh gaming displays, and that is one area where expectations should remain realistic.
For office applications, 60Hz is perfectly normal. Browser scrolling, documents, email, coding, and editing interfaces do not require 144Hz or 240Hz to function effectively.
Casual gaming is possible too, especially given the listed 2ms response specification. Competitive gaming is simply not the reason to buy this monitor.
This is primarily a productivity display, and its strongest features are portability, connectivity, and useful secondary-screen space.
The glossy screen finish is something to consider when choosing a working position. Bright windows or strong lamps directly behind the user can create visible reflections.
Before increasing brightness to compensate, try repositioning the monitor or changing the room lighting. A small adjustment to the screen angle can solve a reflection problem without making the panel unnecessarily bright.
The 300-nit brightness specification is more than adequate for many indoor environments. Outdoor use in direct sunlight is a very different situation and is not where this type of portable monitor is strongest.
Indoor work is the natural environment for a 300-nit portable IPS screen. Cafes, offices, classrooms, studios, and hotel rooms make more sense than direct outdoor sunlight.
The stand or mounting arrangement should also be positioned carefully. A portable monitor sitting too low can make you repeatedly look downward during a long working session.
If the S1 becomes part of a permanent Mac mini desk, consider a small riser or stand that brings the screen closer to the height of the main monitor. The goal is comfortable viewing rather than simply making the monitor fit wherever there is empty desk space.
Angle it slightly inward toward your normal seating position. This keeps information easier to read and takes advantage of the IPS panel's wide viewing characteristics.
Good positioning matters during long workdays, even when the secondary screen is relatively small.
The monitor's connectivity also makes it useful beyond the Mac mini. Matching specifications list compatibility with Windows, macOS, Linux, laptops, tablets, and gaming devices when the required video connection is available.
That means the S1 does not have to remain permanently attached to one computer. It can serve as a Mac mini second screen during the week and connect to another compatible device when needed.
This versatility is valuable for households or offices with mixed hardware. A portable monitor is easier to share than a conventional display permanently mounted to an arm.
Multiple connection options improve long-term usefulness, especially when devices change over time.
Power deserves attention when using HDMI. Because HDMI carries the video signal rather than providing the monitor's required operating power in this setup, the USB power connection still needs to be attached.
Do not mistake a blank screen for a failed HDMI connection if the display is not receiving adequate power. Check both parts of the setup.
USB hubs can create similar confusion. A hub may support data while lacking the necessary display output capability or sufficient power for every connected device.
Test a direct connection when troubleshooting. Removing docks, adapters, and hubs from the signal path is one of the quickest ways to determine where a display problem is occurring.
The included cables are useful here because you can begin with the intended connection arrangement rather than guessing which third-party cable supports the required functions.
If you later replace a cable, make sure its capabilities match the original. A cheaper charging-only USB-C cable may physically connect while failing to reproduce the same display functionality.
For travel, cable organization matters more than it does on a permanent desk. Keep the video and power cables together in a small pouch so the correct connections are available when the monitor is unpacked.
A portable monitor without its proper cable is not particularly useful when you are several hundred miles from the spare cable sitting at home.
The panel itself should be protected during transport. Do not place chargers, power adapters, or other hard accessories directly against the display surface inside a bag.
Use a padded sleeve or protected laptop compartment where possible. The monitor is portable, but the LCD still needs protection against pressure and impact.
The same applies to the ports. Repeatedly pulling cables sideways can eventually place unnecessary stress on USB-C and HDMI connections.
Frequent travel increases physical wear, so careful packing helps preserve the monitor's main advantage over a permanent desktop display.
For business users, the BOSII works well as a dedicated communication screen. Keep Teams, Zoom, Slack, or email visible while the main display remains available for documents and applications.
This solves a common problem during video meetings. Instead of the meeting window covering the spreadsheet or presentation being discussed, both can remain visible at the same time.
For coding, put documentation or a browser preview on the S1. The main display can stay focused on the editor and terminal.
Secondary screens reduce window switching, which is where much of the real productivity improvement comes from.
Students can use the same arrangement for lecture material and notes. Keep the PDF or recorded lecture on the BOSII while writing on the primary monitor.
Researchers can keep source material visible. Writers can leave outlines or references open without covering the document being edited.
The 14-inch screen is not enormous, but it does not need to be. Its job is to give one secondary application a permanent place.
One extra application space is often enough to make a single-monitor workstation feel considerably less crowded.
The reason the BOSII finishes third is mostly competition from the two products above it. Our first-ranked option provides a much larger dual-screen arrangement with two 15.6-inch panels, giving a compatible Mac mini significantly more total workspace.
Our second-ranked portable monitor provides a similarly compact single-screen approach while edging ahead in the overall balance we considered for this comparison. The BOSII remains close, but it does not create the same multi-screen productivity ceiling as the number-one option.
There is another consideration specific to this product category. The S1 is marketed primarily as a laptop screen extender, so some physical mounting language and compatibility guidance is written around laptops rather than a standalone Mac mini.
Mac mini users need independent desk positioning. There is no laptop lid for the monitor to rely on, so make sure the screen can be supported securely in the intended configuration.
This does not prevent it from functioning as an external monitor when connected appropriately. It simply means the physical setup may differ from the arrangement shown in laptop-focused product photographs.
A compact stand can solve this neatly if the supplied support does not suit your desk. Just make sure the screen remains stable when cables are connected.
The 14-inch size actually helps here because it does not require a massive monitor stand. A small support can position it beside the main display without consuming much space.
The compact size makes alternative mounting easier, particularly on desks where a full-size second monitor would feel excessive.
For photo and video work, remember the 72 percent listed color gamut figure associated with matching specifications. That reinforces the idea that this is a useful productivity panel rather than a specialist wide-gamut reference monitor.
Use it for tools, folders, timelines, communication, and reference material. Final color grading should remain on a display chosen and calibrated specifically for that work.
For normal office applications, the distinction matters far less. Documents, spreadsheets, web pages, messaging, and business software do not require a professional wide-gamut panel.
The specifications fit everyday productivity well, which is the more realistic purpose of a portable Mac mini companion.
Built-in speakers add another small convenience when moving between locations. You do not need to pack separate speakers just to hear a tutorial or system audio.
For private work in shared spaces, headphones will usually make more sense. The monitor speakers remain useful as a fallback when headphones are not required.
If no sound comes through after connection, check the audio output selected in macOS. The Mac may still be sending sound to another display or audio device.
Select the intended audio output in macOS before assuming the monitor speakers are not functioning.
The same principle applies to resolution. Confirm that macOS is sending the native 1920 x 1080 signal where appropriate rather than an unnecessarily low resolution.
If text appears too small, use macOS scaling rather than immediately reducing the physical resolution. This can preserve image clarity while changing the effective interface size.
Brightness and contrast can be adjusted through the monitor controls to better match the main screen. Perfect matching is not always possible between different panel models, but obvious differences can usually be reduced.
Matching brightness makes dual-screen work easier, especially when your eyes move between the two displays throughout the day.
We believe the BOSII S1 deserves the number three ranking out of seven for Best Portable Monitor For Mac Mini because it combines a 14-inch 1920 x 1080 IPS panel with 300-nit brightness, a 1000:1 contrast ratio, 60Hz refresh rate, built-in speakers, USB-C and HDMI connectivity, and a portable design weighing around 2.5 pounds.
It ranks below our first two because the top option provides considerably more screen area through its dual 15.6-inch design, while our second-place choice offers a slightly stronger overall balance as a simple secondary

- Full HD display provides sharp everyday Mac desktop visuals.
- Lightweight construction makes the monitor easier to transport.
- Adjustable kickstand supports flexible desktop viewing positions.
- USB-C connectivity can simplify compatible Mac mini setups.
- Portable single-screen design requires minimal permanent desk space.
This is the kind of portable monitor that keeps a Mac mini setup simple
This FlexView portable monitor takes the number four position in our Best Portable Monitor For Mac Mini comparison because it focuses on a straightforward second-screen setup. You get a slim Full HD external display, portable construction, an integrated adjustable kickstand, and connectivity intended for computers, laptops, consoles, and other compatible devices.
That simplicity actually works quite well with a Mac mini. The computer itself already has a compact footprint, so adding one thin portable monitor can create extra working space without filling the desk with another conventional monitor and large stand.
The integrated adjustable kickstand matters here because a Mac mini does not provide a laptop lid for a screen extender to attach to. This monitor can stand independently on the desk, which makes much more sense for a desktop computer.
You can place it beside the main monitor, angle it toward the seating position, and move it again when the workstation changes. There is no need to permanently dedicate a large section of the desk to the second screen.
For normal productivity, Full HD resolution is a sensible choice. A 1920 x 1080 portable display gives you enough space for email, documents, Finder windows, browser research, communication software, editing panels, and other secondary applications.
Full HD is practical for secondary work because it keeps hardware requirements and connection bandwidth reasonable while still providing a clean desktop image. You do not necessarily need another 4K screen just to keep reference material visible.
A writer could leave research on this display while drafting on the primary monitor. Someone working with spreadsheets could keep source data visible on the portable screen instead of repeatedly switching between windows.
Video editors can use it for media bins, notes, scopes, or communication. The main monitor remains available for the timeline and larger preview, which is generally a better use of screen space.
The independent kickstand is particularly useful with a Mac mini
Portable monitors generally fall into two broad designs. Some attach physically to a laptop, while others operate as independent displays with their own stand.
For a Mac mini, the second design is easier to work with. An independent screen needs no laptop attachment, so you can position it wherever the desk layout makes sense.
The adjustable kickstand lets you change the viewing angle rather than accepting one fixed position. This becomes useful when moving between a deep home-office desk and a smaller temporary workspace.
At home, you might position the portable display beside a 27-inch main monitor. At another location, it could become the primary display for the Mac mini if no conventional monitor is available.
That second use is easy to overlook. A Mac mini has no integrated screen, so carrying a portable monitor can turn the computer into a much more transportable workstation.
The monitor can serve as a primary display when travelling between locations, then become a secondary monitor again when you return to the normal desk.
You still need mains power for the Mac mini, of course. This is a portable desktop arrangement rather than a replacement for a battery-powered laptop.
But for someone moving between offices, studios, classrooms, or temporary workspaces, the combination can be quite practical. A Mac mini, compact keyboard, mouse, and thin monitor occupy far less space than transporting conventional desktop equipment.
The lightweight construction helps with this. A normal 24 or 27-inch monitor can technically be transported, but its stand, panel size, and packaging make that inconvenient.
A lightweight portable display is easier to pack, especially if it can slide into a padded laptop compartment or dedicated protective sleeve.
Protection during transport still matters. Portable does not mean the LCD panel can handle heavy chargers, adapters, or other hard objects pressing against it inside a bag.
Keep the screen surface protected and avoid putting pressure directly on the panel. Cables should also be packed without sharply bending their connectors.
The connection method deserves attention with a Mac mini. USB-C can provide a very clean setup when the port and cable support video correctly.
One common mistake is assuming every USB-C cable carries a display signal. USB-C connector shape does not guarantee video, because some cables are intended primarily for charging or basic data transfer.
If the monitor receives power but shows no picture, check the cable before assuming something is wrong with the display. Use a video-capable USB-C cable that supports the required display mode.
Depending on the exact monitor connections and Mac mini generation, HDMI may provide another straightforward route. This can be useful if the computer's USB-C or Thunderbolt ports are already occupied by storage, docks, or another display.
The exact Mac mini model matters. Apple has changed external display support across its chip generations, particularly when several monitors are connected simultaneously.
Check your exact Mac mini display limits before planning a multi-monitor arrangement. A connection physically fitting into the computer does not automatically mean the Mac supports an unlimited number of independent displays.
For this single portable screen, compatibility is generally easier to plan than with a dual-screen extender. You only need one additional display signal rather than trying to drive two extra panels simultaneously.
That reduces cable complexity too. One portable screen is easier to connect, power, position, and troubleshoot.
Once connected, open the Displays settings in macOS. Choose whether the portable monitor should extend the desktop or mirror the main display.
Extended mode gives you additional workspace, which is normally the more useful choice for productivity. Mirroring simply shows the same content on both screens.
Arrange the monitor digitally to match its physical location. If it sits to the left of the main display, position it to the left in macOS as well.
This controls how the pointer moves between screens. Incorrect arrangement creates the strange situation where you move the pointer left physically but need to push it right in software.
Vertical position can be adjusted in the same screen arrangement. If the portable monitor sits lower than the main display, represent that offset in macOS.
Software positioning should match the real desk. It makes moving windows and the pointer between displays feel much more natural.
Why this portable monitor earns fourth place rather than ranking higher
The single-screen design is both the biggest strength and the reason this model sits fourth. It is easier to manage than a dual-screen extender, but it obviously provides less total working space.
Our higher-ranked options give users more screen area or stronger multi-display productivity features. For someone running several applications at the same time, those extra panels can make a noticeable difference.
This monitor takes a simpler approach. One extra display handles the essentials without creating a large multi-screen structure around the Mac mini.
That may actually be preferable on a small desk. A 27-inch main monitor plus one portable side screen already provides a useful amount of desktop space.
Add two more large panels and the workstation can become wider than the furniture comfortably supports. More screen area is useful only when the physical setup remains comfortable.
The kickstand helps here because the portable monitor does not require a large conventional base. It occupies roughly the footprint of the display itself.
You can also change its angle depending on what is being shown. Angle the screen toward your normal seating position rather than placing it completely flat beside the main monitor.
This reduces the viewing angle and makes text easier to read. It also reduces how far you need to rotate your head when glancing at secondary information.
If the monitor is being used for several hours, pay attention to height as well. Portable displays often sit lower than desktop monitors because their kickstands rest directly on the desk.
A small riser can help if you find yourself repeatedly looking downward. Ergonomics still matter even when the display is technically temporary.
Portable equipment should still be positioned comfortably, particularly when it becomes part of an everyday workstation.
For coding, a portable side screen works nicely for documentation, terminal output, or an application preview. The main monitor can remain dedicated to the editor.
For research, keep the source document visible on one screen while notes or writing stay on the other. This is much quicker than repeatedly switching browser tabs and application windows.
Remote workers can keep a video meeting on the portable display while continuing to work on the main screen. Presentation notes can remain visible without covering the shared content.
Secondary tasks are where this display works best, because they benefit from remaining visible without requiring a huge amount of screen space.
Photo and video work needs a little more care. A portable Full HD display can be useful for controls and reference material, but it should not automatically replace a calibrated professional monitor for final color decisions.
If accurate color matters, keep the critical image or video preview on the display you know is properly calibrated. Use the portable panel for supporting application windows.
Brightness should also be adjusted to roughly match the main monitor. A very bright secondary screen beside a dimmer primary display can become tiring during a long session.
Match brightness between the displays as closely as practical rather than simply running both at maximum.
Power is another detail that can cause confusion. Some portable monitors can receive power and video through one compatible USB-C connection, while other setups require separate power depending on the host and connection method.
If the monitor disconnects, flickers, or changes brightness unexpectedly, verify the power source. A weak hub or adapter can sometimes create problems that look like a display fault.
When troubleshooting, connect the monitor directly where possible. Remove unnecessary hubs and adapters until the basic video connection works reliably.
Direct connections make troubleshooting much easier, because each additional adapter introduces another possible failure point.
After the basic setup works, reconnect storage drives, hubs, and other peripherals one at a time. This makes it much easier to identify the device creating a conflict.
The same logic applies to cables. Try the supplied or known video-capable cable before buying additional adapters.
For travel, keep a dedicated cable with the monitor. This prevents arriving at another office with several USB-C charging cables but nothing capable of carrying the display signal.
A dedicated video cable avoids travel problems, and it takes almost no extra space in the bag.
A single portable display also consumes less power than a multi-panel extender. That can simplify temporary setups where power outlets are limited.
The Mac mini still requires its normal power adapter, so plan for at least one reliable mains connection. If the monitor requires separate power, another outlet or suitable USB power source may be needed.
A compact power strip can make this easier when travelling between established indoor work locations. Keep the cable arrangement organized rather than running power and video wires across the keyboard area.
Cable clips or a small reusable tie can help. Portable setups benefit from simple cable management because the workstation is repeatedly assembled and dismantled.
For a permanent desk, route the monitor cable behind the main display or along the back edge of the desk. The portable screen can still be removed without dismantling the entire workstation.
This is another advantage over a monitor mounted permanently to an arm. You gain a second display when needed but can recover the desk space quickly.
The lightweight design also makes the screen useful beyond the Mac mini. A compatible laptop, console, or other video source can potentially use the same display.
That gives the product more value if several devices share the workspace. A portable monitor does not need one permanent host, unlike many desktop installations that rarely move once connected.
For gaming, the Full HD resolution is straightforward for many devices. For office work, it keeps interface elements readable without requiring extreme scaling.
For movies or streaming, the screen can become a compact secondary viewing device. The kickstand makes it easy to position on a table without needing another accessory.
The important thing is not to expect a lightweight portable monitor to behave exactly like a premium desktop display in every category. Portability requires compromises around size, stand design, and sometimes brightness or audio.
The value comes from flexibility, not from replacing every feature of a large high-end monitor.
This is why the fourth-place position makes sense. The products above it offer stronger overall productivity configurations for our Best Portable Monitor For Mac Mini comparison.
Our top choice provides substantially more screen area through a dual-panel arrangement. Other higher-ranked options also offer compelling configurations for users who prioritize maximum workspace.
This model is more restrained. It gives you one independent portable Full HD display with an adjustable kickstand and a much simpler setup.
Simplicity is also its biggest positive. There are fewer screens to power, fewer cables to route, and fewer display-output limitations to consider.
That can make it the more practical choice for a Mac mini user who travels regularly. Carrying one lightweight screen is easier than transporting a complete triple-monitor system.
It also works better when the available desk changes frequently. A single panel can fit into a small hotel desk, shared office, classroom, or temporary studio without needing much setup room.
For someone who primarily works at one large permanent desk, the extra portability may matter less. A conventional desktop monitor can provide a larger panel and a more substantial stand.
Choose portable because you need portability, not simply because the display is thinner than a desktop monitor.
If the monitor will never leave the desk, compare it against conventional second monitors as well. The best choice depends on how often the workstation actually moves.
For a Mac mini that regularly travels, though, the pairing is logical. Both devices are compact and can be packed without dedicating a large amount of luggage space to computer equipment.
Add a compact keyboard and mouse and you have a desktop environment that can be rebuilt in different locations. It is not as convenient as opening a laptop, but it gives a Mac mini owner considerably more flexibility.
The setup works especially well between fixed locations, such as moving between a home office and another established workspace where mains power is always available.
Before the first trip, test the entire setup away from your normal desk. Disconnect the main monitor and make sure the portable display can actually provide the configuration you expect.
Check the cable, power arrangement, macOS resolution, and any adapters. Doing this at home prevents discovering a missing cable after arriving somewhere else.
If the portable monitor will serve as the only display during travel, make sure macOS recognizes it reliably from startup. A secondary monitor that works only after another display has already been connected would create an awkward travel workflow.
Test the exact travel configuration beforehand, including startup and login rather than only plugging the monitor in after macOS is already running.
For everyday use, 1080p remains a practical resolution. Documents and browser windows have enough space to remain useful while the display stays compact.
If interface elements appear too small or too large, adjust scaling in macOS. Do not simply lower the resolution dramatically because that can reduce image sharpness.
The operating system gives you several display scaling options depending on the connection and panel. Choose the one that balances workspace with comfortable text size.
Comfort matters more than maximum desktop area, particularly on a smaller portable screen viewed for several hours.
We believe this FlexView portable display deserves the number four ranking out of seven for Best Portable Monitor For Mac Mini because it combines a Full HD external screen, lightweight construction, an independent adjustable kickstand, and flexible connectivity in a format that suits the compact nature of the Mac mini.
It ranks below the first three because those products offer stronger multi-screen productivity or more compelling overall configurations for users who want maximum portable workspace. A single portable panel simply cannot provide the same desktop area as a dual-screen extender.
That limitation also makes this model easier to live with. There is less hardware on the desk, fewer cables, simpler external-display requirements, and a much easier setup to carry between locations.
Verify the display outputs of your exact Mac mini, use a video-capable USB-C cable or the appropriate HDMI connection, give the monitor adequate power, and configure it as an extended display in macOS. Set up properly, this is a practical portable Mac mini monitor for business, study, editing, coding, research, travel, and everyday second-screen productivity.

- 15.6-inch Full HD display provides useful secondary workspace.
- Detachable design supports more flexible desktop monitor positioning.
- Plug-and-play connectivity simplifies compatible Mac display setups.
- Lightweight construction makes the screen practical for travel.
- Independent positioning works better with compact desktop computers.
The detachable screen design makes more sense with a Mac mini than a fixed laptop frame
The SIAVIALA P5 takes the number five position in our Best Portable Monitor For Mac Mini comparison because its detachable design gives you more freedom than a conventional laptop-mounted screen extender. You get a 15.6-inch portable display that can become useful secondary screen space without requiring a permanent full-size desktop monitor.
That distinction matters with a Mac mini. There is no laptop lid available for mounting an extender, so independent screen positioning is much more useful than a design that only works when physically attached around a notebook display.
The 15.6-inch size is also a practical middle ground. It gives you noticeably more workspace than a small tablet-sized display, but it remains easier to transport than a conventional 24 or 27-inch monitor.
For a Mac mini workstation, that extra screen can hold email, Finder, browser research, notes, communication software, editing controls, or reference documents. The primary monitor stays available for whatever actually needs the larger working area.
A video editor, for example, could leave the main timeline and viewer on the primary display while moving project files or notes onto the SIAVIALA. A programmer could keep documentation visible while the main monitor holds the editor and terminal.
A dedicated secondary screen reduces window switching, which is really the productivity argument for a portable monitor. You spend less time bringing hidden windows forward just to check one piece of information.
The Full HD format also makes sense at 15.6 inches. A 1920 x 1080 desktop provides enough room for normal productivity applications while maintaining reasonable text sharpness at this physical size.
You do not necessarily need 4K resolution for a secondary screen holding Slack, documents, file browsers, or application controls. Higher resolution can be useful, but it also increases bandwidth requirements and may require more aggressive interface scaling on a smaller panel.
Mac mini setup is straightforward once the video connection is sorted
SIAVIALA designs its portable monitors around plug-and-play operation with computers including Macs. That can make initial setup fairly simple, but Mac mini users still need to understand the difference between the physical USB-C connector and actual video capability.
A USB-C connection must support video output if you expect it to carry the display signal. Some USB-C cables are intended primarily for charging and basic data transfer, even though the connector looks exactly the same.
This causes a surprisingly common troubleshooting problem. The portable monitor receives power, but the Mac never produces an image, so the user assumes the screen is defective.
Start with the supplied compatible cable or another cable specifically known to support display output. If the setup uses HDMI instead, make sure the adapter and cable support the required 1920 x 1080 signal.
The exact Mac mini generation matters as well. Apple has changed external display support across different Mac mini processors, so check how many independent displays your specific model can drive if another monitor is already connected.
Do not assume every Mac mini has identical display support. This matters particularly when building a two or three-monitor workstation rather than using the SIAVIALA as the only display.
Once connected, open macOS Displays settings and check that the monitor appears independently. For productivity, you will normally want to extend the desktop rather than mirror the main monitor.
Mirroring simply repeats the same image. Extended mode gives you another usable desktop where separate applications and windows can remain open.
Then arrange the display icons in macOS to match the physical desk. If the SIAVIALA sits to the right of the main monitor, place its digital representation on the right as well.
Matching software and physical positioning matters because it determines how the pointer and windows move between the two displays. A badly arranged desktop feels wrong immediately.
Vertical alignment can be adjusted too. If the portable screen sits several inches lower than the primary monitor, represent roughly the same difference in macOS.
This helps the pointer cross between screens where you expect it to. It is a small setup detail, but one you interact with hundreds of times during a normal workday.
The detachable construction gives you more control over where that screen actually sits. Instead of forcing the panel into one fixed relationship with another display, you can position it around the available workspace.
That flexibility is valuable on smaller desks, where a conventional monitor stand can consume more room than the screen itself.
Angle the portable display slightly inward toward your seating position. This makes the outside edge easier to read and reduces how far you need to turn your head when checking secondary information.
Height deserves attention too. Portable monitors often sit low because their support rests directly on the desk.
If you use the screen for several hours each day, consider a small riser or another stable positioning solution. Looking sharply downward all day is not a good trade for gaining another display.
Portable does not mean ergonomics stop mattering. The display should still be positioned around your normal working posture.
Why the SIAVIALA P5 finishes fifth in our comparison
The 15.6-inch panel is a good size for secondary applications. It can comfortably display a browser, document, communication window, or file manager without requiring constant horizontal scrolling.
For research, keep source material on the SIAVIALA and writing on the main screen. For accounting, put reference data on the portable panel while the larger spreadsheet remains on the primary monitor.
Remote workers can leave a video meeting visible on the second display. The main monitor remains available for actual work instead of disappearing underneath the meeting window.
This is particularly useful during screen sharing. You can share the main monitor while keeping private notes, controls, or communication on the secondary screen.
For coding, a 15.6-inch secondary panel can hold documentation, logs, a browser preview, or terminal output. It does not need to replace the main coding display to improve the workflow.
The same applies to creative work. Photoshop palettes, reference images, file management, or editing controls can move onto the portable monitor.
Keep color-critical work on your best display, though. A portable Full HD panel should not automatically be treated as a substitute for a calibrated professional monitor when precise color decisions matter.
Brightness should also be adjusted so the portable screen does not look dramatically different from the main display. Constantly moving your eyes between a dim panel and an extremely bright one can become tiring.
Matching them perfectly may not be possible, and that is fine. The goal is simply to avoid a large visual jump every time you glance sideways.
Power delivery is another practical issue. Depending on the exact connection configuration, the display may receive power through USB-C or use a separate power connection alongside video.
Stable power matters during long sessions. If a portable monitor starts disconnecting, dimming unexpectedly, or flickering, power should be one of the first things you check.
USB hubs can complicate this. A single hub may already be handling storage drives, Ethernet, keyboards, charging, and another display.
If something behaves strangely, connect the monitor more directly to the Mac mini during troubleshooting. Remove unnecessary adapters until you know the basic monitor connection is stable.
Then add the other hardware back one piece at a time. This is much faster than replacing random cables without knowing which part of the connection chain is causing the issue.
Direct connections simplify troubleshooting, particularly with portable monitors that need both video and adequate power.
The P5's detachable design is also useful for travel. You are not carrying a permanent monitor stand or large desktop base.
That works nicely with the Mac mini because the computer itself is compact. A Mac mini, portable display, small keyboard, mouse, and cables can create a transportable desktop workstation between fixed locations.
This is not the same as laptop portability. The Mac mini still needs mains power, and the monitor may need its own power arrangement depending on the connection.
It is better for moving between work locations than for working literally anywhere. Think home office to studio, office to classroom, or one temporary desk to another.
Before travelling, test the exact setup you plan to carry. Disconnect your normal monitor and make sure the SIAVIALA works correctly from startup if it will become the only display at the destination.
Check every cable and adapter. A portable screen is not particularly useful when the one required video cable is still behind your main monitor at home.
Keeping a dedicated cable kit with the display solves this. USB-C, HDMI, power cables, and any necessary adapters can remain packed together.
A dedicated travel cable kit saves problems and adds very little weight compared with the monitor itself.
The display should also be protected during transport. Keep hard chargers and power adapters away from the LCD surface.
A padded sleeve or protected compartment is preferable. Portable monitors are designed to travel, but the screen itself is still a relatively thin LCD panel.
A bag being dropped or compressed can damage it. Do not treat the word portable as meaning impact resistant.
Protect the panel from pressure during travel, especially when the monitor shares a bag with the Mac mini and its power supply.
One advantage of a detachable display is that it can potentially be used with other compatible devices too. A laptop, compatible phone, tablet, or game console can make use of the screen when the correct output connection is available.
That gives the monitor a life beyond one Mac mini desk. If you replace the computer later, the display can remain useful rather than being tied to a proprietary mounting arrangement.
For entertainment, the 15.6-inch size is large enough for a personal movie or gaming screen. For productivity, it remains compact enough to sit beside another monitor without dominating the desk.
The 15.6-inch format is a sensible compromise between usable screen area and transportability.
A smaller 13 or 14-inch monitor is easier to carry but gives you less application space. A much larger portable screen is easier to work on but starts becoming awkward to pack.
Fifteen and a half inches sits close to a typical larger laptop display, so most users already understand how much workspace to expect. It is enough for one substantial application or several smaller panels.
The fifth-place ranking comes mainly from what the products above it offer. Our higher-ranked choices provide stronger multi-screen configurations, more workspace, or particularly convenient standalone designs for a Mac mini.
The SIAVIALA P5 remains somewhat rooted in the laptop extender category. That creates compromises for desktop-only use, even though its detachable nature makes it more adaptable than a permanently attached extender.
A conventional standalone portable monitor with a purpose-built kickstand can be simpler if it will never be used with a laptop. You place it on the desk, connect it, and there is very little else to consider.
The P5 makes more sense if you value flexibility and may use the screen with both a Mac mini and a laptop. Its detachable positioning becomes more meaningful in that mixed workflow.
Our higher-ranked dual-screen products also provide more total workspace. If your Mac mini supports the required display configuration, having two portable side screens can dramatically increase how many applications remain visible.
The P5 gives you one additional screen, so its productivity ceiling is naturally lower than a full triple-display configuration.
That also makes it easier to manage. One additional display needs fewer video outputs, fewer cables, less power, and less physical desk width.
For many people, that is enough. A Mac mini with one main monitor and one 15.6-inch secondary display already provides a useful two-screen workstation.
The ranking therefore reflects maximum overall capability rather than suggesting this configuration is inadequate. A simpler setup can actually be preferable if you travel frequently or have limited desk space.
More monitors are not automatically better when the additional hardware creates cable clutter or forces an uncomfortable viewing position.
Use the portable screen for content that benefits from remaining visible. Communication, reference material, monitoring dashboards, music controls, Finder, calendars, and notes are good examples.
A common mistake is trying to split every application equally between two displays. Instead, keep the primary task on the main monitor and give the portable screen a consistent supporting role.
This creates a more predictable workflow. You know where information will appear without constantly rearranging windows.
Consistent screen roles improve multi-monitor workflows, particularly when the secondary display is smaller than the main one.
Resolution scaling deserves a little attention in macOS. Use the native Full HD resolution where practical, then choose an appropriate scaling option if interface elements feel uncomfortable.
Do not immediately reduce the display to a much lower resolution just to make text larger. That can sacrifice sharpness unnecessarily.
Viewing distance also matters. A 15.6-inch screen can sit somewhat closer than a large desktop monitor without overwhelming the field of view.
Position it where text remains comfortable rather than matching the exact distance of a much larger primary display simply for visual symmetry.
Comfort matters more than perfect desk symmetry. The two monitors have different jobs and different physical sizes.
For permanent use, cable management can make the portable setup look much cleaner. Route the USB-C or HDMI connection behind the main monitor rather than across the keyboard area.
Leave enough slack for the SIAVIALA to move or rotate without pulling on the port. Repeated sideways tension on a connector can eventually create reliability problems.
If the display is removed frequently, use reusable cable ties rather than permanently fixing everything underneath the desk. This keeps the portable part of the setup genuinely portable.
Good cable routing protects the ports too, not just the appearance of the desk.
We believe the SIAVIALA P5 deserves the number five ranking out of seven for Best Portable Monitor For Mac Mini because it combines a useful 15.6-inch portable display with a detachable design, Full HD output, plug-and-play connectivity, and enough flexibility to move between laptop and desktop workflows.
It ranks below our first four because those products provide stronger overall combinations for dedicated Mac mini use, whether through more total display area, simpler independent stands, or more straightforward desktop positioning. The P5's laptop-extender origins mean some of its design advantages matter less when there is no laptop involved.
That said, its detachable construction solves much of that problem. Verify the external-display support of your exact Mac mini, use the correct video-capable USB-C or HDMI connection, provide stable power, and configure the screen as an extended desktop in macOS.
Set up properly, the SIAVIALA P5 remains a flexible portable second screen for business, editing, coding, study, research, remote work, and travel, giving it a sensible fifth-place position in this seven-monitor comparison.

- 10.5-inch IPS panel delivers sharp 1920 x 1280 resolution.
- Ten-point capacitive touchscreen supports direct on-screen interaction.
- Dual full-function USB-C ports simplify video and power connections.
- 400-nit display covers 100 percent of sRGB.
- Compact 363-gram body makes travel and storage easy.
The SF10T is tiny, but the screen specification is much better than its size suggests
The MINIX SF10T takes the number six position in our Best Portable Monitor For Mac Mini comparison because it approaches portability very differently from the larger displays above it. This is a compact 10.5-inch IPS monitor with a 1920 x 1280 resolution, 15:10 aspect ratio, touchscreen functionality, and enough connectivity to work as a useful secondary screen beside a Mac mini.
The first thing to understand is the size. At 10.5 inches, this is considerably smaller than the 14-inch and 15.6-inch portable monitors that dominate this category, so it is better suited to supporting applications than becoming a large primary desktop display.
The 1920 x 1280 resolution helps considerably because the smaller panel still provides 219 pixels per inch. Text, interface elements, browser content, and documents can look sharp without the display needing to be physically large.
The 15:10 aspect ratio is interesting too. Compared with a typical 16:9 portable monitor, you get a little more vertical working space, which can be useful for documents, coding windows, email, Finder, and web pages.
Brightness reaches up to 400 nits, and MINIX specifies a 1500:1 contrast ratio. The IPS panel also provides wide viewing angles, which matters when the monitor sits off to one side rather than directly in front of you.
Color coverage reaches 100 percent sRGB, with support for 16.7 million colors, HDR, and around 74 percent DCI-P3 coverage. That gives the SF10T a surprisingly capable visual specification for such a compact portable display.
For a Mac mini workstation, I would use it for Finder, messages, music controls, reference material, email, monitoring tools, or application palettes. Keep the large canvas, timeline, spreadsheet, or main document on the primary monitor.
The dual USB-C setup is useful, but Mac touchscreen support needs context
The SF10T includes two full-function USB-C ports along with Mini HDMI. Its USB-C implementation supports up to 65W power input and up to 47W power output, while compatible USB-C connections can carry video, data, and power.
This gives a Mac mini user several ways to build the desk setup. USB-C can reduce cable clutter when the Mac, cable, and display connection are configured correctly, while Mini HDMI provides another video input route.
The package includes USB-C video and power cables as well as an HDMI to Mini HDMI cable. That is useful because a common portable-monitor problem is having the correct ports but discovering the cable on hand only supports charging.
Not every USB-C cable carries video. If the monitor receives power but macOS does not recognize the display, test with the supplied video-capable USB-C cable before assuming there is a hardware fault.
The touchscreen is a more complicated feature for Mac mini users. The SF10T has a capacitive 10-point multi-touch panel, but macOS does not natively provide the same general touchscreen desktop experience that Windows does.
Do not buy it for Mac touch alone without checking the exact software and interaction you expect to use. The display itself can still function perfectly well as an external Mac monitor even when the touch feature is not central to the workflow.
On supported systems, ten-point touch can be useful for scrolling, zooming, selecting controls, or drawing. With a Mac mini, I would treat touch as a secondary feature and evaluate the SF10T primarily on display quality, size, connectivity, and portability.
Once connected, open Displays in macOS and configure the SF10T as an extended display rather than mirroring the primary monitor. Extended mode gives the small screen its own desktop space.
Arrange the display position correctly in macOS so it matches the physical desk. If the MINIX sits below and to the right of your main monitor, place it there in the software arrangement too.
This determines where the pointer crosses between screens. It seems minor until you move the mouse between displays hundreds of times during a workday.
The 15:10 panel can be particularly good for vertical information. A messaging application, long document, browser reference page, or terminal window fits naturally on a display with a little more vertical space than a standard widescreen panel.
For coding, I would keep documentation or terminal output on it. For video editing, scopes, notes, file management, or communication are more realistic uses than trying to squeeze the entire editing timeline onto 10.5 inches.
The small screen needs a defined job. Once you assign it one or two supporting applications, the limited physical size becomes much less of an issue.
Why the MINIX finishes sixth despite having some excellent specifications
Portability is where the SF10T is unusually strong. The monitor weighs only about 363 grams, or roughly 0.8 pounds, and measures approximately 232.9 x 163.9 mm.
That is dramatically easier to carry than most 15.6-inch portable monitors. The 363-gram weight is genuinely travel friendly, especially when the monitor shares a bag with a Mac mini, keyboard, mouse, power supply, and cables.
The magnetic stand also avoids requiring a bulky conventional monitor base. You can position the screen on a desk and pack the support away with the display when travelling.
There is also a 75mm VESA mounting option. That is useful if the SF10T eventually becomes a permanent secondary display rather than remaining a travel monitor.
A small VESA arm could position it beside or underneath the main monitor while freeing desk space. This works well for monitoring dashboards, communication windows, audio controls, or other applications that stay open throughout the day.
VESA support gives it permanent-desk potential, which is something not every ultra-compact portable monitor provides.
The built-in dual speakers add another convenience. Each is rated at 1W, so this is not a replacement for dedicated desktop speakers, but basic audio can be useful when the monitor travels with the Mac mini.
There is also a 3.5mm audio output. If the Mac mini workstation uses headphones or another audio arrangement, you are not forced to rely on the small integrated speakers.
Low blue light functionality is included for longer viewing sessions. As with any display, sensible brightness and viewing distance matter more than simply enabling one eye-comfort feature.
Do not run 400 nits unnecessarily in a dim office. Match brightness reasonably closely with the main display so moving your eyes between screens does not produce a dramatic change in luminance.
The SF10T supports a 50 to 60Hz operating range, with 60Hz being the normal desktop target. That is perfectly adequate for office work, browsing, video, coding, and secondary editing applications.
FreeSync support is included as well. It may be useful with compatible sources, although it is not the main reason we would choose this monitor for a Mac mini productivity setup.
The response time is specified at 25ms. That is another clue about where the product fits: this is a portable productivity and media display rather than a competitive gaming monitor.
Its strengths are portability and pixel density, not extremely fast motion performance.
The 1920 x 1280 resolution deserves another mention because some retailer listings incorrectly simplify the monitor as 1920 x 1080. The manufacturer's specification for the SF10T gives the native panel resolution as 1920 x 1280.
That extra vertical resolution contributes to the 15:10 aspect ratio. For office applications, those additional 200 vertical pixels can be more useful than they sound.
A long spreadsheet or document shows additional rows. A browser page displays more content before scrolling, and a terminal window can keep more output visible.
The 15:10 format suits productivity work, even though it is less common than the standard 16:9 layout.
At 219 PPI, interface scaling becomes important. Running everything extremely small just because the panel has a high pixel density is not necessarily productive.
Use macOS display scaling to find a comfortable balance between workspace and readability. A portable monitor is useful only if the information on it can be read without leaning forward.
This is especially important with a 10.5-inch screen. The physical pixels are dense, but the physical panel is still small.
Sharpness does not replace physical screen size. A high-resolution 10.5-inch monitor cannot display a large application interface as comfortably as a 15.6-inch monitor viewed from the same distance.
That is the main reason the SF10T finishes sixth rather than higher. The products above it provide considerably larger working areas, and some offer multiple displays for substantially more desktop space.
For a Mac mini user doing full-day office work, a 14-inch or 15.6-inch portable monitor is usually easier to use as a true second workspace. The MINIX works better as a compact auxiliary display.
For example, a large spreadsheet is possible on the SF10T, but a bigger panel gives columns and text more physical room. Video editing panels also become easier to manipulate when controls are not packed into 10.5 inches.
The sixth-place rank comes down mainly to size, not poor display specifications. In several technical areas, the SF10T is actually quite impressive.
The 100% sRGB coverage, 400-nit brightness, 1920 x 1280 resolution, dual USB-C connectivity, touch panel, HDR, speakers, and VESA support create a feature set that is richer than some physically larger portable displays.
If extreme portability is the priority, the ranking could feel different for an individual buyer. Someone travelling constantly may prefer a 363-gram screen over a larger display that provides more workspace but adds considerably more weight.
The compact dimensions also make the SF10T easier to use on a narrow desk. It can sit underneath a primary monitor or beside a keyboard without consuming the width of another laptop-sized panel.
Small desks are where this size becomes useful. More screen area is not helpful if the monitor physically does not fit the workspace.
The magnetic stand should be adjusted to keep the display at a comfortable angle. Because the panel is small, placing it too far away makes text harder to read.
Bring it slightly closer than the main monitor if necessary. There is no requirement for every screen on the desk to sit at exactly the same viewing distance.
For permanent use, VESA mounting may solve the height issue more elegantly. A small arm can position the SF10T near eye level or beneath a larger display.
Physical positioning matters with compact screens, because poor placement exaggerates the disadvantages of the smaller panel.
The two USB-C ports also create an interesting power arrangement. The monitor accepts up to 65W PD input and can provide up to 47W output to a compatible connected device.
For a Mac mini, reverse charging is less important because the computer has its own mains power supply. Still, the power-delivery system can be useful when the monitor is shared with laptops, phones, tablets, or other compatible devices.
This is another area where the SF10T has value beyond one computer. It can move between the Mac mini desk and other portable devices rather than remaining permanently attached to one setup.
Multi-device flexibility adds long-term usefulness, particularly if you own both a desktop Mac and a laptop.
Mini HDMI gives you another connection option for devices without USB-C video. The included HDMI to Mini HDMI cable means you do not need to immediately hunt for the less common connector.
If using HDMI, remember that video and power may require separate connections. HDMI does not normally power the portable monitor.
USB-C can be cleaner when a compatible single-cable setup is available. But there is nothing wrong with using separate power and HDMI if that configuration proves more reliable.
Reliability matters more than minimum cable count. One cable looks cleaner, but two stable cables are preferable to an unreliable hub arrangement.
If the monitor flickers or disconnects, simplify the connection chain. Remove hubs, docks, and adapters temporarily and test directly from the Mac mini.
Then reconnect peripherals one at a time. This makes it much easier to determine whether the issue is the monitor, cable, dock, power supply, or host connection.
For travel, keep the supplied cables together with the display. A 10.5-inch monitor is easy to pack, but it is useless if the necessary video cable is sitting behind the main monitor at home.
A dedicated cable kit makes travel easier, especially when moving between several offices or workspaces.
The included magnetic stand also provides some protection and positioning flexibility, but the LCD itself should still be treated carefully. Do not pack a heavy Mac mini power supply directly against the screen surface.
Use a padded compartment and keep hard accessories separated. The monitor weighs very little partly because the enclosure is compact, so avoiding pressure on the panel matters.
The SF10T can also work well as a diagnostics monitor. A small external screen can be useful when setting up a Mac mini, server, compact PC, or other computer where a full-size display is unnecessary.
That is a more specialized use, but the tiny footprint is excellent for occasional system access. You can keep the display stored away and connect it only when direct screen access is required.
For presentations, the wide IPS viewing angles help when several people need to look at the panel from different positions. MINIX specifies a 178-degree viewing range.
The screen is still only 10.5 inches, so it is better for sharing with one or two nearby people than presenting across a conference room. For that, a larger external display or projector is more appropriate.
Built-in speakers can handle basic presentation audio, but again, expectations should match the compact hardware. Dual 1W speakers prioritize convenience over room-filling sound.
The SF10T is designed around compact utility, and almost every feature makes more sense when viewed through that lens.
For gaming, FreeSync and 60Hz support are useful additions, and a Nintendo Switch or other compatible device can make the monitor a compact gaming display. The small size can actually be convenient when travelling.
The 25ms response time means fast competitive gaming is not the strongest application. Casual gaming, media playback, and productivity are more natural fits.
For a Mac mini, the strongest setup is probably one large main monitor plus the SF10T as a small secondary control or information display. This lets the compact screen do something specific rather than asking it to replace a much larger workspace.
Give the small screen one clear purpose, and it becomes much easier to justify keeping it connected.
It could permanently display email, calendar, music, system monitoring, chat, notes, or a reference page. Creative users could place tool palettes or scopes there.
Developers could use it for terminal output or logs. Streamers could keep chat or monitoring information visible without covering the primary screen.
That is where the 10.5-inch format feels less restrictive. You are not trying to fit your entire workflow on it.
The low-blue-light panel is useful for longer sessions, but remember to take normal breaks and position the screen correctly. Eye comfort depends on the whole setup, including brightness, distance, ambient lighting, and text size.
The display's 400-nit maximum is useful in brighter rooms. Indoors at night, you may prefer much lower brightness.
Color coverage is good enough that photos and video should look vibrant, but users doing professional color work should still calibrate and verify the screen rather than assuming a 100% sRGB specification guarantees perfect out-of-box accuracy.
For final color decisions, a larger calibrated main display remains the safer choice. The MINIX can then handle supporting content while still benefiting from its good gamut coverage.
Good gamut coverage is still valuable, even when the monitor is not being used as the final reference display.
We believe the MINIX SF10T deserves the number six ranking out of seven for Best Portable Monitor For Mac Mini because its compact 10.5-inch size limits how much physical workspace it provides compared with the larger monitors above it. The touchscreen is also less compelling on a Mac mini because macOS does not offer the same native multi-touch desktop experience as Windows.
Those

- Portable display design adds useful secondary Mac workspace.
- Full HD screen suits documents and everyday productivity.
- Built-in speakers reduce the need for separate desktop audio.
- Travel-friendly construction makes temporary workstations easier to build.
- External monitor design works across multiple compatible devices.
This is a straightforward portable screen, and that can be enough
The TravelView takes the number seven position in our Best Portable Monitor For Mac Mini comparison because it focuses on the basics: portable external screen space, Full HD viewing, built-in audio, and a design intended for travel and secondary-display use. It is less ambitious than some of the multi-screen products higher in our ranking, but that simplicity can still make sense for a compact Mac mini workstation.
A Mac mini already takes up very little desk space. Pairing it with a compact portable second display lets you add another working area without installing a second full-size desktop monitor.
That is useful for everyday office work. Keep email or Slack on the portable screen while the main display handles spreadsheets, documents, design work, or whatever application actually needs the larger workspace.
For research, the portable monitor can hold source material while you write on the main display. For coding, documentation or a terminal can stay visible without constantly covering the editor.
Video editing is another practical example. The primary monitor can remain dedicated to the timeline and larger viewer while the portable display handles Finder, project notes, communication, or other supporting windows.
The benefit is fewer hidden windows, not simply having another panel sitting on the desk. A second screen becomes useful when you give it a specific job.
The Full HD format is also sensible for this kind of use. A 1920 x 1080 desktop provides enough room for secondary applications without demanding the same bandwidth or scaling considerations as another 4K display.
Text, browser pages, documents, and normal interface elements can remain readable while still providing meaningful working space. For a secondary Mac monitor, that balance is often more important than chasing the highest possible resolution.
The built-in speakers make temporary Mac mini setups easier
Built-in speakers are a useful addition because the Mac mini itself does not provide the kind of audio experience most people want for regular media or video calls. An external display with its own speakers can reduce the number of separate devices required on a temporary desk.
This can be particularly useful during travel. Instead of packing a portable monitor plus external desktop speakers, the monitor can handle basic audio output for meetings, videos, system sounds, and casual media.
Do not expect compact integrated speakers to replace a good pair of headphones or dedicated desktop speakers. Small monitor enclosures have limited space for larger drivers and meaningful low-frequency output.
For normal speech and occasional video playback, though, built-in speakers are convenient. They also keep a Mac mini workstation cleaner when audio quality is not the main priority.
After connecting the monitor, macOS may continue sending sound somewhere else. Open the sound output settings and select the external display if you want to use its speakers.
Video and audio routing are separate settings, so a working picture does not necessarily mean macOS will automatically choose the monitor for sound.
Connection setup deserves similar attention. Portable monitors commonly use USB-C, HDMI, or a combination of the two, but you should check the exact connections supplied on this listing before choosing cables or adapters.
USB-C is especially easy to misunderstand. The physical connector does not guarantee that a particular port or cable carries a video signal.
A USB-C charging cable may physically fit both devices and still fail to display an image. Use a cable that supports video output if the monitor is being connected through USB-C.
HDMI can be another straightforward option when available. A Mac mini has traditionally provided useful display connectivity, although the exact combination of ports and supported external monitors varies by model generation.
This matters if you already have a primary display attached. Check the external-display specifications for your exact Mac mini before planning a larger multi-monitor setup.
Different Apple silicon generations support different combinations and numbers of external displays. Do not assume every Mac mini behaves identically just because the physical ports look similar.
Once the portable monitor is connected, open Displays in macOS. For productivity, set it up as an extended desktop rather than mirroring the primary monitor.
Mirroring displays the same content twice. Extension creates additional desktop space where separate windows can remain open.
Then arrange the displays in macOS so their positions match the physical desk. If the portable monitor sits on your right, put it on the right side of the software arrangement.
Correct positioning makes cursor movement natural. Otherwise you can end up moving the pointer in the opposite direction just to reach the second screen.
The vertical position matters too. Portable monitors often sit lower than conventional desktop screens, so reflect that difference in the macOS arrangement.
This determines where the pointer crosses between the displays. It is a small adjustment, but you notice it constantly during everyday work.
Why this portable monitor finishes seventh in our comparison
The biggest reason is that the six products above it offer more distinctive features for our Best Portable Monitor For Mac Mini category. Some provide larger multi-screen configurations, detachable designs, touch functionality, or more clearly documented specifications.
This model takes a simpler route. It provides the basic second-screen experience, but there is less verified technical information available to distinguish it from the stronger products in our seven-monitor group.
That does not make a simple portable monitor a bad idea. In fact, a single-screen setup can be easier to use than a complicated laptop extender when the host computer is a Mac mini.
You do not need two additional display outputs. There are fewer cables to manage, less power demand, and less physical hardware spread across the desk.
For somebody working from a smaller home office, that simplicity can be preferable. One main monitor and one portable side screen already provide enough space for many professional workflows.
A second screen solves many productivity problems without requiring a full three-monitor workstation.
The portable format also makes sense if the Mac mini moves between locations. The computer itself is compact enough to carry, but it needs a display wherever it goes.
A portable monitor can serve as the primary display at a temporary location and then return to secondary-monitor duty at home. That gives it more flexibility than a conventional monitor permanently attached to an arm or heavy stand.
You still need power for the Mac mini. This is not a battery-powered laptop replacement, so think of the setup as transportable between desks rather than something designed for working anywhere outdoors.
It works best between powered work locations, such as a home office, studio, classroom, hotel desk, or another established workspace.
Before travelling, test the exact configuration you intend to carry. If the portable monitor will become the only screen, disconnect your normal display and make sure the Mac mini boots and displays the login screen correctly through the portable monitor.
Check every adapter and cable at the same time. Finding out that the required HDMI adapter is still connected behind your home monitor after arriving somewhere else is avoidable.
Keeping a small dedicated cable kit with the portable monitor helps. Pack the video cable, power connection, and any Mac-specific adapter together.
Test the complete travel setup first, not only the monitor while your normal desktop hardware remains connected.
Physical protection matters during travel too. A portable monitor may be thin and lightweight, but the LCD panel can still be damaged by pressure.
Do not place the Mac mini power supply or another hard object directly against the screen inside a bag. A padded sleeve or protected compartment is much safer.
Cables should not be sharply bent at their connectors either. Portable equipment gets plugged and unplugged far more frequently than a permanent desktop monitor.
Frequent travel increases connector wear, so a little care with cable routing and packing can prevent intermittent connection problems later.
On the desk, position the monitor according to how it is actually being used. If it mainly holds email or reference material, placing it slightly to one side and angled inward usually works well.
Do not position it extremely low just because a portable monitor naturally rests close to the desk surface. Long sessions with your head constantly tilted downward can become uncomfortable.
A small riser or independent stand can improve the viewing height if necessary. The exact solution depends on the monitor's physical support design.
Portable displays still need sensible ergonomics, particularly when they become part of an eight-hour working setup.
For video editing, use the portable screen strategically. Put bins, notes, communication, or file management there rather than automatically making it the critical preview display.
The same principle applies to photography and graphic design. Unless you have verified and calibrated the panel for color-critical work, keep final color judgments on the stronger primary monitor.
A portable screen can still be extremely useful without being the reference display. Most editing applications contain plenty of panels that need space but do not require perfect color reproduction.
Supporting tools are ideal secondary content, leaving the best monitor available for the actual image or video.
For office work, the situation is easier. Spreadsheets, Word documents, PDFs, email, browser windows, calendars, and communication applications do not normally require specialist display performance.
Put the source spreadsheet on one screen and the report being written on the other. Keep a PDF open while taking notes without repeatedly minimizing and restoring windows.
During a video meeting, the call can remain on the portable screen while the primary monitor holds the document being discussed. This becomes particularly useful during screen sharing.
Keeping meeting controls on another screen prevents them from constantly covering the work you are trying to present.
Built-in speakers help in that situation too. Voices can come directly from the display without another set of desktop speakers taking up space.
For private meetings or noisy environments, headphones remain the better option. Integrated speakers are mainly about convenience.
Power delivery can cause problems with portable displays if the setup is marginal. If the screen flickers, disconnects, or changes brightness unexpectedly, verify that it is receiving adequate power.
Hubs deserve particular suspicion during troubleshooting. A direct connection is easier to diagnose because a USB-C hub may already be handling storage, networking, charging, and other peripherals.
Connect the monitor directly first if possible. Once the display is stable, reconnect other hardware one item at a time.
This tells you whether the monitor itself is having trouble or whether the issue is somewhere else in the connection chain. Randomly replacing adapters is slower.
Brightness should be adjusted around the room rather than automatically set to maximum. A portable monitor sitting close to you can feel unnecessarily bright in a dim office.
Try to make the main and secondary screens reasonably similar in perceived brightness. Large brightness differences become tiring when your eyes move between the displays repeatedly.
The same is true for color temperature. Perfect matching may not be possible, but two screens that look dramatically different can be distracting.
macOS display settings can help with resolution and orientation. Use the monitor's native Full HD mode where practical and adjust scaling if interface elements are uncomfortable.
Lowering the actual output resolution simply to make text larger can reduce sharpness. Scaling is normally the cleaner approach when appropriate options are available.
Use native resolution where practical, then adjust the interface around your viewing distance.
A portable display can also become useful beyond the Mac mini. Depending on the available inputs, compatible laptops, game consoles, tablets, or other computers may be able to use the same screen.
This gives the product more value in a shared household or office. It does not have to remain permanently assigned to one computer.
That flexibility is another reason portable monitors make sense even when they are not the highest-performing displays in the room. They can solve temporary screen problems quickly.
One monitor can serve several devices, provided the required video standards and cables are compatible.
The built-in speaker system reinforces that versatility. A game console or media device can potentially produce both picture and basic audio without requiring another accessory.
Again, check the exact ports and supported connection methods on this specific Amazon listing before purchasing cables. The available indexed information for ASIN B0GKP7FBG3 is limited, so I would not assume a port specification that has not been verified.
This lack of detailed technical information contributes to the seventh-place ranking. When comparing portable monitors, brightness, color coverage, panel type, refresh rate, weight, dimensions, and connection standards all help determine which screen is best suited to a Mac.
Clear specifications make buying decisions easier, and the stronger products in our comparison provide a more identifiable feature set.
That matters if you have a specialized use case. A photographer may care about color gamut, while someone working outdoors may care more about brightness.
A gamer might prioritize refresh rate. A frequent traveler might care more about weight and thickness than either of those specifications.
Without verified numbers, I would treat this monitor primarily as a general-purpose portable productivity display rather than making assumptions about specialist performance.
General productivity is the safer use case, including documents, research, communication, administration, coding tools, and normal second-screen tasks.
The seventh-place ranking also reflects screen count. Higher-ranked products in our list can provide more workspace through larger or multi-panel configurations.
One portable monitor gives you a two-screen setup when combined with a primary display. A dual-panel extender can potentially create three working areas.
That difference matters for people running several applications simultaneously. It matters much less if you simply want email or a browser visible beside your main task.
More screen area helps heavy multitasking, but it also increases cable requirements, desk width, power consumption, and setup complexity.
This product stays on the simpler side of that tradeoff. There is less equipment to carry and fewer displays to configure.
For travel, that can actually be a positive. Packing one monitor is easier than protecting a folding multi-panel system.
It can also fit smaller temporary desks. Hotel furniture and shared workspaces do not always have enough width for three displays.
A single portable screen is easier to deploy, even if it provides less total desktop space than our higher-ranked choices.
If you use the monitor permanently beside a Mac mini, spend a few minutes on cable management. Route power and video behind the main monitor or along the rear edge of the desk.
Leave enough slack to reposition the portable display without pulling on its connector. Constant sideways tension on USB-C or HDMI ports can eventually cause problems.
Reusable cable ties work well because the screen can still be removed for travel. Permanent cable clips can be used farther back where the fixed portion of the cable remains on the desk.
Good cable routing keeps portability intact while preventing the desk from becoming cluttered.
For everyday workflow, give the secondary monitor a consistent purpose. Maybe communication always stays there, or perhaps it is reserved for research and reference material.
This reduces the amount of window rearrangement needed every morning. You begin to know where information will appear automatically.
The same idea works for editing. Keep project management and file browsing on the portable screen every time rather than randomly moving panels between monitors.
Consistent screen roles improve productivity, particularly when one display is noticeably smaller than the other.
We believe this TravelView model deserves the number seven ranking out of seven for Best Portable Monitor For Mac Mini because it provides the essential benefits of a portable Full HD external display and integrated speakers, but offers fewer clearly verified differentiating features than the six products above it.
The limited indexed technical information also makes it harder to assess characteristics such as brightness, color gamut, panel technology, refresh rate, and exact connectivity against the stronger options. For buyers with specialized requirements, those details matter.
Still, seventh place does not mean the basic concept is poor. A lightweight second screen with built-in audio can be exactly what a Mac mini user needs for documents, research, meetings, coding, administration, or travel.
Verify the exact ports on the Amazon listing, confirm the external-display capabilities of your Mac mini, use video-capable cables, provide stable power, and configure the screen as an extended desktop in macOS. Used that way, this remains a practical portable Mac mini display for users who value a simple second-screen setup more than advanced multi-monitor features.