

Quick Buying Guide: The best photo printer for photo booth should meet your target print size, guests per hour, and event transport needs. Compare dye-sublimation and ink-based systems for speed, dry handling, media cost, and maintenance. Calculate cost per print using matched paper and consumables, then check tray capacity and replacement time during busy sessions. Confirm computer or booth-software compatibility, available drivers, cut formats, and connection type. A sturdy case, spare media, backup power planning, and readily available support reduce disruption more than extra editing features.

- Complete photo booth package includes DSLR camera and photo printer
- 15.6-inch touchscreen provides simple guest-controlled photo booth operation
- Large 29-inch LCD displays captured photos throughout the event
- Intel i5 computer with 8GB RAM handles capture and printing
- RGB lighting and adjustable ring light improve event photo presentation

This is a complete photo booth setup, not just a printer sitting on a table
The PAAFNN Mirror Pro earns our number one position for Best Photo Printer For Photo Booth because this package approaches printing as part of an entire event workflow. You get the booth hardware, DSLR camera and printer together, with a 15.6-inch interactive touchscreen and a separate 29-inch LCD display built into the system.
That distinction matters when running weddings, birthday parties, corporate events, graduations, and other paid photo booth jobs. A good printer is important, but guests also need an easy way to take the photo, preview it, interact with the booth, and receive the finished print without the operator rebuilding the workflow around separate pieces of equipment.
The full-set configuration is especially appealing for someone starting a photo booth business. Instead of buying a booth shell and then working out the camera and printing arrangement afterward, this configuration packages the major hardware together.
The DSLR camera is a major advantage when image quality matters. A dedicated camera gives you much more photographic potential than relying entirely on a tablet or inexpensive webcam, particularly when lighting is controlled properly.
The adjustable ring light helps with that. Guests at an evening reception may be standing in a dim ballroom with colored ambient lighting, and without controlled frontal illumination faces can become dark or uneven.
A ring light provides predictable illumination near the camera position. That makes it easier to maintain consistent portraits as different groups step in front of the booth throughout the night.
The RGB lighting around the machine is more about presentation than photographic exposure. At an event, though, presentation matters because the booth needs to be visible and inviting without requiring another decorative structure around it.
The touchscreen, DSLR and printer create a much better event workflow
The front 15.6-inch capacitive touchscreen is where guests interact with the booth. A large touch interface reduces operator involvement, which becomes important when twenty people suddenly decide they want photos at the same time.
A guest should be able to approach, follow the on-screen workflow, pose, take the image and continue toward printing without needing an attendant to explain every step. That is what separates a usable commercial booth from a collection of photography equipment placed beside each other.
The 29-inch LCD display adds another layer. It can display photo booth shots and slideshows, so people waiting nearby can see images from the event rather than staring at a blank enclosure.
This can be surprisingly useful at weddings and parties. One group finishes its session, their images appear on the larger display, and the next group immediately understands what the booth does and how the finished photographs look.
The included printer is central to the experience. Digital sharing is convenient, but an actual printed photograph gives guests something physical to take away from the event.
For a commercial photo booth operator, print workflow matters almost as much as image quality. Guests do not want to wait several minutes for each print while a queue grows across the room.
Before an event, test the complete capture-to-print sequence repeatedly. Do not test only one photograph and assume the setup is ready.
Run several consecutive sessions, print multiple copies, and check how the software behaves when groups move through quickly. A problem that never appears during one test photo can become obvious after twenty consecutive jobs.
Keep spare printing media ready before guests arrive. The worst time to learn how to reload a printer is when a wedding queue is standing beside you watching.
Consumable planning also affects the economics of a photo booth business. Work out the cost per finished print before pricing an event, then include some extra media for duplicate prints, test shots, mistakes, and unexpectedly high participation.
The system uses an Intel i5 mini computer with 8GB of RAM and 256GB of storage. That gives the booth a proper Windows-based computing platform for capture, display, editing, printing, and event software rather than depending on a basic embedded interface.
Eight gigabytes of memory is sensible for booth software, especially when the system needs to manage DSLR capture, graphics, touchscreen input and printing during the same session.
The 256GB storage capacity also gives room for event images and software. Still, event operators should not treat the internal drive as the only copy of important client photographs.
Back up each completed event. Ideally, keep the original images in at least two locations before clearing local storage for another job.
A photo booth can produce hundreds of files during a busy reception. Organizing those images by event name and date immediately is much easier than sorting through months of mixed sessions later.
Why we believe this full setup deserves the number one rank
The strongest argument for rank one is integration. This package combines capture, interaction, display and printing rather than forcing the buyer to build those parts independently.
The industrial-grade aluminum construction also makes sense for event work. Photo booth equipment gets transported, assembled, packed, moved through venues, and handled far more often than ordinary home electronics.
That does not mean it should be treated roughly. Protect the touchscreen, camera, display, printer and internal computer carefully during transportation because one damaged component can stop the entire booth from operating.
For professional use, a suitable transport case is worth considering. Cables should be organized and labelled as well, particularly when different people may set up the booth at different events.
Consistent setup prevents event-day mistakes. If the camera cable, printer connection, lighting power, and display connection always follow the same layout, troubleshooting becomes much faster.
The camera should also be configured before guests arrive. Check focus, exposure, white balance and framing under the actual venue lighting rather than using whatever settings worked at the previous event.
A wedding ballroom with warm lighting can produce very different skin tones from a bright corporate venue. Even with a ring light, ambient light can influence the final image.
Take test photos with a person standing where guests will actually pose. Empty-background test images do not reveal exposure problems on faces nearly as well.
Printer color should be checked against the camera output too. A photograph that looks good on the touchscreen can still print too dark or with noticeably different color.
Do several test prints before the event begins. Look at skin tones, shadow detail, highlights, sharpness and whether the print layout is being cropped correctly.
This is especially important when creating custom photo templates. Wedding names, event dates, borders and logos can consume more of the printable area than expected.
Leave enough margin around important faces. Guests do not stand in exactly the same position every time, so a layout that works perfectly for one test photograph may crop another group badly.
Print speed should be considered alongside print quality. A commercial booth needs to keep people moving, particularly during the busiest part of an event.
If one group requests multiple copies, the printer suddenly has more work to do. Build the software workflow so duplicate printing is controlled rather than allowing every guest to create an unnecessary stack of prints.
The 29-inch display can help keep waiting guests engaged during that process. Previous images can remain visible while the printer handles the physical output.
The touchscreen should also be cleaned regularly. Fingerprints accumulate quickly during a busy event and can make an otherwise expensive booth look poorly maintained.
Carry microfiber cloths and basic equipment-cleaning supplies. Presentation matters when clients are paying for event service, particularly at weddings and corporate functions where the booth sits in a highly visible area.
The ring light deserves the same attention. Adjust brightness according to the venue rather than automatically running it at maximum output.
Too much frontal light can make photographs flat and uncomfortable for guests. Too little can force the camera toward higher ISO settings or slower exposures.
Positioning also matters. Leave enough distance between the booth and backdrop for small groups to fit comfortably while keeping the camera framing useful.
Test the largest group you expect to photograph. A setup that looks perfect for two people can become awkward when six friends try to squeeze into the frame.
The photo booth's slideshow capability can add value during longer events. Guests see earlier photographs appearing throughout the evening, which encourages more people to participate.
For private events, make sure the client is comfortable with public slideshow display before enabling it. Some events may prefer images to remain private or only appear briefly during each session.
App-based control adds another convenience for the operator. You can manage aspects of the booth without turning every adjustment into an interruption at the guest-facing touchscreen.
Operator control becomes useful during busy sessions. If something needs checking, it is better to manage the system discreetly than stop the line and take over the front interface.
There are still some practical disadvantages. This is a much larger and more expensive purchase than buying a standalone compact photo printer.
It also creates a single integrated workflow where several components need to work together. Camera communication, software, printer drivers, touchscreen operation, and Windows all need to be tested before every important booking.
That is normal for professional booth equipment, but buyers should understand the difference. This is closer to purchasing an event system than purchasing a simple printer.
Have a backup plan for critical components. Carry spare cables, printing consumables, power accessories and whatever small parts are necessary to recover from common failures.
If the booth is being used commercially every weekend, preventive maintenance matters. Inspect connectors, clean ventilation openings, check the printer, update software carefully, and test everything after any major Windows or application update.
Do not install a major software update an hour before a paid event. Test changes when you have enough time to roll them back or troubleshoot unexpected driver problems.
Power is another practical consideration. Use a properly rated surge protector or UPS where appropriate, especially because the booth contains a computer, displays, camera equipment and a printer.
Stable power helps protect the entire booth workflow. A brief venue power interruption should not ideally corrupt a session or force the computer through an abrupt shutdown.
Keep power and data cables positioned where guests cannot trip over them. Event venues can become crowded, and a cable pulled from the booth can stop printing immediately or damage a connector.
Cable covers or careful routing along walls can make the installation both safer and more professional.
The white enclosure is also useful for events because it fits reasonably well with weddings, birthdays and corporate decor. RGB lighting can then change the visual character without replacing the physical booth.
For operators, that versatility matters. One booth can work across different event styles rather than being visually tied to one theme.
When evaluating the Best Photo Printer For Photo Booth, we also have to acknowledge that this product is broader than the keyword itself. You are not receiving only a dedicated printer.
You are buying the infrastructure around the printer as well. For somebody who already owns a professional booth, that may be unnecessary, but for a buyer building a new operation it can be a major advantage.
The included DSLR camera means the capture side is covered. The printer handles physical output, while the touchscreen and 29-inch LCD create the guest interface and event display.
That complete workflow is why it earns first place. It solves more of the photo booth printing problem than a printer alone.
We give the PAAFNN Mirror Pro full photo booth package our number one rank out of seven because it combines a DSLR camera, photo printer, 15.6-inch capacitive touchscreen, 29-inch LCD display, adjustable ring light, RGB illumination, Intel i5 mini PC, 8GB RAM, 256GB storage, Windows 11 platform, app-based control, and durable aluminum construction into one event-focused system.
For someone searching for the Best Photo Printer For Photo Booth, this is our strongest choice when the goal is building a complete wedding, birthday, corporate, or party photo booth rather than adding a printer to equipment you already own. It costs more and requires more setup than a standalone printer, but the integrated camera, printing, touchscreen, lighting, computer, and display system make it exceptionally practical for operators who want one coordinated photo booth package.

- Large interactive mirror screen creates an engaging guest photo experience
- Integrated printer configuration provides physical photos directly at events
- Touchscreen operation lets guests control photo sessions with minimal assistance
- Full-size booth format works well for weddings and professional events
- Integrated camera and lighting design simplifies complete booth installation
The large mirror format makes this feel like an event attraction, not just a printer
This interactive mirror photo booth earns our number two position for Best Photo Printer For Photo Booth because it combines the printing process with the part guests actually interact with. Instead of placing a small printer beside a camera and laptop, you get a full interactive photo booth system designed around events, guest participation, image capture, and physical photo output.
That distinction matters at weddings, birthday parties, corporate functions, graduations, and reception venues. Guests generally do not care about the technical process behind the print, they care that they can approach the booth, understand what to do, take a good photograph, and receive a finished copy without waiting around.
The large mirror-style display is the obvious feature here. It gives people a much larger visual area than a conventional tablet booth, which is useful when several guests are posing together and everyone wants to see the framing before the photograph is captured.
The interactive screen improves the guest workflow because instructions, previews, animations, and photo selections can happen directly at the booth. That reduces the amount of explanation an operator has to repeat throughout a busy event.
Picture a wedding reception after dinner when twenty guests arrive at the photo booth within a few minutes. A clear self-service interface matters at that point because even small delays start creating a queue.
The integrated printer configuration is equally important. A photo booth can send digital images to phones, but physical prints remain one of the main reasons people use these systems at events.
The printer has to work as part of a fast event workflow
When choosing the Best Photo Printer For Photo Booth, print quality is only one consideration. Reliable repeated printing matters just as much, because an event printer may need to produce photographs continuously while new groups are already waiting for their turn.
This is where an integrated booth has an advantage. The camera, interactive display, computer workflow, and printer are intended to operate as one system rather than being assembled from unrelated equipment on the night of the event.
Before using the booth professionally, run a proper stress test. Take multiple sessions consecutively and print every one of them rather than testing a single photograph and deciding the system is ready.
Ten or twenty consecutive prints will tell you much more. You can see whether the software queue behaves correctly, whether the printer maintains consistent output, and whether the operator can reload media without disrupting the event.
Always prepare extra printing media before an event. Estimate expected guest numbers, how many copies each group may request, and then bring additional supplies for test prints, duplicates, and unexpectedly heavy usage.
A wedding with 150 guests does not necessarily mean 150 prints. One group may want four copies so everyone gets one, while another group may return to the booth several times during the night.
This is also why cost per print matters for commercial operators. Paper and printing consumables need to be included in the event price rather than treated as an insignificant expense afterward.
The mirror display can make the booth easier for groups to use because everyone can see themselves before capture. This sounds basic, but it reduces badly framed photographs and repeated sessions caused by somebody discovering they were outside the image.
Good framing reduces wasted prints. Every photograph that has to be retaken because the camera position was wrong consumes time and potentially another set of printing media.
Set the camera position before guests arrive. Use a real person for the test rather than checking the frame against an empty backdrop.
If the event is likely to have groups of five or six people, test with a similarly sized group. A composition that looks excellent for two people may be far too tight once several friends step into the booth.
Lighting deserves the same attention. Photo booth cameras work best when faces receive predictable illumination instead of relying entirely on whatever lighting happens to exist in the venue.
A dark reception room may use purple uplighting, candles, moving lights, and very little neutral illumination. Controlled booth lighting keeps skin tones more consistent as the surrounding event lighting changes.
Do several test prints after setting the lighting. The image on a bright display can look noticeably different once it becomes a physical photograph.
Check faces, shadows, highlights, contrast, and color. If prints consistently look too dark, fix the camera or printing workflow before the first guest arrives rather than expecting people to accept poor output.
Why we put this mirror booth at number two
The strongest argument for this product is the large-format interactive experience. It feels more substantial at an event than a small tablet booth and gives the operator something that can become part of the venue setup rather than disappearing into a corner.
The physical print remains the important final step. Guests can take the photograph, interact with the display, and leave with something tangible rather than simply receiving another digital file among thousands already stored on a phone.
This is particularly effective at weddings. A printed photograph can go home with the guest, while another copy can potentially be used for a guestbook or event display depending on how the operator structures the service.
Corporate events can use the same basic workflow differently. The booth can become an activity during a launch, conference, staff function, or promotional event while the prints provide an immediate takeaway.
The large enclosure does create practical disadvantages. This is not something you casually put into a backpack with a compact dye-sublimation printer.
Transport needs to be planned. A full-size mirror booth requires careful event logistics, including vehicle space, safe handling, cable management, setup time, and protection for the display during travel.
A proper flight case or protective transport solution is worth considering if the booth will be used commercially. Displays and touch surfaces do not respond well to being repeatedly loaded into vehicles without protection.
Measure venue access too. Stairs, narrow doors, elevators, loading docks, and parking distance can turn an otherwise simple setup into a difficult job.
This is something new operators sometimes overlook. They focus on how attractive the booth looks once installed and forget that somebody has to move the entire system from storage to the venue and back again.
Setup consistency saves time at every booking. Label cables, keep power accessories together, and use the same connection sequence whenever possible.
Printer preparation should be part of that routine. Check media levels, perform a test print, verify the correct printer is selected in the booth software, and confirm that the print dimensions match the event template.
Templates can cause problems when they are designed without considering the actual printable area. Important faces, borders, event names, or graphics can end up too close to the edge.
Always print the final template before leaving for the venue. Looking at it on a computer screen is not enough.
The printed result is what the client actually receives. Color, cropping, sharpness, and layout should therefore be judged from a real print rather than only from the monitor.
Keep the interactive screen clean as well. A mirror-style booth collects fingerprints rapidly because guests are touching it throughout the event.
Carry suitable microfiber cloths and approved cleaning supplies. A dirty touchscreen can make expensive equipment look poorly maintained under bright venue lighting.
The same applies to the camera lens and lighting equipment. Check them before each booking rather than assuming they remained clean during transport.
Commercial photo booths need preventative maintenance. A small problem discovered at home is inconvenient, while the same problem discovered fifteen minutes before a wedding reception begins can affect the entire booking.
Power protection is another practical consideration. The booth may have a display, computer, printer, camera, and lighting system operating from the same event power source.
Use properly rated power equipment and avoid overloaded extension arrangements. If a UPS is appropriate for the system, it can help protect the computer and workflow from short venue power interruptions.
Cables should be routed where guests cannot trip over them. A cable cover can be a small investment compared with somebody pulling the booth connection out while a print is being processed.
Photo booth reliability depends on the whole setup, not only the printer. Camera communication, software, storage, power, display operation, lighting, and printing all need to work together.
This is also why software updates should be handled carefully. Do not install a major operating-system or booth-software update immediately before a paid event.
Update when you have enough time to test the complete capture and printing process afterward. Printer drivers can occasionally behave differently after system changes, and that is something you want to discover well before guests arrive.
Storage management matters if the booth keeps local copies of event photographs. Create a clear folder structure using event names and dates, then back up completed events rather than leaving every client session on one internal drive.
Keep at least one separate copy of important event photos. A drive failure should not erase a client's complete gallery after the event has finished.
For commercial operators, speed of troubleshooting becomes another reason to standardize everything. If the printer suddenly stops responding, you should know which connection, driver, print queue, and power source to check first.
Write a short setup checklist and use it at every event. Camera detected, printer detected, paper loaded, lighting tested, touchscreen calibrated, template checked, storage available, and one complete test session printed.
That five-minute routine can prevent a surprising number of event problems.
The mirror booth also benefits from having enough physical space around it. Guests need room to stand back from the camera, and larger groups need space to arrange themselves without blocking other event traffic.
Booth placement affects photo quality and guest flow. Putting the system in a narrow corridor may create queues that interfere with the rest of the venue.
A dedicated backdrop area with open space in front is better. Keep bright venue lights or windows from creating difficult backlighting behind guests where possible.
The booth should also be positioned where people can see it. A beautiful setup hidden behind a partition will naturally receive less use.
For a paid photo booth business, utilization matters because the client wants guests to enjoy the service they purchased. The interactive mirror design helps here because it is visually noticeable.
The large screen gives this product real event presence. It can show guests what is happening from several feet away rather than requiring them to approach a tiny interface first.
There is still a reason this product ranks second rather than first. Our first-place choice provides a particularly complete DSLR-focused package with a clearly specified 15.6-inch touchscreen, 29-inch secondary display, computer hardware, lighting, camera, and printer configuration.
This second-place mirror booth is very compelling, but its product documentation is less clear about some of the underlying hardware details. When equipment is being purchased for commercial work, detailed specifications matter because operators need to know exactly what they are servicing and replacing later.
That uncertainty keeps it just below our top recommendation. It does not erase the advantages of the mirror format or the integrated printing workflow.
Rank two is still a very strong result. This system offers a much more complete event experience than simply buying a standalone printer and building everything else around it.
For a new operator, that integration can save substantial setup work. For an established operator, the large mirror format can also provide a different booth style to offer alongside smaller conventional systems.
We give this Mirror Pro interactive photo booth our number two rank out of seven because its large interactive mirror screen, integrated photo printing configuration, guest-controlled touchscreen workflow, camera-ready design, event-focused enclosure, and complete booth approach create a strong platform for weddings, birthday parties, corporate functions, graduations, and other professional events.
For someone searching for the Best Photo Printer For Photo Booth, this is an excellent second-place choice when you want the printer to be part of a complete guest-facing attraction rather than a separate piece of equipment hidden behind a table. It misses first place because our top-ranked package provides clearer and more comprehensive hardware specifications, but the large interactive format, integrated printing workflow, and professional event presence make this a very appealing photo booth system.

- Large 21.5-inch touchscreen gives guests an easy interactive workflow
- Integrated printer support makes instant physical photo delivery much simpler
- DSLR camera compatibility helps produce sharper professional event photographs
- RGB lighting can be adjusted remotely for different event environments
- Built-in Mini PC handles booth software, capture, sharing, and printing
The 21.5-inch mirror setup gives guests enough room to actually enjoy the booth
The VANYA Ellipse 21.5 earns our number three position for Best Photo Printer For Photo Booth because it combines printing support with a much more complete guest experience. The system is built around a large 21.5-inch interactive touchscreen, DSLR camera compatibility, RGB lighting, a built-in computer platform, and a dedicated printer area rather than treating the printer as an afterthought.
That matters at weddings, birthdays, corporate events, proms, and brand activations because the printer is only one part of the job. Guests need to understand what to press, where to stand, when the image is being taken, and how to get their finished print without an operator explaining the process every thirty seconds.
The ellipse-style mirror format gives the booth a larger visual presence than a small tablet kiosk. It also gives groups a clear preview before capture, which can reduce retakes caused by someone standing outside the frame or looking in the wrong direction.
The touchscreen is especially useful for self-service events. A guest can move through the photo workflow directly from the display while the booth software manages capture, preview, sharing, and printing in the background.
The configuration is designed around DSLR cameras, with common Canon-style DSLR mounting being typical for this type of booth. That is a useful advantage when image quality matters because a proper camera gives you much more control over exposure, focus, and overall image quality than a basic webcam.
For an evening wedding reception, that can make a real difference. The room may be dim, filled with colored uplighting, and constantly changing as DJs and venue lighting systems move through different scenes.
A DSLR paired with controlled booth lighting gives you a more repeatable result. Guests should not receive beautifully exposed photos at 7 PM and muddy, dark prints at 10 PM simply because the ballroom lights changed.
The printer workflow is where this starts to make sense for commercial events
The Ellipse 21.5 is designed with printer integration in mind, including a printer area compatible with common professional event-printing layouts. That built-in printer support helps keep the booth self-contained rather than requiring a separate table full of equipment and cables beside it.
For someone looking for the Best Photo Printer For Photo Booth, that integration matters because event printing is repetitive. The printer may produce dozens or hundreds of images in one evening, often while new guests are already starting their next session.
A fast print is useful, but reliability is even more important. A printer that is extremely quick for the first twenty photos and then stops because media was loaded badly can create a bigger problem than a slightly slower printer that runs consistently.
Before a paid event, run repeated test sessions. Take ten or twenty photo booth captures, send each one through the software, and print them consecutively.
Repeated testing exposes workflow problems early. You may discover a print queue issue, a crop problem, or a driver setting that never appeared during a single test photo.
The booth software should also be tested with the exact template you plan to use. A 2 x 6 photo strip and a 4 x 6 print have very different layouts, and important faces or event graphics can be cropped if the template is not designed around the actual print size.
Do not wait until guests arrive to find this out. Print the final template physically and inspect it before leaving for the venue.
Color should be checked on paper too. A touchscreen can make images appear brighter than the final print, especially when the display itself is set to high brightness.
Judge print quality from an actual finished photo, not only from the preview screen. Check skin tones, shadow detail, highlights, sharpness, and whether event graphics look clean around the edges.
The printer compartment also helps with cable management. Keeping the printer close to the computer reduces the number of loose cables stretching across the venue floor.
That sounds like a small detail until a guest catches a cable with a shoe. One disconnected USB cable can stop printing immediately while the rest of the booth appears to be working normally.
Use proper cable covers where anything crosses a walkway. Event spaces become crowded, and the booth needs to remain safe as well as functional.
The Mini PC platform is another useful part of the system. Similar VANYA configurations use an Intel i5 processor, 8GB of RAM, 256GB SSD storage, and Windows 11, which is enough for mainstream DSLR booth software, image capture, printer drivers, animations, and sharing functions.
Eight gigabytes of RAM is adequate for typical booth software. The system is not being asked to edit feature films, but it does need to run several tasks at once without slowing down in front of guests.
The internal SSD provides space for event images and application files. Still, do not treat the internal drive as permanent archival storage.
After each event, copy the photographs to another drive or cloud location. A commercial operator should have at least one separate backup before deleting any client session.
Why we believe this one earns third place rather than the top spot
The RGB lighting system can be controlled through an app or remote, which gives the operator some flexibility over presentation. Adjustable RGB lighting helps the booth fit different event themes without changing the physical hardware every weekend.
A wedding might use soft warm lighting around the booth. A corporate launch may use blue or branded colors, while a birthday party can use brighter multicolor effects.
Keep decorative RGB lighting separate in your mind from actual photographic lighting. Colored accent lights make the booth attractive, but the camera still needs clean illumination on faces.
Use the main fill light or ring light to expose guests properly. Decorative lighting can then support the atmosphere without ruining skin tones.
One practical benefit of the ellipse design is that it gives the booth a recognizable shape. Guests can spot it across a room, which encourages use during busy events.
Visibility affects how much the booth gets used. A technically excellent photo printer hidden behind a wall does not create much value for the client if guests barely notice it.
Placement should therefore be planned with the venue. Put the booth somewhere visible but not directly inside a main walkway.
Leave enough room in front for small groups. If you expect six people to pose together, test that arrangement before the event rather than designing the setup around one person.
The booth should also have enough distance between camera and backdrop. Too little space forces people into a cramped composition and makes larger groups difficult to frame.
Group size changes the ideal camera position. A setting that looks perfect for two guests may cut off shoulders when five people squeeze into the same spot.
The app-controlled functionality is useful for the operator because adjustments can sometimes be made without standing in front of the guest screen. This keeps the guest experience cleaner and prevents unnecessary interruptions.
For commercial operators, that can be useful during a long event. If lighting or booth settings need adjustment, doing it discreetly is better than stopping the entire queue.
The system is also easier to standardize than a booth assembled from many unrelated components. Camera, computer, display, printer area, lighting, and software can all be packed and transported as one known configuration.
Standardized setup reduces event-day mistakes. Label every cable, keep accessories in the same case, and use the same setup sequence every time.
A checklist helps. Power connected, camera detected, printer detected, touchscreen working, booth software opened, lighting set, storage available, template loaded, and one successful test print completed.
That final test print is important. Do not stop after confirming that the camera works.
The photo booth is only ready once the complete sequence from guest interaction to physical print has been tested. Anything less leaves part of the workflow unverified.
Transport is one of the disadvantages of this design. A full mirror booth is much larger and heavier than carrying a compact printer and tablet.
You need to plan for commercial transport. Vehicle space, stairs, elevators, loading access, setup time, and protective cases all become part of operating the booth professionally.
A flight case is strongly preferable for regular rental use. Touchscreens, mirrors, cameras, and internal computers do not respond well to repeated unprotected transport.
The printer should have its own transport protection too if it is removable. Dye-sublimation printers contain moving parts and should be transported according to the manufacturer's instructions.
Before every event, check consumables. Printer media should be loaded correctly, and spare sets should be easy to reach.
Running out of print media is entirely avoidable. Estimate the expected number of sessions and bring extra for duplicates, test photos, mistakes, and unusually high guest participation.
Commercial operators also need to know the cost per print. Paper and ribbon consumption directly affect how profitable an event package is.
If a client wants unlimited prints, calculate what unlimited realistically means for a four-hour event with the expected guest count. Do not price the package as though consumables cost nothing.
Software maintenance deserves attention as well. Windows updates, printer drivers, camera drivers, and booth applications can change over time.
Never perform a major update immediately before an event. Update when you have time to fully retest printing, camera detection, sharing, and touchscreen behavior.
A driver update that breaks printing is inconvenient in the workshop. At a wedding reception it becomes a service failure.
The 21.5-inch display should be cleaned regularly because it is touched by hundreds of fingers. Use appropriate screen-safe cleaning products rather than harsh chemicals.
The same applies to the mirror surface. Fingerprints and smudges become very visible under event lighting.
A clean booth looks more professional to paying clients. Appearance matters because this equipment often sits in the middle of carefully decorated venues.
The unit should also be connected to a reliable power source. The booth may be running a computer, display, camera system, lighting, and printer at the same time.
Use correctly rated power cables and avoid questionable extension arrangements. A short power interruption can crash the booth computer or interrupt a print job.
A suitable UPS can be useful for the computer and control hardware when venue power is unreliable. The printer's power requirements should be checked separately before connecting it to any backup system.
Event reliability depends on more than print quality. Stable electricity, good cables, tested software, enough media, clean lighting, and proper camera settings all contribute to whether guests receive their prints smoothly.
The main reason this product ranks third instead of first or second is that its printer and camera configuration can vary depending on the package selected. That gives buyers flexibility, but it also means you need to confirm exactly what is included before ordering.
Our first-place package is more clearly defined as a full camera and printer setup, while our second-place system provides a strong full-size mirror experience. This Ellipse configuration sits slightly behind them because the exact hardware bundle deserves more checking.
That said, the underlying platform is very strong. A 21.5-inch interactive display, DSLR support, integrated printer area, Mini PC, RGB lighting, app control, and full event-oriented enclosure make it much more useful than a printer alone.
Third place reflects package clarity more than capability. Once configured with a reliable professional printer and DSLR, this system can handle a very polished event workflow.
For weddings, the large screen gives guests a clear way to interact. For corporate events, the software and print templates can be customized around branded designs.
For birthdays and parties, RGB lighting and instant prints create a more engaging setup than a basic camera station. The same hardware can therefore serve several event types rather than being locked into one niche.
We give the VANYA Ellipse 21.5 our number three rank out of seven because its 21.5-inch capacitive touchscreen, DSLR compatibility, integrated printer area, Mini PC platform, RGB lighting, app and remote control, event-focused mirror enclosure, social sharing capability, and support for common photo booth print formats create a very complete foundation for commercial booth work.
For someone searching for the Best Photo Printer For Photo Booth, the Ellipse 21.5 is a strong third-place choice if you want printing integrated into a full interactive event system rather than buying a standalone printer. It ranks below our first two choices because the exact printer and camera bundle should be confirmed carefully before purchase, but once paired with the right professional print hardware, its large touchscreen, DSLR workflow, flexible lighting, and commercial booth format make it an excellent option for weddings, parties, rentals, and corporate events.
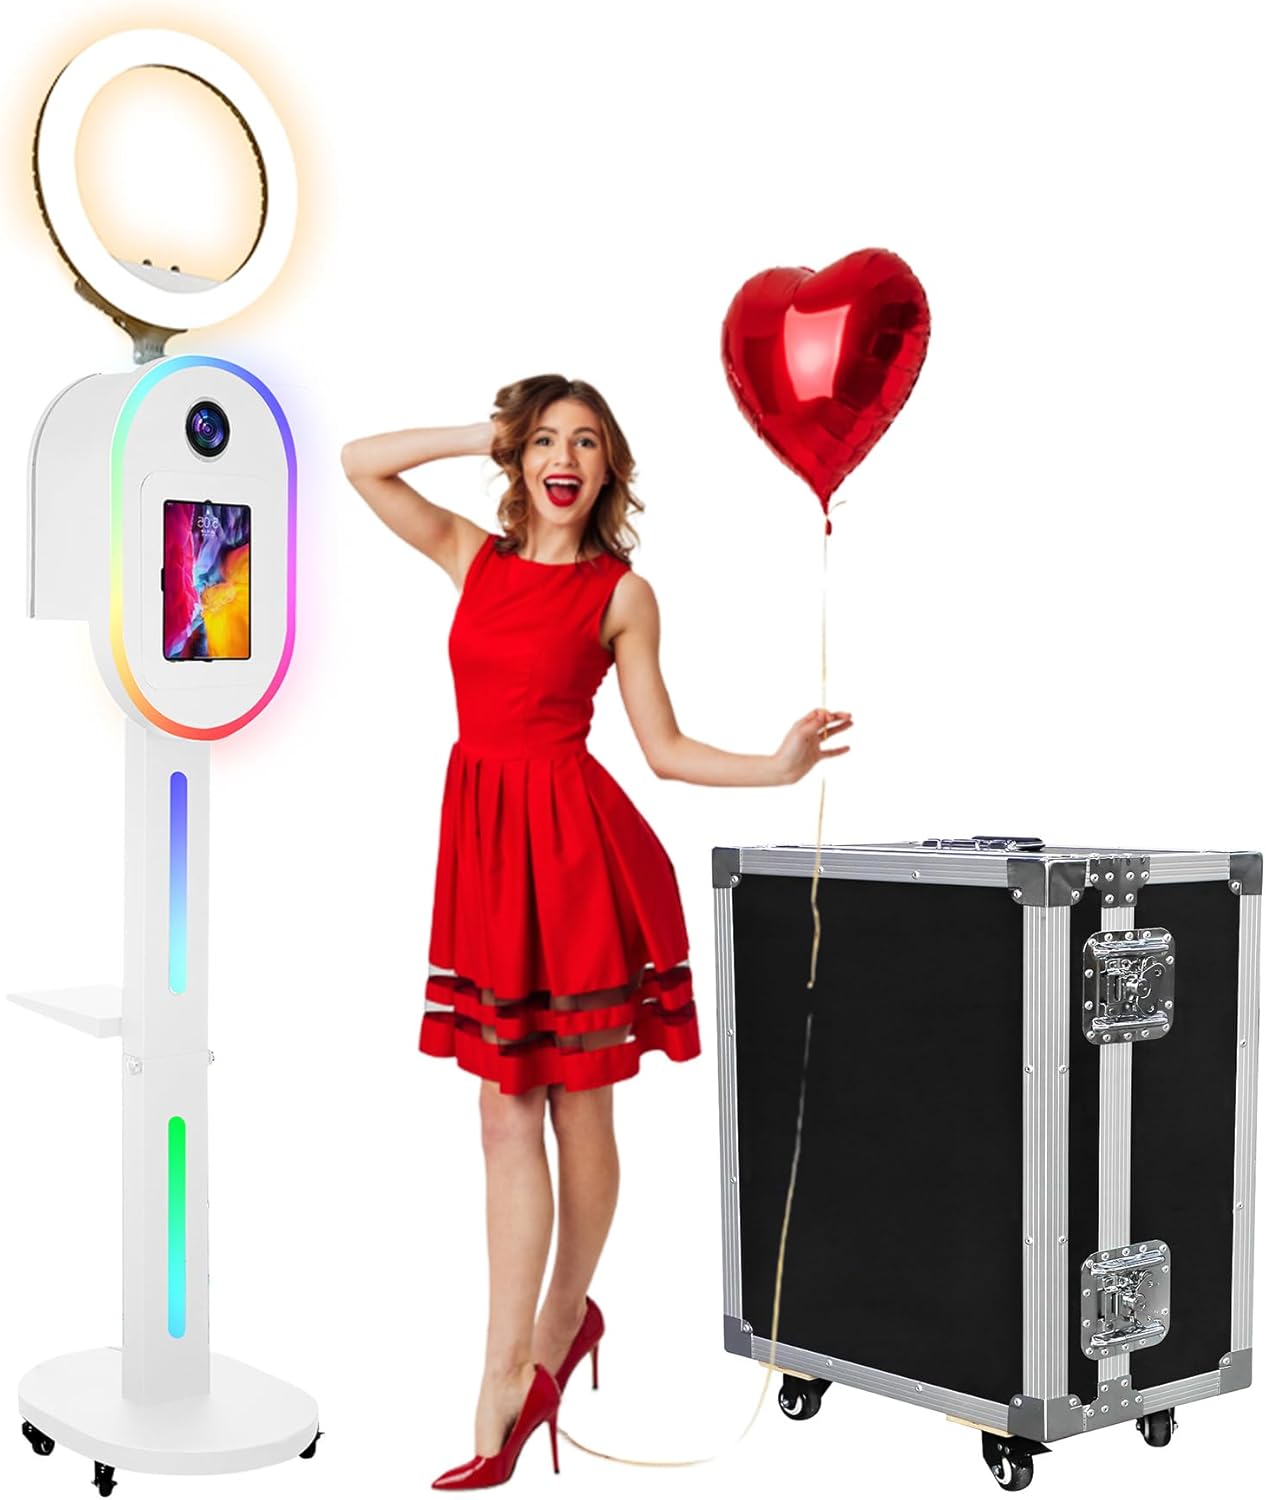
- Supports both iPad and dedicated camera photo booth setups
- Connects with compatible printers for instant event photo printing
- RGB lighting synchronizes with music for engaging event presentation
- App and remote controls simplify lighting adjustments during events
- Flight case configuration improves transportation for professional rental businesses
The dual iPad and camera design gives this booth useful flexibility
The ZLPOWER Dualuse earns our number four position for Best Photo Printer For Photo Booth because it approaches event printing from a flexible angle. Rather than locking the operator into one capture device, the booth supports both iPads and cameras, so it can suit anything from a simple touchscreen selfie station to a more photography-focused event setup.
The listed iPad compatibility is broad, covering common 10.2-inch, 10.5-inch, 10.9-inch, 11-inch, 12.9-inch, and 13-inch models. That matters when a rental business already owns tablets and wants to upgrade the booth hardware without replacing the device just because the enclosure only accepts one generation.
Camera compatibility gives the system another direction. An iPad is convenient for quick operation and social sharing, while a dedicated camera can make more sense when image quality, controlled exposure, and professional event photography are the priority.
That two-device approach is genuinely useful for someone serving different types of clients. A birthday party may only need a fast iPad workflow, while a wedding or corporate event might justify a more elaborate camera and printer configuration.
The booth is also designed to connect with a printer for instant physical output. That is the feature that makes it relevant to anyone searching for the Best Photo Printer For Photo Booth rather than simply wanting a digital selfie kiosk.
Guests can take a photograph and receive something physical rather than only sending the file to a phone. At weddings and private events, that printed copy often becomes the part people actually keep.
It is worth noting that the printer is something you need to match carefully with the booth workflow. The Amazon listing describes printer connectivity, so confirm the exact printer, software, print size, drivers, and connection method you intend to use before a paid booking.
The RGB lighting and app control make more sense once the room fills with guests
The ZLPOWER uses RGB lighting that can be controlled by remote or app. The lighting can also synchronize with music, which gives the booth more visual presence at receptions, parties, DJ events, and other environments where decorative lighting is already part of the room.
That may sound mostly cosmetic, and for image exposure it is. You should still use suitable photographic lighting if you want predictable faces and skin tones, because colored RGB effects are not a substitute for a proper key or fill light.
But presentation matters with rental equipment. A photo booth sitting in a dark corner can be technically excellent and still get very little use if guests do not notice it.
The music-synchronized lighting can help the station look like part of the event rather than a piece of office equipment placed beside the dance floor. This becomes particularly useful for DJs who offer photo booth rental as an additional service.
App control also saves unnecessary trips to the booth. An operator can make lighting adjustments without constantly stepping between guests and taking over the front of the station.
The system supports recording and sharing photos and videos as well. Social platforms and Bluetooth sharing give guests another output method alongside physical prints.
This combination is useful because not everyone wants the same thing. One guest might want a printed strip for a scrapbook while another wants the digital image immediately for social media.
For a professional event, test both workflows before guests arrive. Take a photograph, print it, then test the digital sharing route rather than assuming that because capture works, every other part of the system must also be configured correctly.
The entire capture-to-print sequence should be tested. Camera or iPad detection, booth software, printer drivers, media size, print queue, sharing connection, and lighting should all be checked as one system.
Run more than one photograph too. A commercial booth may process dozens of groups during a short period, and some problems only appear once the printer receives repeated jobs.
Print ten or twenty sessions consecutively before using the setup professionally. Watch for delayed print queues, software errors, cropped templates, communication problems, or media loading issues.
A booth that prints perfectly once is not necessarily ready for a four-hour wedding. Reliability under repeated use is what matters.
Why the ZLPOWER Dualuse earns fourth place rather than moving into our top three
The strongest part of this system is its flexibility. You can build around an iPad or camera, connect a printer, use digital sharing, adjust RGB effects, and choose a transport package according to how the booth will be used.
ZLPOWER offers flight case and honeycomb case configurations. For somebody running a rental operation and moving the booth from venue to venue every weekend, the flight case is the more professional approach.
Transport protection becomes more important than it initially seems. Booth equipment gets loaded into vehicles, rolled through hotel corridors, moved into elevators, carried through loading areas, and packed again late at night.
A screen or mounting component damaged during transport can cancel the next booking. Proper transportation is part of professional photo booth ownership, not an optional concern after the equipment has already been purchased.
The complete package can also become fairly heavy. Depending on configuration and packaging, this is substantially more equipment than carrying a small printer and tablet in separate bags.
Plan the vehicle space before taking commercial bookings. Check whether the venue has stairs, lifts, loading access, parking restrictions, and enough space for the booth once assembled.
The wide iPad compatibility is a major positive because tablets change generation regularly. Being able to support sizes from around 10.2 inches through 13 inches gives an operator more freedom when upgrading the tablet later.
Still, always confirm the specific model and mounting arrangement. Similar diagonal screen sizes can have different body dimensions, camera positions, and button locations.
Physical fit matters as much as screen size. Do a full installation test well before the event rather than discovering that a new tablet blocks a control or camera opening.
The camera option deserves similar preparation. If you move from iPad capture to a dedicated camera, check the booth software, USB connection, camera power arrangement, exposure settings, and whether live view behaves correctly.
A dedicated camera can deliver better photographs, but it also introduces more things to configure. The camera needs enough power to operate for the entire booking, and sleep settings should not interrupt the booth midway through the event.
Lighting should be set using actual people. An empty backdrop can look correctly exposed while faces still print too dark.
Take several test photographs with somebody standing where guests will pose. Then print those images rather than judging them entirely on the tablet or computer display.
Printed photographs need their own quality check. Screens are illuminated from behind, while printed images reflect room light, so brightness and color can look noticeably different.
Check skin tone, contrast, shadow detail, sharpness, cropping, and the placement of any decorative event graphics. If the booth offers 2 x 6 strips, 4 x 6 prints, or another format through the chosen printer software, test each format you plan to sell.
Do not change templates fifteen minutes before guests arrive. A small layout adjustment can unexpectedly shift the crop or introduce a printer setting problem.
Consumables should also be planned from expected event volume. An event with 100 guests can easily require more than 100 prints because groups may request multiple copies.
Carry more printer media than the booking estimate. Test prints, errors, duplicate requests, and unexpectedly popular booth usage all consume supplies.
This matters directly to profitability too. A photo booth operator should know the cost of producing each physical print before offering an unlimited-print package.
The booth's digital-sharing capability can reduce some pressure on printing, but physical prints remain valuable. They give guests an immediate souvenir and give event organizers something tangible that ordinary smartphone photography does not provide.
For weddings, consider whether the workflow will produce one print for the guest and another for a guestbook. If so, double the expected media consumption when planning supplies.
A corporate event may use a completely different workflow. Branded print borders and digital sharing might matter more than duplicate copies.
The flexible booth format adapts well to those different jobs. That is one reason the ZLPOWER ranks above more basic fixed-purpose systems.
There are still some reasons it remains at number four. The listing emphasizes the booth hardware and connectivity rather than specifying one clearly integrated professional printer package.
That means the buyer needs to do more homework around the exact printing setup. Our higher-ranked choices offer a more clearly defined route toward a complete camera and printing workflow.
For someone who already owns a suitable photo printer, that may actually be an advantage. You are not forced to replace a printer you already trust.
For a first-time buyer, though, a more complete package can reduce setup uncertainty. Printer compatibility needs to be confirmed before purchase, particularly if instant printing is the main reason for buying the booth.
The same applies to photo booth software. An iPad application and a camera-based Windows workflow can have very different printer support and customization options.
Decide which platform you intend to use first. Then make sure the printer, sharing method, template system, and capture hardware all work within that platform.
The RGB lighting should also be configured before guests arrive. Store useful presets if the app allows it rather than experimenting with colors while people are waiting.
For weddings, subtle static colors may look more appropriate early in the evening. Music synchronization can make more sense once the dance floor becomes active.
The booth can change character without changing hardware, which is useful for rental businesses serving very different clients.
Keep the front of the unit clean throughout the event. Touchscreen and iPad booths collect fingerprints quickly, particularly when dozens of guests use them within an hour.
A microfiber cloth and suitable screen-safe cleaner should be part of the operator kit. A polished booth looks more professional in photographs taken around the venue as well.
Cable management is another simple thing that can separate a good setup from a careless one. Keep power and data leads away from guest walkways or use suitable floor cable protection.
A disconnected printer cable can stop output immediately. A guest tripping over a power cable can create a much larger problem.
Event equipment has to be safe as well as functional. Position the booth where people can approach comfortably without blocking doors, food service, or main pedestrian routes.
Leave enough camera distance for the expected group size. If the booth is placed too close to a wall or backdrop, several guests may not fit into the frame properly.
Test with the largest realistic group before opening the booth. Four or five people standing together reveal framing problems that one operator standing alone will not.
Power stability deserves attention too. The booth may involve a tablet, camera, RGB lighting, printer, and perhaps other control hardware depending on configuration.
Use properly rated power equipment and follow the printer manufacturer's requirements. Avoid connecting everything through a chain of cheap extension strips simply because the venue outlet is far away.
A reliable booth needs a reliable power setup. Brief electrical interruptions can interrupt printing or force connected hardware to reconnect.
If you use a UPS, size it according to the actual equipment load. Printers can have very different electrical requirements, so do not assume that a small computer UPS is automatically suitable for every photo printer.
For rental use, carry spare USB cables, power cables, adapters, and any proprietary mounting hardware that would stop the booth from operating if lost. Small components are cheap compared with refunding a booking.
It is also worth keeping an offline copy of the required app or installation files where licensing permits. Venue internet can be unreliable, and the booth should not depend on downloading something important immediately before opening.
Prepare the system to operate without perfect venue WiFi. Digital sharing may need internet access, but basic photo capture and local printing should ideally remain functional when practical.
The ZLPOWER unit can share photos and videos through common social platforms, which is valuable when the connection is available. Guests increasingly expect both print and digital delivery rather than choosing only one.
Bluetooth sharing provides another route depending on the workflow. Test that feature with different phones because event guests will arrive with a mix of devices.
After the event, back up the original photographs. Do not leave the only copies on an iPad, memory card, or booth computer that will be used again the following weekend.
Create folders by client and date. Professional image management matters after the party ends just as much as smooth printing during the event.
Check the client's privacy expectations as well. Corporate functions, private parties, and weddings can have different requirements around storing or publicly sharing guest photographs.
Do not automatically upload everything to social media just because the booth technically supports it. Sharing should match the event agreement and guest expectations.
The fourth-place rank ultimately reflects the difference between flexibility and integration. ZLPOWER gives you a broad platform, but you may need to choose and configure more of the surrounding printing workflow yourself.
That can be good for an experienced operator. Someone who already knows which printer, camera, tablet, and software they prefer can build a setup around equipment they trust.
For a new operator, there is more planning involved. A package with the printer and capture hardware already standardized removes some of those decisions.
We give the ZLPOWER Dualuse our number four rank out of seven because its broad iPad compatibility from 10.2 through 13 inches, camera support, printer connectivity, RGB illumination, music synchronization, app and remote control, Bluetooth sharing, social media support, and flight case option create a flexible platform for commercial photo booth work.
For someone searching for the Best Photo Printer For Photo Booth, the ZLPOWER Dualuse is a positive fourth-place choice if you want the freedom to choose between tablet and camera capture while integrating your preferred printer. It ranks below our first three because the printing hardware is less standardized as a complete package, but for DJs, rental operators, weddings, birthdays, and event businesses that value flexible hardware and strong visual presentation, this is still a very capable photo booth system.

- Large 10.1-inch touchscreen makes guest photo sessions easy to control
- Built-in LED ring light and flash improve indoor event photographs
- Zink technology prints colorful 3 x 4-inch photos without ink cartridges
- More than 250 customizable frames add variety for different events
- QR code sharing lets guests quickly save digital photo copies
This HP booth is much easier to run when you want printing built into the experience
The HP Sprocket Photo Booth earns our number five position for Best Photo Printer For Photo Booth because it combines a camera, interactive screen, lighting, editing controls, and instant printing inside one relatively compact unit. The main interface is a 10.1-inch LCD touchscreen for guest control, so people can see themselves, select layouts and filters, preview the result, and then print without needing a separate computer station beside the booth.
The printing system uses 3 x 4-inch Zink photo paper rather than conventional ink cartridges. Zink places the color-forming material inside the paper itself, so there are no separate ink cartridges to replace during an event.
That can simplify event preparation considerably. Instead of checking several ink tanks and paper separately, the operator mainly needs to make sure enough compatible Zink sheets are loaded and ready for the expected number of guests.
The included bundle starts with 110 Zink sheets, which is useful for testing and smaller parties. For commercial events, though, 110 prints can disappear much faster than expected once groups begin asking for duplicate copies.
A wedding with 100 guests does not necessarily generate only 100 photographs. Some guests may return several times, and a group of four may want four physical copies from one session.
That means print media needs to be calculated before accepting an unlimited-print package. Keep additional paper ready rather than waiting until the last few sheets before deciding whether more supplies are required.
The touchscreen, ring light and customization features work well for self-service events
The built-in flash and LED ring light are useful because indoor event lighting is rarely ideal for portraits. Reception halls can be dim, birthday venues may use colored lighting, and corporate events often have strong overhead lights that leave uneven shadows on faces.
Controlled frontal lighting gives more predictable portraits. Guests move constantly, so you want the booth lighting to stay relatively consistent even while the rest of the venue changes throughout the evening.
The 10.1-inch screen provides live preview before the photo is printed. This is useful because guests can see whether everybody actually fits into the frame before committing paper to a bad photograph.
That sounds simple, but it reduces waste. If somebody is cut off at the side or looking away from the camera, it is much better to notice that on the screen than after producing a physical print.
The Sprocket system also provides more than 250 frames along with filters and event customization options. That makes it easier to adapt the same booth for weddings, birthdays, graduations, holiday parties, family gatherings, and corporate events.
Custom frames make printed photos feel event specific rather than looking like generic snapshots. An operator can choose a visual style that fits the client instead of using exactly the same border at every booking.
Guest controls are another interesting feature. The system allows event preferences such as maximum print quantities, sharing permissions, restricted access, audio settings, brightness, screensavers, and language to be configured.
Maximum-print controls are particularly useful during busy events. Without them, one enthusiastic group can potentially print repeated copies while a queue forms behind them.
Setting sensible limits keeps the printer moving and prevents one table of guests from consuming a large part of the event's paper supply. This becomes more important when print media is one of your largest recurring costs.
QR code sharing gives guests a digital option too. A guest can print a physical copy while also accessing the image digitally, which is useful for people who want to post or save the photograph on their phone.
Digital sharing can reduce pressure on the printer as well. If four people pose together, you may not always need four physical copies when everyone can also retrieve the image digitally.
The booth uses WiFi for connected features. Test the sharing setup before the event because venue internet can be unpredictable, especially inside hotels, convention spaces, and older buildings.
Basic local printing should be checked separately from online sharing. If the venue network becomes unreliable, guests should ideally still be able to take and print photographs even if cloud or QR features become temporarily unavailable.
The whole capture-to-print workflow should be tested beforehand. Take repeated photos, apply frames, print them, and try the sharing features exactly as guests will use them.
One successful print is not enough for a professional event test. Run a longer sequence so you can see how the paper feed, interface, print queue, and wireless functions behave over repeated sessions.
Why the Sprocket finishes fifth despite being one of the easiest systems to use
The HP Sprocket Photo Booth prints at up to 300 x 300 dpi on 3 x 4-inch media. That is appropriate for small instant event keepsakes, but this is not the same printing approach used by larger professional dye sublimation printers designed for high-volume commercial booths.
The compact Zink format is the main compromise. It is convenient and eliminates ink cartridges, but professional event operators may prefer larger print sizes, faster throughput, and the output consistency of dedicated event printers.
The media tray capacity is also relatively modest at around 20 sheets. That means an operator running a busy event needs to keep an eye on paper levels and reload more frequently than with high-capacity commercial printers.
For a home birthday party, that may not matter at all. For a four-hour wedding reception with several hundred print requests, it becomes more noticeable.
The prints themselves have sticky backing, which creates an interesting extra use. Guests can peel the backing and attach the photographs to scrapbooks, journals, guest books, walls, or other surfaces.
That works particularly well for wedding guest books. One copy can go home with the guest while another can be placed directly into the book beside a handwritten message.
Sticky-backed prints add another event use case without requiring adhesive tape or glue at the guestbook table. It is a small feature, but one that can genuinely improve the workflow for certain event packages.
The included carrying case is another practical positive. Photo booth hardware gets transported far more often than normal consumer electronics, so protection during travel matters.
Even though this system is relatively compact, the touchscreen still needs to be protected. Do not throw the unit into a vehicle beside tripods, speaker stands, and other heavy equipment without the padded case.
The bundle also includes two screen protectors. That is useful because the touchscreen is the part every guest interacts with throughout the event.
Fingerprints and repeated touching become unavoidable. Clean the display periodically with suitable screen-safe materials so the interface continues to look professional under bright venue lighting.
The booth weighs roughly 7.3 pounds, which is dramatically easier to transport than the large mirror booths ranked above it. Its body measures approximately 14 inches wide, 21 inches high, and only a few inches deep.
That portability is one of the strongest reasons to choose it. A single operator can carry it, place it on an appropriate stand or surface, and move between events without transporting a full-size mirror enclosure.
The tradeoff is event presence. Large mirror booths naturally become part of the room, while the Sprocket is visually smaller and may need more intentional placement so guests notice it.
Put the booth somewhere visible and accessible. Hiding it behind a DJ setup or in a dark corner reduces participation no matter how easy the interface is.
Leave enough space in front for groups to stand comfortably. Test the framing with several people rather than assuming that because one person fits, a full group will too.
The unit's compact format is especially good for house parties and smaller venues where a large mirror booth would simply take up too much floor space. It also makes it appealing to operators who need something that can be deployed quickly.
Power and WiFi should still be checked before opening the booth. A simple setup does not eliminate the possibility of bad venue power, poor wireless coverage, or incorrectly loaded print media.
Keep spare paper beside the booth during operation. Walking back to a vehicle every time the printer needs another pack is avoidable and slows the event.
The HP event controls can also help prevent waste. Set print limits according to the package the client purchased and explain the digital-sharing option if guests want additional copies.
Print size is another reason we place this at number five. The 3 x 4-inch format is fun and portable, but it is smaller than the classic 4 x 6 output many people expect from professional event photography.
That does not make it inferior for every event. Smaller instant prints work extremely well for casual parties, guestbooks, scrapbooks, and social events where convenience matters more than traditional photo-lab sizing.
The right printer depends on the event style. A corporate gala expecting premium 4 x 6 photographs has different requirements from a birthday party where people want quick sticky-backed souvenirs.
The 300 dpi resolution is enough for this small physical size. Do not judge the printer only by comparing its numerical resolution with an inkjet designed for large photo enlargements.
The print dimensions are much smaller, so the intended viewing distance and use are different. These are instant keepsakes rather than gallery-sized photographic prints.
The integrated camera and lighting are also convenient for users who do not already own professional camera equipment. There is no requirement to configure a DSLR, lens, tethering software, and separate lighting system before guests can start using the booth.
That simplicity is one of the Sprocket's biggest advantages. You can spend more time managing the event and less time troubleshooting multiple independent components.
On the other hand, experienced professional booth operators may see the integrated design as limiting. A DSLR setup gives you more control over lenses, sensor performance, depth of field, exposure, and lighting.
The larger photo booth systems above this product are better suited to that kind of professional customization. They also give operators more freedom to choose dedicated dye sublimation printers for higher-volume jobs.
The HP Sprocket instead prioritizes accessibility. It is closer to a turnkey instant photo station that happens to include quite a lot of customization.
The mobile app and sharing functions extend that further. Guests can leave with both a physical photograph and a digital copy without the operator manually transferring files.
That combination works very well for casual events. It is fast enough to understand, small enough to transport easily, and flexible enough to personalize.
Always check the booth before a booking after any major firmware or software update. Connected products can behave differently after updates, and event day is not the time to discover that a new version changed the printing workflow.
Keep the booth plugged in and updated when you have enough time to test afterward. Then run several complete sessions and confirm the frames, QR sharing, and printing all work normally.
The paper itself should also be stored properly. Keep Zink media dry and protected from excessive heat, humidity, and physical damage.
Good media storage helps maintain consistent output. Damaged or contaminated paper can create print problems even when the printer itself is working normally.
If the booth is being used for a paid event, carry more than one unopened pack. That gives you a backup if a pack is damaged or if participation is higher than the client expected.
Another consideration is print speed. The Sprocket is not intended to compete with high-throughput commercial event printers that can produce 4 x 6 prints in seconds.
A queue can therefore build if many groups request prints simultaneously. Keep the guest workflow moving and use digital sharing to reduce unnecessary duplicate printing when appropriate.
This is one reason it ranks below our first four choices. Those systems are better positioned for larger professional events or provide more flexible integration with commercial-grade printers.
The Sprocket makes up some ground through portability and simplicity. You receive a photo booth and printer in a package light enough for one person to handle comfortably.
It is also much less intimidating for a family or small event operator who does not want to configure a DSLR-based workstation. The touchscreen interface keeps the guest side straightforward.
The 110-sheet bundle provides enough media to start experimenting immediately. Use some of those sheets for proper setup testing rather than trying to preserve every single one for the first paid event.
Test prints are part of the operating cost. They help ensure your actual event output looks correct before guests begin using the booth.
We give the HP Sprocket Photo Booth our number five rank out of seven because its 10.1-inch touchscreen, built-in flash, LED ring light, 3 x 4-inch Zink printing, 300 x 300 dpi output, more than 250 customizable frames, event controls, QR code sharing, WiFi connectivity, sticky-backed photos, included 110-sheet paper supply, padded carrying case, screen protectors, and lightweight design create a remarkably complete compact photo booth package.
For someone searching for the Best Photo Printer For Photo Booth, the HP Sprocket is a positive fifth-place choice when portability, instant printing, easy guest operation, and digital sharing matter more than high-volume professional output. It ranks below the larger booth systems because the 3 x 4-inch Zink format, modest paper capacity, and consumer-oriented printing workflow are less suited to demanding commercial events, but for birthdays, smaller weddings, guestbooks, family gatherings, and portable event setups, it is one of the easiest all-in-one solutions to use.

- Large 10.1-inch touchscreen provides simple self-service photo booth operation
- Integrated 8MP autofocus camera keeps event capture setup compact
- ZINK printing produces 3 x 4-inch photos without ink cartridges
- Built-in LED ring light improves illumination for indoor event portraits
- Dual-band WiFi supports connected sharing and mobile photo workflows
This version keeps the whole booth compact, and that is its biggest advantage
The HP Sprocket Photo Booth earns our number six position for Best Photo Printer For Photo Booth because it combines the camera, screen, lighting, and printer into one compact unit. You get a 10.1-inch interactive touchscreen, an 8MP autofocus camera, built-in LED ring light, WiFi connectivity, and 3 x 4-inch ZINK printing without needing a separate DSLR, laptop, and external printer table.
That simplicity matters for birthday parties, family events, smaller weddings, and operators who need something they can carry into a venue without bringing several cases of equipment. The entire unit weighs around 8 pounds, which is dramatically easier to move than the large mirror booths ranked above it.
The touchscreen resolution is 1280 x 800, giving guests enough room to preview their photo and work through the booth interface. It feels much more natural than asking people to use a tiny printer display or hand their phone to an operator.
The built-in 8MP autofocus camera also removes another setup step. There is no separate camera body to mount, no lens to attach, and fewer cables running between different pieces of hardware.
For a casual event, that can be a real benefit. Set up the booth, check the framing, test the lighting, load the media, and you have a usable capture and print station without constructing a full photography rig.
The LED ring light is built into the booth as well. Indoor events often have dim or colored ambient lighting, so having controlled light around the camera can make faces look more consistent from one session to the next.
The ZINK printer is convenient, but you need to understand its limits
The Sprocket Photo Booth uses ZINK ZERO INK printing technology. Instead of using conventional ink cartridges or dye-sub ribbon, the color-forming material is contained within the special photo paper itself.
That makes media changes simpler. There is no ink level to monitor separately and no cartridge to discover is empty halfway through a birthday party.
The supported paper is HP 3 x 4 ZINK Photo Paper, with a media size around 3.5 x 4.25 inches before the finished print format is considered. Photos feed out through the front of the unit, which makes the collection point easy for guests to understand.
This is useful when the booth is sitting on a stand at a party. Guests can take the image, wait for the print, and collect it directly without an attendant opening a compartment or handing it over.
Where ZINK starts to struggle is high-volume professional work. Dedicated dye-sublimation event printers are generally better suited to situations where hundreds of prints need to be produced quickly and consistently over several hours.
The HP is more about portability and convenience. It works well when the print itself is a small instant souvenir rather than a premium 4 x 6 lab-style photograph.
The first practical rule is to bring more paper than you think you need. A 100-person event does not mean 100 prints.
Groups may want duplicates. Guests may return to the booth more than once, and some sessions will inevitably be repeated because somebody blinked or stepped outside the frame.
Print media should be calculated before the event. Include test prints, duplicate requests, retakes, and at least some additional reserve rather than bringing exactly the theoretical guest count.
Test several consecutive prints too. One successful photo does not tell you how the booth behaves after repeated sessions.
Run ten or twenty photos before a paid event. Check print consistency, paper feeding, touchscreen response, camera focusing, and whether the system stays connected to the network.
The WiFi hardware supports both 2.4 GHz and 5 GHz networks. That gives you more flexibility in venues where one band may be crowded or unreliable.
Do not make the event completely dependent on venue WiFi, though. Hotels and reception spaces can have congested wireless networks, weak guest access, or captive portals that create problems for connected devices.
Test whatever sharing workflow you plan to use before opening the booth. The local photo capture and printing process should be your priority, with online sharing treated as an additional service.
Why this Sprocket lands at number six rather than higher
The main reason is print capacity and professional flexibility. The units above it give you larger booth formats, DSLR support, more control over camera hardware, or easier integration with dedicated commercial printers.
The Sprocket is designed around convenience first. That makes it easier to carry and easier to operate, but also gives the professional operator fewer ways to customize the camera and printing system.
An 8MP built-in camera is perfectly usable for small event prints. It is not the same tool as a modern DSLR or mirrorless camera with a larger sensor, interchangeable lens, and full exposure control.
If you are photographing a corporate gala where the client expects premium portrait quality, a dedicated camera-based booth may be the better choice. For a birthday party where guests want immediate 3 x 4 prints, the Sprocket makes much more sense.
The same comparison applies to the printer. ZINK is wonderfully simple because there are no cartridges, but high-volume dye-sub printers are generally the more appropriate commercial choice for operators producing large quantities of event photographs every weekend.
The smaller print format is another compromise. A 3 x 4-inch image is portable and fun, but some wedding and corporate clients will expect the more familiar 4 x 6 size.
That does not make the smaller print bad. It simply changes what kind of event package this product suits best.
The 10.1-inch screen is large enough for individual guests and smaller groups to interact comfortably. It is also much smaller than the 21-inch and larger mirror-style displays found in some of the booths ranked above it.
A huge mirror booth naturally becomes part of the event decor. This HP is more discreet and needs to be placed somewhere visible if you want guests to notice it quickly.
Booth placement affects participation more than people expect. Put it near the social part of the venue, but not directly in a doorway or where a queue will block catering staff.
Leave enough room in front of the camera for groups. Test with three or four people rather than setting the frame using one person standing alone.
The autofocus camera should be given enough light and distance to work consistently. Do several test captures with real people under the venue lighting before the event begins.
The ring light should also be adjusted with faces in the frame. Too much light can make the image flat, while too little can leave faces dull compared with the bright touchscreen preview.
Always judge quality from a physical test print. A bright LCD can make an image look better than it will on paper.
Look at skin tones, contrast, sharpness, and shadow detail. If the physical prints are too dark, fix the capture settings or lighting before guests start using the booth.
The booth contains 16GB of internal storage, with part of that reserved for the operating environment and image storage. That is enough for normal booth operation, but it should not be treated as permanent event backup.
Copy completed event photos to another storage location if the system allows export within your workflow. Do not rely on one small internal storage device as the only copy of a client's photographs.
Backing up event images is basic professional practice. A hardware problem after the event should not erase the only copies of the session.
The physical dimensions are around 21.7 inches by 13.6 inches by 2.2 inches. That flat body is one reason the system is much easier to transport than a traditional full-size photo booth enclosure.
At roughly 8 pounds, one person can comfortably move it between events. That is a serious advantage for mobile operators, DJs, or small businesses working without a large setup crew.
Use a protective carrying case anyway. Touchscreens and camera modules should not be transported loose beside stands, speakers, and other event equipment.
Portability only helps if the equipment arrives undamaged. A proper padded case is cheaper than replacing a damaged display.
The 48W power requirement is also relatively modest compared with more elaborate booth systems. It uses a 12V, 4A AC adapter.
Still, power cables need to be routed safely. Keep them away from guest walkways or use proper floor covers where cables must cross an open area.
An accidentally disconnected power lead can end the photo session immediately. A trip hazard can create a much bigger problem.
The system includes mobile compatibility with a long list of iPhone, iPad, and Android devices. That makes connected workflows easier for users who want photos to move between the booth and mobile devices.
Mobile connectivity is useful for digital sharing, especially when guests want both a physical print and a copy on their phone.
Again, do not assume every phone will behave identically. Test the intended QR, app, or wireless workflow beforehand and keep instructions simple for guests.
One of the best things about an integrated product like this is that fewer components need troubleshooting. A DSLR-based booth might involve camera tethering, printer drivers, computer software, USB hubs, power supplies, and external lighting.
The HP reduces that complexity. For someone running occasional parties rather than a full-time rental business, that can matter more than having maximum camera control.
The downside is that integrated systems are harder to upgrade piece by piece. If you want a better camera later, you cannot simply swap the 8MP internal module for a full-frame mirrorless body.
That limited upgrade path contributes to the sixth-place ranking. The systems above it are more adaptable for commercial operators who want to choose their own camera and printer hardware.
Professional photographers may also prefer a printer with a faster output cycle and larger paper capacity. The Sprocket is better for controlled event volume than nonstop production.
For smaller events, though, its simplicity works in its favor. There is less hardware to transport, less setup to configure, and fewer devices occupying valuable venue space.
A house party, children's birthday, graduation dinner, bridal shower, or small wedding can be a very natural fit. The booth provides the activity and the physical souvenir without requiring a dedicated operator all night.
That self-contained design remains genuinely useful. Guests can interact with one clear screen rather than a collection of separate equipment.
Keep the screen clean during use. Touchscreens pick up fingerprints quickly, especially when children or large groups use them repeatedly.
A microfiber cloth and screen-safe cleaner should stay in the operator kit. The booth may be small, but it should still look clean and professional.
Media should also be stored correctly. Keep ZINK paper dry, flat, and away from excessive heat.
Damaged paper can create printing problems even when the photo booth itself is working perfectly. Carry at least one spare unopened pack to any paid booking.
Consumables are part of the system, not an afterthought. You cannot offer instant printing if the correct paper is not available.
We put this HP below the previous Sprocket bundle partly because the other listing includes additional paper, a padded carrying case, screen protection, and decorative accessories. The underlying booth hardware is very similar, but the bundle provides a little more immediate event value.
That difference is enough to separate the rankings. If you already own transport protection and extra media, the practical gap becomes much smaller.
We give the HP Sprocket Photo Booth our number six rank out of seven because its 10.1-inch 1280 x 800 touchscreen, 8MP autofocus camera, built-in LED ring light, dual-band WiFi, 3 x 4-inch ZINK printing, front paper output, 16GB internal storage, compact 48W power requirement, mobile connectivity, and roughly 8-pound body create an unusually simple all-in-one instant photo system.
For someone searching for the Best Photo Printer For Photo Booth, the HP Sprocket Photo Booth is a positive sixth-place choice when portability, simple operation, ink-free printing, and an integrated camera matter more than professional DSLR flexibility or high-volume print speed. It ranks below our larger systems because the smaller ZINK format and fixed hardware offer less room for commercial expansion, but for birthdays, smaller weddings, family events, guestbooks, and portable self-service setups, it remains one of the easiest photo booth printers to deploy.

- Portable flight-box design simplifies transportation between different event venues
- RGB round lighting creates more consistent illumination around guests
- Music-synchronized light strip adds customizable visual effects during parties
- iPad-compatible design provides a familiar touchscreen photo booth interface
- Portable construction suits weddings, birthdays, rentals, and corporate events
This is the portable option, but you need to plan the printing side carefully
The Kricikr FlightBox RGB earns our number seven position for Best Photo Printer For Photo Booth because it takes a different approach from the large integrated systems higher in our ranking. Its main strengths are portable flight-box construction and iPad compatibility, combined with RGB lighting and a music-synchronized light strip that make it easy to turn a relatively compact setup into a guest-facing event station.
For a mobile operator, portability matters more than it first appears. A photo booth may need to travel through hotel loading areas, elevators, narrow hallways, staircases, parking garages, and crowded reception spaces several times every week.
A flight-box style enclosure makes that process more manageable. The booth hardware has a defined transport format instead of requiring the operator to carry several loose pieces and rebuild the entire station at each venue.
The iPad-compatible design also keeps the guest interface familiar. People already understand tapping a touchscreen, so the learning curve for guests stays relatively low even when they have never used that particular photo booth before.
That becomes important when a line starts forming at a birthday party or wedding. The operator should not have to explain every screen to every group before they can take a photograph.
The RGB round light is another useful part of the design. It gives the booth a visible illuminated frame while helping establish a more controlled light source around the capture area.
The additional music-synchronized light strip is more about presentation than photographic exposure. At a party with a DJ, it can make the booth visually fit the room instead of looking like a plain tablet mounted on equipment.
The printer is where this setup needs more planning than our higher-ranked picks
When looking specifically for the Best Photo Printer For Photo Booth, the most important limitation is that this product is primarily a booth station rather than a clearly defined professional printer bundle. You need to build the printing workflow around the booth rather than receiving the same level of integrated print hardware found in some of our higher-ranked choices.
That is not necessarily bad for an experienced operator. If you already own a dye-sublimation printer you trust, keeping the printer separate can actually be useful because you are free to choose your preferred model, media size, and print speed.
For somebody buying their first booth, though, it creates another set of decisions. You need to confirm that the iPad software, sharing workflow, printer, network connection, and print format can all work together properly.
Do this before accepting a paid booking. Do not assume that because the iPad can take a photograph, the image can automatically reach whatever printer you happen to own.
Run the complete capture-to-print workflow repeatedly. Take a photo, apply the event template, send it to the printer, collect the finished print, then immediately start another session.
Repeat that ten or twenty times. This exposes connection problems, print queue delays, template errors, and media issues that may never appear during one casual test.
Printer speed matters when the booth gets busy. A printer taking a long time for every photograph may seem acceptable when you are testing alone, then become frustrating when fifteen guests are waiting.
Think about duplicate copies too. Four people taking one group photograph may each want a print, which means the printer suddenly needs to produce four copies before the next group has finished its session.
Consumable planning is part of event printing. Bring enough paper and ribbon or other required media for the expected number of sessions, then add extra for duplicate prints, test images, mistakes, and higher-than-expected participation.
If you advertise unlimited printing, calculate the actual cost before pricing the package. Paper and printer consumables can become a significant operating expense over a long event.
Print size should also be decided early. A classic 4 x 6 photo and a 2 x 6 photo strip require different templates, and the selected printer needs to support the format you intend to sell.
Always produce a physical test print of the final event template. A design that looks perfect on an iPad screen can have unexpected cropping or margins once printed.
Check skin tones on the actual print rather than relying entirely on the tablet display. Screens emit light and can make images appear brighter than the finished photograph.
Lighting is particularly important here because the RGB effects can influence the visual environment. Decorative colored lighting should not be confused with clean photographic lighting.
If the RGB system is set to deep blue or red, make sure the main capture light still produces natural-looking faces. Otherwise, guests may look fine on the screen while printed skin tones become strange.
Take test photographs under the exact lighting configuration you intend to use. Change the room lights if possible and see how the booth responds before guests arrive.
Why the Kricikr FlightBox RGB finishes seventh in our comparison
The portable construction is genuinely useful, but the products ranked above this one provide more complete printing or capture solutions. Some integrate the printer directly, while others offer larger displays, dedicated cameras, or clearer professional print workflows.
The seventh-place ranking mainly comes from integration, not because the booth lacks useful event features. Kricikr gives you a flexible station, but the operator needs to do more work around printing and the final configuration.
The iPad approach also has advantages and disadvantages. It reduces equipment complexity because one tablet can handle the guest interface and image capture workflow.
At the same time, an iPad camera does not provide the same photographic flexibility as a dedicated DSLR or mirrorless camera. A professional camera gives the operator more control over lenses, exposure, depth of field, sensor performance, and external lighting.
For casual birthday parties, that difference may barely matter. For premium wedding packages or corporate portrait work, clients may expect a higher level of photographic output.
Match the booth hardware to the event you are selling. There is no reason to build an expensive DSLR workflow for every children's party, but there is also no reason to promise premium portrait quality from hardware intended primarily for convenient event selfies.
The flight-box design can be especially useful for DJs and rental operators. If you are already transporting speakers, lighting stands, cables, and other equipment, having the photo booth packed into a defined case makes loading easier.
Keep the iPad protected during transportation too. If the tablet is removable, transporting it separately in a padded case may be safer than leaving it exposed inside the booth assembly.
Check all mounts before every event. Repeated transportation can loosen hardware over time, and a tablet mount that feels slightly loose at home can become a real problem once guests begin touching the screen repeatedly.
Physical stability matters with self-service equipment. Guests will not handle the booth as carefully as the owner does.
Cable management needs similar attention. Power leads, printer connections, charging cables, and any networking equipment should be routed where guests cannot catch them with their feet.
If a cable must cross a walking area, use proper cable protection. A disconnected printer is inconvenient, but a guest tripping over a cable is much more serious.
The booth's RGB lighting should be configured before opening the event. Choose an appropriate effect and brightness rather than adjusting it constantly while guests are trying to use the station.
Music synchronization can be useful at parties, but it may be less appropriate during a formal corporate reception. The lighting should match the event rather than dominate it.
For weddings, a static color that matches the decor may look more polished during dinner. Faster effects can be introduced later when the dance floor becomes active.
Kricikr's app ecosystem also supports media creation and sharing features. Depending on the workflow, guests can work with photos, GIFs, or other event media and move toward digital sharing rather than relying exclusively on physical prints.
That combination can reduce duplicate print demand. If several people appear in one photo, one or two physical copies may be enough when everyone can also receive a digital version.
Digital sharing should complement printing, not be treated as an excuse for an unreliable print setup when physical prints are part of the package being sold.
Test sharing before the event. Venue WiFi can be congested, restricted, or simply unreliable once hundreds of guests connect their phones.
Whenever practical, make sure basic capture and local printing can continue even when internet access is poor. A photo booth should not become unusable just because hotel WiFi stops responding.
Bring spare cables and charging accessories as well. USB and power cables are inexpensive compared with the cost of losing an entire booking because one connector fails.
The same applies to adapters. A small backup kit can save an event, especially when the booth is being used commercially every weekend.
Keep printer supplies together in the same equipment kit. Do not scatter paper, ribbon, cleaning materials, and spare cables across several cases where they become difficult to find during a busy session.
A setup checklist helps too. Confirm tablet power, booth app, camera access, lighting, printer connection, media level, event template, sharing method, and one complete successful test print.
That last step matters. The system is not ready simply because the lights turn on and the iPad launches correctly.
The booth is ready when a finished print comes out correctly. Everything before that is only part of the test.
Clean the booth before guests arrive. Touchscreens and glossy surfaces collect fingerprints quickly, and RGB lighting can make those marks surprisingly visible.
Keep a microfiber cloth nearby during operation. Use cleaning products appropriate for the tablet and booth materials rather than spraying random cleaners directly onto electronics.
Placement within the venue also affects how successful the booth feels. Put it somewhere visible enough to attract guests but not where the queue blocks a doorway, catering route, or dance floor.
Leave enough room for groups to pose comfortably. A booth designed around selfies still needs physical space for three or four people to stand together.
Test the camera framing using several people. One operator standing alone in front of the booth does not represent the way guests will actually use it.
If the printer is located beside or behind the booth, make sure guests know where finished prints appear. Clear physical placement is better than having an operator repeatedly point toward the printer.
For commercial work, consider the print turnaround as part of the guest experience. If the photo takes thirty seconds to create but several minutes to print, the overall system still feels slow.
Queue management matters during popular events. Keep the next group moving through capture while previous prints are being completed where the software and physical layout allow it.
The booth can also be useful for branding. An event operator can customize digital overlays and the overall visual presentation according to the client and software capabilities.
Corporate events particularly benefit from consistent branding on both digital and printed output. Test logos at their final physical print size because fine text that looks sharp on an iPad can become difficult to read on a small photo strip.
Do not overfill the template. Leave enough space for the photograph itself rather than covering a large percentage of the image with event graphics.
A good template should support the photo, not make the guests look squeezed into a tiny remaining area.
After each event, back up the photographs and media files. Do not leave the only copies inside the iPad or app storage before using the booth for another client.
Organize files by event and date. This makes client requests much easier to handle later if somebody asks for another copy.
Privacy matters too. Make sure the way photos are stored, displayed, and shared matches what the event organizer expects.
Not every private party wants an online public gallery. Sharing features should follow the client's privacy requirements.
The lower ranking also reflects the primary keyword itself. Someone searching specifically for the Best Photo Printer For Photo Booth may reasonably prefer a product where the professional printer is clearly included and specified.
This Kricikr product is more accurately viewed as the booth platform around which you can build that printing workflow. That flexibility can be excellent for experienced operators but less convenient for someone expecting a completely turnkey print package.
If you already own a trusted dye-sublimation printer, the situation changes. The ability to keep using your preferred printer may actually make this more attractive than an all-in-one unit with a fixed printing system.
The product works best for operators who value flexibility. You can build the capture, sharing, and printing arrangement around the event packages you already sell.
For first-time operators, plan the complete budget rather than looking only at the booth price. A compatible iPad, printer, media, stand accessories, backup cables, software subscriptions, and transportation equipment can all add to the final cost.
Kricikr's ChackTok ecosystem itself has optional paid functionality for more advanced event rental features, so software costs should also be considered when calculating ongoing business expenses.
This is another reason to test the exact workflow you need before offering it commercially. Free basic controls and paid event features can serve different purposes.
Despite those compromises, there is a lot to like here. The portable flight-box construction, tablet compatibility, RGB round lighting, music synchronization, app-oriented operation, and event-friendly design give it genuine value.
Seventh place does not mean the booth is unusable. It means the six products above it provide a more complete match for our printer-focused ranking or offer stronger integrated hardware.
We give the Kricikr FlightBox RGB our number seven rank out of seven because its portable flight-box housing, iPad compatibility, RGB round light, music-synchronized lighting, app-based operation, event-oriented design, and flexible digital workflow provide a useful foundation for weddings, parties, corporate functions, and mobile rental businesses.
For someone searching for the Best Photo Printer For Photo Booth, the Kricikr FlightBox RGB is a positive seventh-place choice when portability, tablet operation, customizable lighting, and the freedom to choose your own printer matter more than receiving a fully integrated print system. It ranks below our other picks because the printing workflow requires more planning and separate hardware, but for an operator who already owns a suitable event printer and wants a compact booth platform that is easy to transport, it can still be a practical and flexible setup.