

Quick buying guide: start with paper, then ink and tip
For double-sided books, test the reverse side before committing to wet ink; a protective sheet protects the next page, not artwork on the back. Check whether the exact marker is water-based or alcohol-based, choose a tip small enough for your book's details, and swatch one pass plus overlapping passes on the same paper. Buy a manageable palette, follow ventilation and storage instructions, and choose dry pencils when preserving the reverse matters more than marker effects.

- Huge 216-color selection provides extensive choices for detailed coloring.
- Brush tips handle controlled details and smooth expressive coloring.
- Soft chisel tips cover larger coloring areas more efficiently.
- Alcohol-based ink supports smooth blending and layered color transitions.
- - Dual-tip construction provides two useful coloring tools per marker.


- Pastel color selection works beautifully for softer coloring palettes.
- Dual-tip design handles both detailed areas and broader fills.
- Alcohol-based ink supports smooth blending between neighboring pastel shades.
- Color-coded caps make individual marker shades easier to locate.
- - Included carrying case keeps the complete marker collection organized.
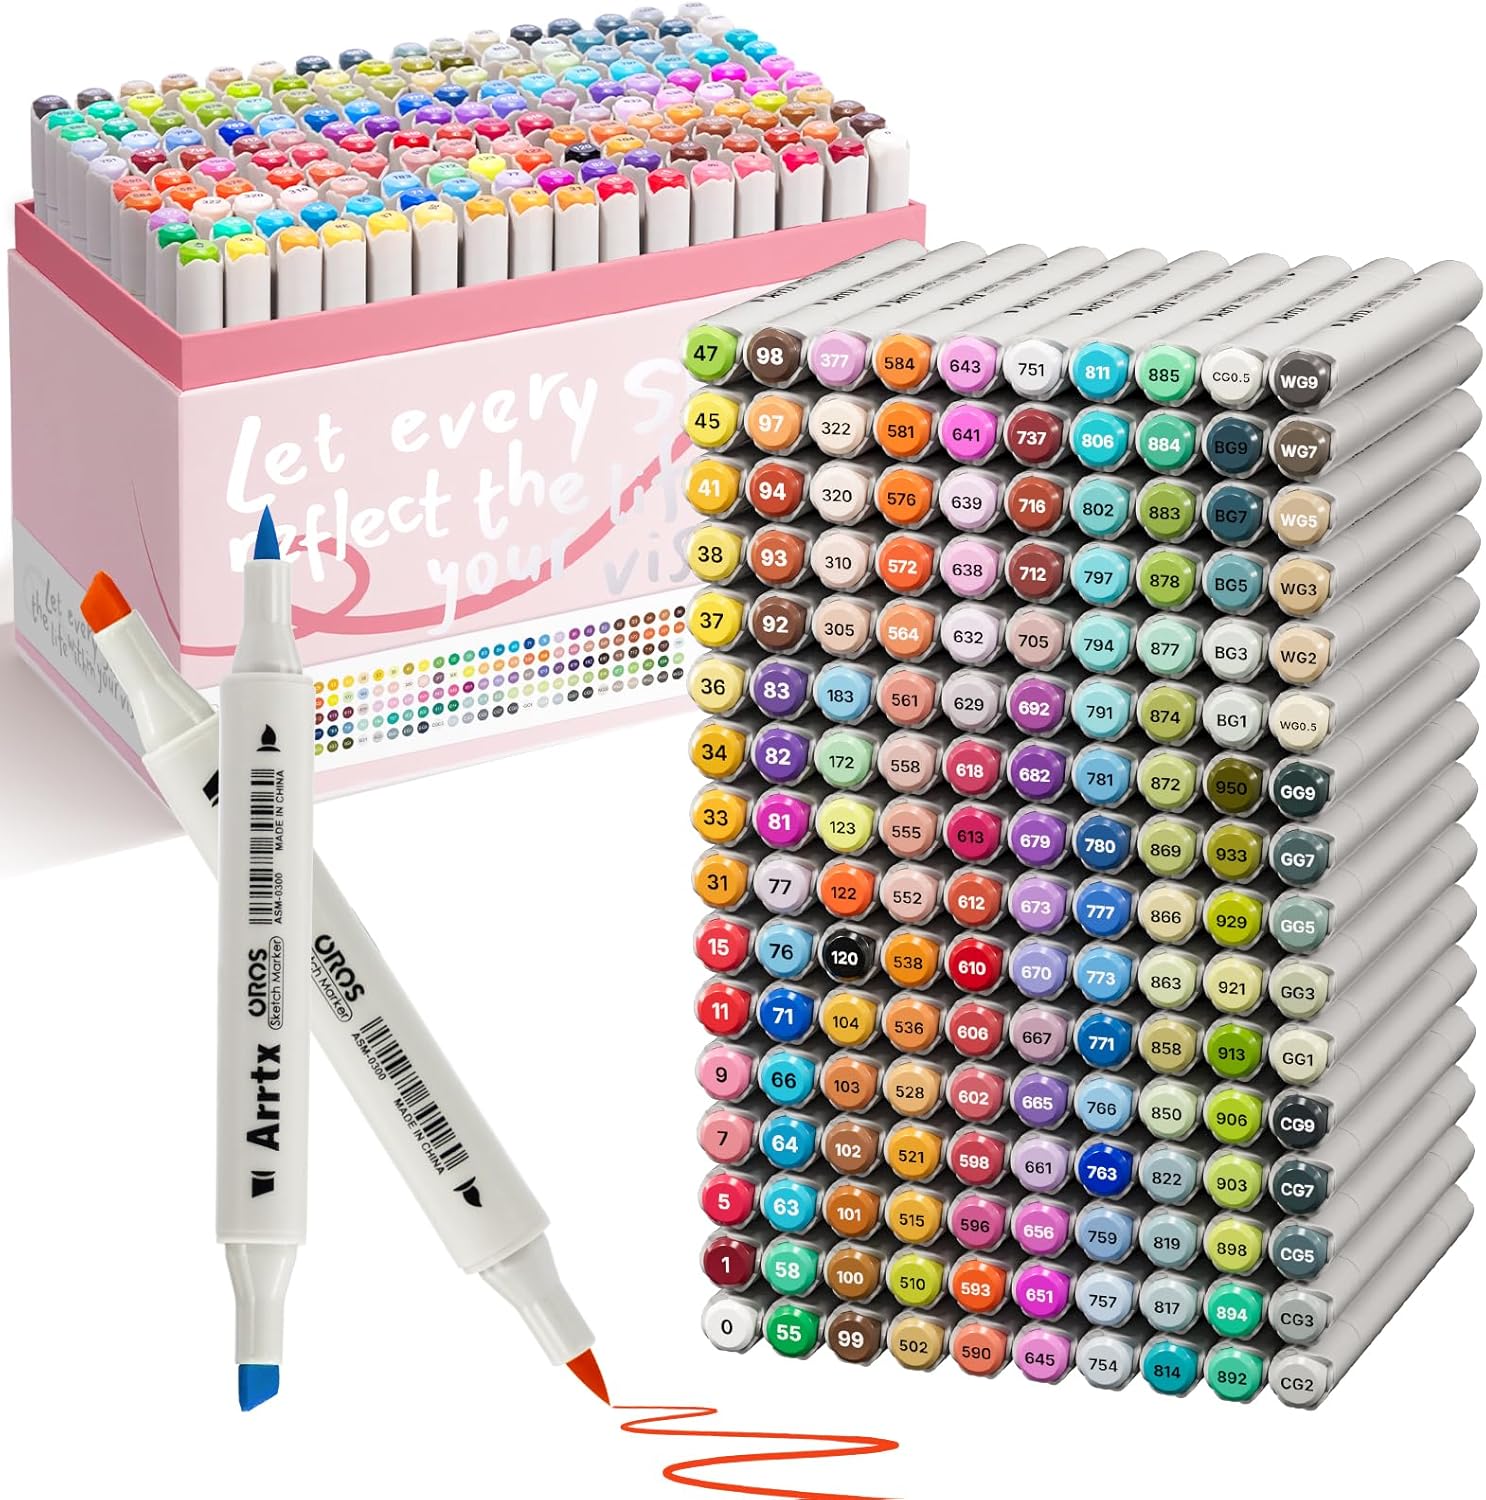
- Broad color selection provides plenty of choices for detailed illustrations.
- Alcohol-based ink supports smooth blending and layered color transitions.
- Dual-tip construction handles detailed sections and larger coloring areas.
- Organized color system makes related shades easier to identify.
- - Rich ink coverage works well for adult coloring projects.

- Massive 240-color selection provides extensive choices for detailed coloring.
- Acrylic paint formula delivers strong opaque color coverage.
- Fine marker control works well around smaller printed details.
- Large shade range reduces the need for manual color mixing.
- - Versatile paint markers can support coloring and other craft projects.

- Dual-tip construction handles detailed coloring and broader filled sections.
- Rich color selection supports varied palettes across complex illustrations.
- Smooth ink application works well for coloring and illustration projects.
- Coordinated shades make layered coloring and transitions easier to plan.
- - Versatile marker design suits coloring, sketching, and creative illustration.

- Acrylic paint formula provides bold and more opaque color coverage.
- Waterproof finish helps completed artwork resist moisture after drying.
- Controlled marker tips work well around smaller coloring details.
- Versatile paint formula supports coloring, painting, and craft projects.
- - Layerable colors allow highlights and decorative accents over dried areas.

- 104-color selection provides plenty of variety for detailed coloring.
- Dual-tip design handles precise details and broader filled areas.
- Alcohol-based ink supports smooth blending between neighboring color shades.
- Coordinated color range works well for shading and illustration.
- - Portable storage organization keeps the large marker collection manageable.
Choose markers around the book you actually use
The best marker for coloring books is not simply the set with the most colors. It is the combination of ink, tip and paper that lets you finish a page without fighting the materials. Start with a book you enjoy, then look at the size of its smallest spaces, whether artwork appears on both sides, and how much uneven color bothers you. These details matter more than an impressive case or a huge advertised palette.
Think about your usual session, too. A few quiet minutes coloring small leaves calls for different control than filling broad geometric patterns. If you dislike testing and adjusting technique, prioritize a forgiving routine and modest color selection rather than complicated blending. If gradients are the reason you color, leave room in your budget for suitable paper and practice sheets.
The ranked products above provide shopping options, not a guarantee that every ink works on every book. Check the exact listing for ink type, tip configuration, replacement availability and handling instructions. When those details are unclear, ask before ordering. A short, repeatable paper test is more useful than assuming that a marker labeled for art will suit a particular bound coloring book.
Understand water-based and alcohol-based ink
Water-based markers and alcohol-based markers behave differently, but neither category is automatically safe for both sides of a coloring page. Water-based ink can be convenient for casual coloring; depending on the formulation and paper, repeated wet strokes may roughen fibers or leave visible overlaps. Alcohol-based ink is often chosen for layered color and blending, but it can travel through absorbent paper. The book, technique and particular ink all influence the result.
Separate three observations when testing. Show-through means you can see the colored area from the reverse because the sheet is translucent. Bleed-through means ink has penetrated to the reverse surface. Transfer means it has reached the sheet underneath. A protective sheet helps protect the next page; it does not rescue a printed image on the back of the page you are coloring.
For double-sided books, begin cautiously with an inconspicuous test and consider dry colored pencils if preserving the reverse is important. Our colored pencils for artists guide gives you another category to compare. For alcohol-marker projects on separate sheets, consult the alcohol marker paper guide, while still checking the chosen paper's instructions. Do not confuse a paper recommendation with proof that your existing coloring book will resist penetration.

Pick tips that fit the smallest shapes
A fine or rounded tip is useful for narrow stems, lettering-like patterns and compact borders because it gives you a relatively small contact area. A brush tip changes width as its angle and pressure change, which can help with broad petals and tapered strokes but requires practice. A chisel tip can cover larger regions; its corner can reach smaller spaces, although rotating it consistently takes attention.
Choose around the smallest recurring feature in your favorite books, not just the largest blank area. An oversized tip can make tiny details frustrating even if it fills backgrounds quickly. Conversely, using a very fine tip for every large region increases the number of passes and opportunities for streaks. A dual-tip format may solve that problem, provided both tips are useful to you and the exact product actually includes them.
Test control by drawing a narrow curved line, coloring a small triangle and filling a larger square. Hold the marker at your natural angle rather than forcing a grip that only works during a demonstration. Avoid pressing hard to manufacture a wider stroke: paper can roughen, tips can lose shape, and control may worsen. For added outlines, compare the fineliner pens for drawing guide; test any combination before drawing over a finished page.
Make a swatch test before the first full page
Use a spare page or a discreet area with the same paper as the artwork. A swatch on unrelated cardstock tells you about that cardstock, not the book. Place a clean protective sheet underneath, then make a single stroke, a small filled patch and a patch with a second overlapping pass. Include a dark color and a pale color because different shades can expose different problems.
Let the test dry according to the ink's behavior and product guidance, then inspect the front, reverse and protective sheet in ordinary light. Look for fuzzy edges, roughened fibers, streaks, show-through, bleed-through and transferred ink. Feel the paper gently once dry; do not repeatedly rub a wet patch. Check whether the printed outline remains crisp rather than assuming every printing ink tolerates every marker.
Keep a simple note of the book, color and technique. If one pass works but three passes damage the surface, that is useful information: use lighter layering or choose another medium. Repeat the test when moving to a different book, even from the same publisher. Paper specifications and printing can vary. The aim is not to prove that a marker is universally good or bad, but to find a combination you can use confidently on this particular project.
Build a useful palette instead of chasing quantity
A compact palette can be easier to use than dozens of nearly identical shades. Begin with colors you genuinely enjoy and a few lighter and darker companions. For a floral page, that might mean two greens, a warm flower family, a cool flower family and a neutral. Plan the palette on scrap paper before committing to the artwork so competing colors do not become a surprise halfway through.
Color names and cap colors are only rough guides. Make your own swatch reference on relevant paper and keep it with the set. If markers have printed identifiers, record them without assuming the identifier means the same shade across brands. Check whether colors can be bought individually or replaced in smaller packs; replaceability can matter more than the initial number of pens.
Leave intentional white space when it supports the design. Every shape does not need a different color, and every large background does not need ink. Repeating a few colors across the page can create a calmer result and reduce decision fatigue. If you want softer texture or fine adjustments, dry pencils may complement marker areas after testing the combination. The colored pencils for sketching guide offers a useful comparison without implying that every pencil and marker pairing behaves identically.

Use a controlled coloring workflow
Before starting, slide a protective sheet beneath the active page and make sure the work surface is stable. Work on one manageable region at a time. Use light, consistent strokes and try to keep your direction deliberate rather than repeatedly scrubbing an uneven spot. Wet ink can look different from dry ink, so pause before deciding that a patch needs more passes.
For broad areas, test how quickly your ink dries on that paper and whether adjacent strokes leave obvious boundaries. For small details, approach the outline from inside the shape and leave a slight margin if the ink tends to spread. Rotate the book when a curve is awkward instead of twisting your wrist into a tense position. A comfortable angle and a steady support surface can improve control without demanding more pressure.
When practicing blends, use scrap first and start with just two compatible shades. Some inks, papers and printed outlines resist the effect you expect; a colorless tool is not a universal eraser. Stop layering if the surface begins to pill or the reverse becomes saturated. Keep the test sheet nearby as a reminder of the limit you observed. After the page is dry, assess it at normal viewing distance rather than treating every tiny overlap as a failure.
Keep the workspace airy and the markers organized
Read the manufacturer's warnings, age guidance and storage directions before use. Work in a comfortably ventilated space, especially with strongly scented inks, and close caps between colors. Do not deliberately sniff markers or treat a low odor as proof of safety. Keep supplies away from food, drinks, young children and pets, and stop using a product if it causes irritation. Follow its label rather than adding improvised solvents to refresh it.
For storage, follow the instructions for the exact marker. Some designs are intended to lie horizontally, while others have different guidance. Keep caps securely fitted and avoid leaving the set in direct sun, near heat or in a damp area. A shallow tray or case that makes shades easy to find can reduce uncapped searching time, but organization should not override product-specific storage requirements.
Transport markers in a closed case so tips and caps are not repeatedly knocked loose. If a marker seems dry, check cap fit and permitted maintenance before assuming it needs replacing. Use only compatible replacement tips or refills explicitly supported by the manufacturer. Record troublesome colors and check them on scrap before your next page. A predictable setup is more valuable than a storage system that looks attractive but makes supplies awkward to reach.

Decide what to buy with a short final checklist
First, confirm the exact ink category and whether it suits your intended paper test. Second, choose a tip that can handle the smallest shapes you regularly color. Third, look at the palette as usable light, middle and dark values rather than a raw count. Fourth, check the practical details: cap fit, storage guidance, individual replacements and the space needed to keep the set accessible.
Match the purchase to the problem you are solving. If thin paper and double-sided artwork are the difficulty, buying more saturated markers may not fix it. If your outlines are tidy but large regions look streaky, a different tip, technique or paper may help more than a larger set. If your hand feels tense, test a comfortable barrel and relaxed grip rather than assuming a heavier marker is better.
Start small when the paper compatibility is uncertain. Use the same swatch routine across candidates and judge the dried result, reverse side and protective sheet together. Keep the combination that makes your usual coloring enjoyable, and save experimental blends for spare pages. The right choice is the set you can use with reasonable control and sensible care on the books you actually own, not the one that promises a perfect result without testing.
Coloring-book marker FAQs
Are alcohol markers suitable for every coloring book?
No. Alcohol-based ink can penetrate absorbent paper, and results depend on the ink, paper and number of passes. Test the same paper, inspect the reverse, and use a protective sheet underneath. Avoid assuming that a double-sided book will preserve its reverse artwork.
Do water-based markers always avoid bleed-through?
No. Water-based ink can still show through or penetrate some papers, while repeated wet strokes may roughen the surface. Test a single pass and overlapping passes on the actual book paper before coloring a full page.
What is the difference between show-through and bleed-through?
Show-through is the visible color seen through a translucent sheet. Bleed-through means ink has reached the reverse surface. Check a clean sheet underneath as well to identify transfer to the following page.
Which marker tip is easiest for small details?
A fine or rounded tip often gives useful control in narrow spaces. A brush or chisel tip can cover broader areas, but its angle and pressure affect stroke width. Test the smallest recurring shapes in your book with a relaxed grip.
How should I store coloring markers?
Follow the exact manufacturer's storage instructions rather than assuming all markers need the same orientation. Fit caps securely, keep supplies away from heat and direct sun, and use only supported refills or replacement tips.
Can I color both sides of a page with markers?
Only proceed if your test shows an acceptable result for that paper and ink. A protective sheet does not prevent damage to the reverse artwork. If preserving both sides is important, consider dry colored pencils instead of an untested wet-ink combination.