7 Best Document Camera

7 Best Document Camera Article updated:

Quick guide: test the page, focus and software together

Measure your largest page or demonstration area, then verify the exact camera's field of view and working distance. Test small text, page corners and moving hands in the actual audience view rather than choosing on a resolution number alone.

Confirm the computer, cable, operating system and application route before buying. Rehearse lighting and focus, select the microphone separately, and clear private paperwork from the capture area. Recording, OCR and cloud storage depend on the exact software and your organization's policy.

1
V500S 8MP Wireless Document Camera
Brand: JOYUSING
Features / Highlights
  • 8MP camera captures detailed documents and classroom presentation materials.
  • Four connection modes include WiFi, USB, VGA, and HDMI.
  • Built-in 7200mAh battery supports flexible wireless classroom operation.
  • Adjustable camera arm helps frame books, worksheets, and objects.
  • - Mac and Windows compatibility supports teaching and conferencing workflows.
Our Score
9.74
CHECK PRICE

The four connection modes make this unusually flexible for a classroom

The JOYUSING V500S is an 8MP wireless document camera designed for teaching, presentations, distance learning and web conferencing, with WiFi, USB, VGA and HDMI connection options. When comparing the best document camera choices, that flexibility matters because classrooms and meeting spaces often contain a strange mixture of modern laptops, older projectors and large displays that do not all use the same connection.

An 8MP image sensor gives the camera enough resolution to capture considerably more detail than a basic low resolution webcam pointed at a desk. That becomes important when the material contains small handwriting, textbook diagrams, photographs or detailed objects that students need to see clearly.

A teacher can place a worksheet underneath the camera and display it to the entire room rather than preparing a separate digital version. The same setup works for handwritten calculations, book pages, maps and physical examples that are difficult to explain verbally.

The adjustable camera position helps with those different materials. 8MP capture gives lessons useful visual detail, while the articulated design lets the user change the viewing area instead of constantly moving everything underneath a fixed camera.

This is one of the practical advantages of a dedicated visual presenter. A webcam is built primarily to face a person, while a document camera is designed specifically to capture material positioned on a desk.

The 7200mAh battery removes a cable that can become surprisingly annoying

The V500S includes a 7200mAh rechargeable battery, which makes the wireless functionality much more useful. The camera can be positioned where the presentation works best rather than always being placed according to the nearest convenient power outlet.

That can matter in a classroom where equipment gets moved between desks. A teacher might demonstrate a science object at one table, then reposition the camera for a worksheet or art demonstration somewhere else.

WiFi connectivity provides another option when physical cabling is inconvenient. Wireless operation gives teachers more placement freedom, especially in rooms where running another cable across a teaching area creates unnecessary clutter.

USB remains useful when a direct computer connection is preferred. For online teaching and web conferencing, connecting the document camera to a Mac or Windows computer allows physical documents and objects to become part of a digital lesson.

HDMI is useful for a different workflow. A classroom display or compatible projector can receive the camera image without requiring the presentation to revolve entirely around computer software.

VGA support is less exciting technologically, but it can be genuinely valuable in education. Many schools still have older projectors installed permanently, and replacing a functioning projector just because a newer camera lacks the required connection is unnecessary.

Lighting and focus still matter regardless of resolution. Good lighting improves document readability considerably, particularly when glossy pages create reflections or a classroom has uneven overhead lighting.

Users should also frame only the area students actually need to see. Filling half the image with an empty desk reduces the useful size of the text or object being demonstrated.

Why we believe the V500S deserves our number one position

The JOYUSING V500S earns our top ranking because it covers several different document camera workflows with one device. It can function as a classroom visualizer, a computer connected teaching camera, a direct display source and a wireless presentation tool.

The four connection modes are a major reason for that versatility. WiFi, USB, HDMI and VGA cover very different setups, which reduces the chance that the camera becomes unusable simply because the available classroom equipment uses a different connection.

The 8MP sensor also makes sense for educational material. Documents contain fine detail, and a camera intended to show handwriting or textbook illustrations needs enough resolution to preserve that information when the image is enlarged on a classroom display.

The 7200mAh battery strengthens the wireless use case. A wireless connection is much less useful if the camera still needs to remain beside a wall outlet whenever it is operating.

Mac and Windows compatibility also broadens its usefulness for remote learning. Teachers can incorporate physical worksheets, demonstrations and handwritten explanations into online sessions without relying entirely on screen sharing.

There are still some practical considerations. Wireless connections can introduce more setup variables than a simple USB cable, so classrooms that never move the camera may prefer the reliability and simplicity of a wired connection.

Battery charging also becomes another maintenance task. If wireless operation is important for the next lesson, the camera needs to be charged beforehand rather than discovered empty when the class has already started.

For frequent demonstrations, establish a fixed area on the desk with good lighting and enough space for Letter or A4 documents. That makes switching between books, worksheets and physical objects much faster during an actual lesson.

That is why we believe the JOYUSING V500S deserves the number one position in our Best Document Camera ranking. Its 8MP imaging and four-mode connectivity, combined with a 7200mAh battery, adjustable presentation design and Mac and Windows support, give teachers and presenters a flexible system that can handle traditional classrooms, modern displays, online teaching and physical document demonstrations without being locked into one connection method.


2
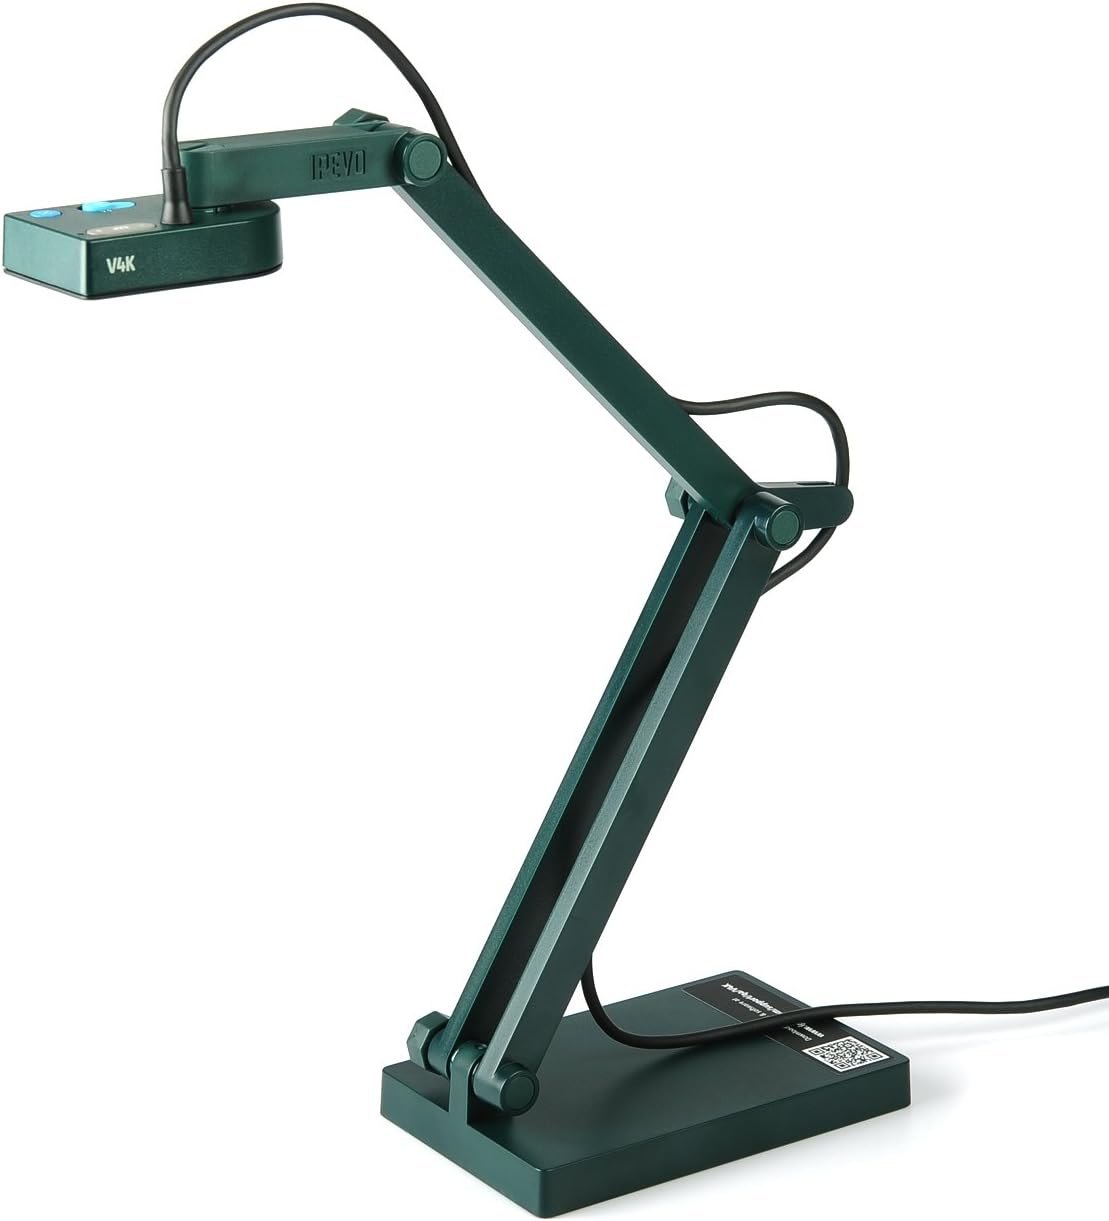
V4K 8MP Ultra HD Document Camera
Brand: IPEVO
Features / Highlights
  • 8MP camera captures detailed documents and physical teaching materials.
  • Supports up to 3264 by 2448 pixel resolution.
  • USB connection provides simple setup with compatible computers.
  • Multi-jointed stand allows flexible positioning over different objects.
  • - Fast focusing helps when switching between documents and demonstrations.
Our Score
9.64
CHECK PRICE

The 8MP camera gets the important part right: students can actually see the detail

The IPEVO V4K is an 8MP USB document camera designed for teachers, presenters and remote learning environments where physical material needs to appear clearly on a computer or larger display. When comparing the best document camera options, its ability to capture images at resolutions up to 3264 by 2448 pixels gives it enough detail for handwriting, textbook pages, diagrams and small physical objects.

Resolution matters more with a document camera than it might initially seem. A classroom display can enlarge a small worksheet considerably, and low resolution capture makes fine text and thin lines noticeably harder to read once that image is stretched across a large screen.

The 8MP sensor helps preserve those details. A teacher can place a mathematics worksheet under the camera and show handwritten calculations without needing to recreate the entire problem digitally.

The same applies to art and science lessons. High resolution capture preserves small visual details, which is useful when students need to inspect texture, handwriting, illustrations or the small components of a demonstration.

It also saves preparation time. Existing books, worksheets and physical materials can become presentation content immediately rather than being scanned and converted into separate files before class.

The articulated stand is simple, but it solves a lot of classroom problems

The V4K uses a multi-jointed stand that allows the camera head to be repositioned depending on what is being shown. That flexibility is useful because a full textbook page needs a very different framing distance from a small object or handwritten note.

A teacher can raise the camera to capture a larger area, then bring it closer when students need to inspect something small. The document stays on the desk while the camera position changes around it.

This is much more practical than trying to use a normal webcam for overhead work. The adjustable arm is designed for tabletop demonstrations, while an ordinary webcam is primarily built to point toward a person's face.

Focus performance matters during those changes too. If the camera moves from a flat worksheet to a three-dimensional object, the focusing system needs to respond without requiring a long interruption in the lesson.

USB connectivity keeps the basic installation straightforward. The camera connects to a compatible computer for both operation and video transfer, which means there is no separate video cable arrangement required for a normal computer based teaching setup.

That approach is particularly useful for online lessons. The document camera can show handwriting, books and physical demonstrations while the computer handles the conferencing or teaching software.

Lighting still needs attention. Good lighting makes printed documents substantially easier to read, especially with glossy textbook pages that can reflect strong overhead lights directly toward the camera.

Position the page so glare does not cover the material students need to see. Even an 8MP sensor cannot recover text that has been hidden behind a bright reflection.

Why the V4K takes our number two position

The IPEVO V4K earns a high position because it focuses on the features that matter most during actual document presentation. The 8MP sensor provides useful detail, while the articulated stand makes switching between different types of material relatively easy.

The maximum 3264 by 2448 resolution gives teachers plenty of image information for ordinary classroom material. Detailed capture works well for text and diagrams, which are two of the most common reasons to buy a document camera in the first place.

The USB design also keeps the workflow relatively straightforward. Connect the camera to the computer, position the teaching material underneath it and use compatible presentation or conferencing software to display the image.

The reason we place the V4K at number two rather than number one is connectivity flexibility. Our top ranked JOYUSING V500S provides WiFi, USB, VGA and HDMI connection options rather than depending primarily on a USB computer workflow.

The JOYUSING also includes a 7200mAh battery, making wireless positioning more practical in classrooms where the camera needs to move around. That gives our number one choice more freedom across different teaching environments.

The IPEVO takes a simpler approach. That can actually be preferable for a teacher who already uses a laptop or desktop computer for every lesson and has no reason to connect the document camera directly to a projector through HDMI or VGA.

There are fewer wireless variables to manage as well. A wired USB connection can be reassuring when a lesson needs to start immediately and nobody wants to troubleshoot network connectivity in front of a class.

Users should still set up the presentation area carefully. Leave enough desk space for a full sheet or open book, position the camera before class and check focus and lighting on the actual display students will be viewing.

That is why we believe the IPEVO V4K deserves the number two position in our Best Document Camera ranking. It falls just behind our first choice in wireless freedom and connection versatility, but its 8MP sensor, up to 3264 by 2448 resolution, adjustable multi-jointed stand and straightforward USB operation make it an excellent option for teachers and presenters who want detailed overhead capture without unnecessary complexity.


3
INS-2 Portable Document Camera and Webcam
Brand: INSWAN
Features / Highlights
  • Portable folding design makes classroom storage and transport easier.
  • Dual-purpose operation works as document camera and webcam.
  • Adjustable camera positioning handles documents and three-dimensional teaching objects.
  • USB connectivity provides straightforward computer setup for online lessons.
  • - Compact footprint works well on smaller teaching and office desks.
Our Score
9.24
CHECK PRICE

The portable design makes sense when the camera does not stay in one classroom

The INSWAN INS-2 is a portable document camera that can also function as a webcam, giving teachers and presenters one device for overhead demonstrations and face-to-face online communication. When comparing the best document camera options, that dual-purpose design is useful for people who regularly move between classrooms, offices or home teaching spaces rather than leaving a large visual presenter permanently installed on one desk.

Portability matters more in education than it initially seems. Teachers often share rooms, equipment gets stored between lessons, and a document camera may need to travel between a classroom and home office.

A compact folding design makes that easier. The camera can be packed away instead of occupying permanent desk space when it is not being used.

That is useful for teachers working from smaller desks too. A compact document camera leaves more working space for textbooks, worksheets and the physical objects that actually need to appear underneath the lens.

The webcam function adds another practical use. Instead of keeping separate cameras for showing a teacher and displaying documents, the same device can cover different parts of an online lesson.

Switching from a worksheet to a physical object should not interrupt the lesson

A document camera needs flexible positioning because classroom materials are not all flat. One minute the teacher may be displaying a printed worksheet, while the next demonstration involves a calculator, model, electronic component or other three-dimensional object.

The adjustable camera design allows the viewing position to change according to the material. Raising the camera captures a larger working area, while bringing it closer can make smaller details easier for students to inspect.

This is where a dedicated document camera has an advantage over an ordinary webcam. Overhead positioning is designed for tabletop teaching material, rather than requiring a conventional webcam to be balanced awkwardly above a desk.

A mathematics teacher, for example, can work through a problem by hand while students watch each line being written. There is no need to prepare a digital version of every calculation beforehand.

Art instruction benefits in a similar way. The camera can show the teacher's hands, paper and materials while the demonstration develops naturally in real time.

USB connectivity keeps the computer workflow straightforward. A wired connection is particularly useful for online teaching because it avoids relying on a separate wireless link just to transmit the camera image.

Lighting still needs to be set up correctly. Even lighting makes handwritten material much easier to read, while strong reflections from glossy pages can hide important parts of an otherwise clear image.

Users should also frame the document tightly. If half the video image shows an empty desk, the actual worksheet becomes smaller when students view the feed on their own screens.

Why the INS-2 takes our number three position

The INSWAN INS-2 earns a high position because it combines portability with a useful dual camera role. It can handle document presentation during a lesson and then function as a webcam when the teaching format changes.

The folding design is one of its strongest practical features. Portable hardware works well for shared teaching spaces, particularly when equipment cannot remain permanently installed in the same room.

The adjustable positioning also provides flexibility for different subjects. Books, worksheets, handwriting and small physical objects all require slightly different framing, and a movable camera is easier to adapt during an actual lesson.

The reason we place the INSWAN at number three is that our first two choices provide stronger advantages in specific areas. The JOYUSING at number one offers an 8MP camera plus WiFi, USB, VGA and HDMI connectivity, along with a 7200mAh battery for more flexible wireless operation.

The IPEVO V4K at number two provides an 8MP sensor with resolution up to 3264 by 2448 pixels and a well suited multi-jointed stand. That combination gives it a particularly strong case for detailed classroom document capture.

The INSWAN takes a more compact and portable approach. Users who move the camera frequently may actually prefer that simplicity over a more elaborate classroom installation.

The main limitation is that a portable USB document camera does not offer the same direct display flexibility as a model equipped with HDMI, VGA and wireless connection options. A computer will normally play a more central role in the workflow.

For many teachers, that is not a major issue. If lessons already run through a laptop with conferencing, presentation or classroom software, USB operation can be the easiest arrangement anyway.

That is why we believe the INSWAN INS-2 deserves the number three position in our Best Document Camera ranking. It falls behind our first two choices in connection versatility and high-resolution presentation flexibility, but its portable folding design, webcam functionality, adjustable camera positioning and straightforward USB operation make it a positive option for teachers, tutors and presenters who want one compact camera that can move easily between overhead demonstrations and online communication.


4
HD Pro Flexible USB Document Camera
Brand: HUE
Features / Highlights
  • Flexible neck positions the camera easily above teaching materials.
  • Full HD capture provides clear video for everyday demonstrations.
  • USB connection offers straightforward setup with Mac and Windows.
  • Built-in microphone supports lessons, recordings, and online presentations.
  • - Compact portable construction fits easily on smaller classroom desks.
Our Score
8.93
CHECK PRICE

The flexible neck is simple, but teachers can do a lot with it

The HUE HD Pro is a flexible USB document camera designed for classrooms, remote teaching, presentations and everyday visual demonstrations. When comparing the best document camera options, its strongest practical feature is the flexible neck because the camera can be positioned above worksheets, books and physical objects without requiring a large articulated stand.

That flexibility matters when the subject changes during a lesson. A full workbook page requires a wider view, while a small science object or handwritten calculation may need the camera positioned much closer.

The neck lets the teacher make those changes quickly. Flexible positioning works well for mixed teaching materials, particularly when moving between flat documents and three-dimensional objects during the same class.

A mathematics teacher could place a worksheet underneath the camera and solve each problem by hand. Students see the working process as it happens instead of only seeing a finished digital slide.

Art lessons benefit in a similar way. The camera can be positioned above a drawing surface so students can watch the teacher's hands and materials without the teacher having to hold a webcam manually.

USB and a built-in microphone keep the computer workflow straightforward

The HUE HD Pro connects through USB, which makes it a natural fit for classrooms already built around a Mac or Windows computer. The same connection handles the camera workflow without requiring a separate wireless network configuration.

This simplicity can be useful during online lessons. The teacher can connect the camera to the computer, select the appropriate video source and begin showing physical teaching material through compatible conferencing or presentation software.

The built-in microphone adds another useful function. Video and audio can come from one teaching device, although teachers with dedicated classroom microphones may still prefer their existing audio setup.

The camera can also work for recording demonstrations. A teacher could prepare a short explanation of a worksheet, practical activity or art technique and save the presentation for students to watch later.

Good lighting remains important. A clear camera cannot fully compensate for a dark desk or strong glare reflecting directly from glossy textbook pages.

Positioning the material correctly matters too. Place the page so the important content fills most of the camera frame rather than showing a large area of unused desk around it.

This becomes especially important during remote learning. Tight framing makes small text easier to read when students may be watching on relatively small laptop or tablet screens.

Teachers should test the final image on the actual display or conferencing platform before beginning an important lesson. Compression, screen sharing and video software can make the student view look different from the local camera preview.

Why the HUE HD Pro takes our number four position

The HUE HD Pro earns its place because it keeps the document camera concept straightforward. A flexible camera neck, USB connection, built-in microphone and compact footprint cover many of the everyday requirements of classroom presentation.

The flexible neck is particularly useful on smaller desks. The camera can reposition without a bulky support system, leaving more room for the book, worksheet or physical object being demonstrated.

USB operation is another positive for users who want predictable computer connectivity. There is no need to manage batteries or wireless pairing when the camera will spend most of its life beside the same classroom laptop.

The reason we place the HUE at number four is that our three higher ranked choices provide stronger flexibility in specific areas. The JOYUSING at number one combines an 8MP camera with WiFi, USB, VGA and HDMI connectivity plus a 7200mAh battery.

The IPEVO V4K at number two provides an 8MP sensor with resolution up to 3264 by 2448 pixels and an articulated stand designed for detailed tabletop capture. That gives it an advantage when fine document detail is the priority.

The INSWAN at number three provides a portable folding design and dual-purpose document camera and webcam functionality. That can be particularly useful for teachers moving between different teaching locations.

The HUE takes a simpler route. It is more appropriate for users who mainly want a compact USB visualizer and do not need direct HDMI output, wireless operation or a large collection of connection modes.

That simplicity can actually make daily use easier. A teacher who uses the same computer every lesson may prefer plugging in one USB cable over managing additional wireless and display settings.

That is why we believe the HUE HD Pro deserves the number four position in our Best Document Camera ranking. It falls behind our higher ranked choices in connection versatility and advanced capture flexibility, but its flexible neck, Full HD presentation capability, built-in microphone, USB connectivity and compact classroom friendly design make it a positive choice for teachers who want a straightforward visual presenter for documents, demonstrations and online lessons.


5
INS-2 USB Document Camera with Autofocus
Brand: INSWAN
Features / Highlights
  • USB connectivity provides straightforward setup for computer-based presentations.
  • Autofocus helps maintain clarity when switching teaching materials.
  • Adjustable camera position handles documents and three-dimensional objects.
  • Compact design works well on crowded classroom desks.
  • - Built-in lighting helps illuminate documents in darker teaching spaces.
Our Score
8.77
CHECK PRICE

The autofocus is useful when the lesson keeps changing underneath the camera

The INSWAN INS-2 is a USB document camera designed for teachers, tutors, presenters and remote learning setups where physical material needs to be shown through a computer. When comparing the best document camera options, its autofocus and adjustable overhead design are particularly useful because lessons rarely involve one perfectly flat sheet sitting at exactly the same distance from the camera for an entire class.

A teacher might begin with a textbook page and then switch to a handwritten worksheet. Five minutes later, the lesson could involve a calculator, model or another three-dimensional object that sits much closer to the lens.

Autofocus reduces the amount of manual adjustment required during those changes. Automatic focusing keeps demonstrations moving more smoothly, which matters when thirty students are waiting for the next example rather than watching someone repeatedly adjust a camera.

This is particularly useful for mathematics and science lessons. A teacher can move between printed instructions, handwritten calculations and physical objects without preparing a separate digital slide for every part of the demonstration.

The camera can also be useful for art instruction. Showing the actual movement of a pencil, brush or craft tool often communicates more than displaying a completed image after the process has finished.

The USB setup makes sense when the computer already runs the lesson

The INS-2 uses a USB connection, making it a natural choice for classrooms where a Mac or Windows computer already controls the presentation. The computer can receive the camera feed and then display or share it through compatible teaching, conferencing or presentation software.

That workflow is particularly convenient for remote tutoring. The teacher can display a worksheet underneath the camera while students watch the explanation through their normal online meeting platform.

A wired connection also removes some variables. USB avoids relying on a separate wireless connection, which can be useful when reliability matters more than being able to move the camera around the room.

The adjustable camera position helps with framing. Raising the camera increases the visible working area for larger documents, while bringing it closer can make small objects occupy more of the image.

Built-in lighting is useful when the desk itself is poorly illuminated. Classroom ceiling lights are not always positioned for overhead camera work, and a shadow from the camera or teacher can reduce document readability.

Extra light does need to be used carefully with glossy material. A bright light reflecting directly from laminated pages can create glare that hides text, even when the camera image itself is sharp.

Framing is another detail teachers sometimes overlook. Fill the image with the material being taught rather than showing a large empty section of desk around a relatively small worksheet.

This matters even more during online learning. Students viewing the lesson on smaller laptop screens need the useful content to occupy as much of the video frame as reasonably possible.

Why the INS-2 takes our number five position

The INSWAN INS-2 earns its position because it provides the main features required for computer-based document presentation without making the setup unnecessarily complicated. USB connectivity, autofocus, adjustable positioning and integrated lighting cover many everyday teaching situations.

Autofocus is probably the most practical feature during an actual lesson. Different teaching objects need different focus distances, and automatic adjustment can save repeated interruptions as materials change.

The compact format is useful as well. A document camera needs enough room underneath it for teaching material, but the equipment itself should not consume most of the available desk.

The reason we place this INSWAN at number five is the stronger flexibility provided by the four models above it. Our number one JOYUSING combines an 8MP camera with WiFi, USB, VGA and HDMI connectivity plus a 7200mAh battery.

The IPEVO V4K at number two provides an 8MP sensor with resolution up to 3264 by 2448 pixels and a multi-jointed stand. That gives it a strong advantage for detailed document capture.

Our higher ranked portable INSWAN option emphasizes flexible document camera and webcam operation, while the HUE HD Pro uses a highly flexible neck and built-in microphone for a straightforward classroom and remote teaching workflow.

This INS-2 is more focused on conventional USB document capture. It does not offer the same broad connection flexibility as a camera equipped with HDMI, VGA and WiFi, so a computer normally remains central to the presentation setup.

That can still be the right arrangement for many users. If every lesson already runs from a laptop, adding more connection modes may provide little practical benefit.

That is why we believe the INSWAN INS-2 USB Document Camera deserves the number five position in our Best Document Camera ranking. It falls behind our higher ranked choices in connection versatility and broader presentation flexibility, but its autofocus, adjustable camera positioning, built-in illumination and straightforward USB workflow make it a positive option for teachers and tutors who primarily need a dependable overhead camera for computer-based lessons, handwritten explanations and physical demonstrations.


6
SmartScan Portable Document Camera with Auto Deskew
Brand: JOJOCY
Features / Highlights
  • Automatic deskewing helps straighten angled document captures during scanning.
  • Multilingual recognition supports documents containing several different written languages.
  • Portable design makes moving between classrooms and offices easier.
  • Overhead capture works well for books, worksheets, and documents.
  • - Document scanning features extend usefulness beyond live classroom presentations.
Our Score
8.33
CHECK PRICE

The scanning features make this more interesting than a basic overhead camera

The JOJOCY portable document camera is designed to handle physical documents from above while adding features such as multilingual recognition and automatic deskewing. When comparing the best document camera options, that combination is useful for people who need to capture paperwork as well as display it during teaching, office work or presentations.

Automatic deskewing addresses a very ordinary problem. A sheet of paper placed underneath an overhead camera is not always perfectly square with the lens, especially when documents are being swapped quickly.

Software correction can straighten an angled page after capture. Automatic deskewing helps create cleaner document scans, which is useful when the result needs to be saved or shared rather than simply viewed for a few seconds during a lesson.

This can save time in an office where several documents need to be digitized. Instead of repeatedly adjusting each sheet by a few millimeters, users can concentrate on placing the material within the capture area.

The multilingual functionality is another interesting feature for document-heavy work. Schools, international businesses and language tutors may regularly handle printed material containing more than one language.

It makes sense when you need presentation and document capture together

A conventional document camera is primarily a live presentation tool. Place a worksheet or physical object underneath the camera and show that image to students or colleagues through a connected computer.

The JOJOCY adds more emphasis on digitizing paperwork. That changes how useful the device can be outside a classroom because the same overhead setup can assist with capturing documents for electronic storage.

For a small office, that could mean digitizing forms or reference material without using a traditional flatbed scanner for every page. Overhead capture can speed up repetitive document handling, particularly when the original material needs to remain accessible throughout the process.

Books are another good example. A flatbed scanner requires the book to be positioned against a glass surface, while an overhead camera can capture an open page from above.

That does not mean every capture will automatically be perfect. Page curvature, shadows and lighting can affect the result, especially near the center binding of a thick book.

Lighting should therefore be even across the entire capture area. A bright light on one side and shadow on the other can make text recognition less reliable and produce a less professional looking digital copy.

The document should also fill an appropriate portion of the frame. Better framing gives recognition software clearer source material, rather than wasting resolution on a large empty desk surrounding a small page.

Users working with important records should check captured files before discarding or filing away the originals. OCR and automatic correction features are useful tools, but important names, numbers and financial information should still be verified.

Why the JOJOCY takes our number six position

The JOJOCY earns its place because it combines traditional overhead capture with document processing features that can be genuinely useful in an office or classroom. Automatic deskewing and multilingual recognition give it a slightly different focus from document cameras built almost entirely around live video.

The portable format is useful too. Compact equipment works better in shared workspaces, particularly when the document camera needs to move between a classroom, office and home setup.

The scanning oriented functionality can also reduce the need for separate equipment in some situations. A user who occasionally digitizes documents but also needs a visual presenter may appreciate having both workflows available from one device.

The reason we place the JOJOCY at number six is that the five products above it provide stronger features for traditional document camera use. Our number one JOYUSING combines an 8MP camera with WiFi, USB, VGA and HDMI connectivity plus a 7200mAh battery.

The IPEVO V4K at number two offers an 8MP sensor with resolution up to 3264 by 2448 pixels and a highly adjustable stand. Those specifications make it particularly well suited to detailed live classroom demonstrations.

The INSWAN and HUE models higher in the ranking also provide straightforward teaching workflows with flexible positioning, USB connectivity and webcam or microphone functionality depending on the model. Those features may matter more than OCR-style document processing for teachers who primarily need live presentation.

The JOJOCY therefore makes the most sense for a slightly different user. Someone who regularly captures printed pages, works with multilingual documents and still wants overhead presentation functionality may find its feature mix more useful than its ranking suggests.

Users should simply remember that automated document correction does not eliminate the need for good source material. Keep pages reasonably flat, provide even lighting and verify important recognized text before relying on the resulting digital document.

That is why we believe the JOJOCY SmartScan Portable Document Camera deserves the number six position in our Best Document Camera ranking. It falls behind our higher ranked choices in live presentation flexibility and connection versatility, but its automatic deskewing, multilingual document support, portable overhead design and scanning focused features make it a positive option for users who want one device for both document presentation and everyday digitization work.


7
Classroom Visualiser Portable Document Camera
Brand: Generic
Features / Highlights
  • Overhead camera design displays worksheets and books during lessons.
  • Adjustable positioning supports different document sizes and physical objects.
  • Portable construction makes classroom storage and movement more convenient.
  • Computer connectivity supports teaching, presentations, and visual demonstrations.
  • - Compact footprint leaves useful desk space for lesson materials.
Our Score
8.04
CHECK PRICE

This covers the basic classroom job without making the setup complicated

This portable classroom visualiser is designed around the basic purpose of a document camera: put a worksheet, book or physical object underneath the lens and display it so other people can see it more clearly. When comparing the best document camera options, that straightforward approach can still work well for teachers who primarily need an overhead presentation tool rather than a large collection of advanced connection and scanning features.

The usefulness becomes obvious during handwritten demonstrations. A mathematics teacher can work through a problem on paper while students follow each step on a classroom display instead of waiting for the completed answer.

Science lessons can use the same setup for small physical objects. Components, samples and demonstration materials can be positioned underneath the camera and enlarged for students sitting farther away.

This is where a visualiser differs from an ordinary webcam. Overhead capture is designed for physical teaching materials, while a conventional webcam is usually positioned horizontally toward the person speaking.

Books are another practical use. A teacher can open a textbook underneath the camera and discuss a particular diagram or paragraph without scanning the page beforehand.

Camera positioning matters more than people expect

A useful document camera needs to accommodate different material sizes. A full worksheet requires a relatively wide capture area, while a small object should occupy much more of the frame if students are expected to examine its details.

Adjustable positioning helps solve that problem. Moving the camera farther away increases the visible working area, while bringing it closer can provide a tighter view of smaller teaching material.

The goal should always be to use the available image efficiently. Good framing makes classroom content easier to see, particularly when the final picture is being viewed on smaller displays during online lessons.

Leaving a large empty border around a document wastes useful image area. A worksheet should normally occupy most of the frame without cutting off important edges or making the teacher constantly reposition the page.

Lighting has a similar effect on image quality. Even a capable camera can produce a difficult-to-read image when the document sits in a dark area or underneath harsh lighting that creates reflections.

Glossy books and laminated worksheets require particular attention. Move the material or adjust the light source when glare creates bright areas that obscure text.

Physical stability matters too. A stable camera position keeps the image easier to follow, especially while a teacher is writing or manipulating an object underneath the lens.

Before a lesson starts, it is worth checking the actual output on the classroom display rather than relying only on a small computer preview. Text that appears readable on a nearby monitor may look different once projected across a larger room.

Why this classroom visualiser takes our number seven position

This model earns a place in our ranking because it addresses the core document camera workflow in a portable format. Teachers can display physical materials without converting every worksheet, book page or handwritten explanation into a digital presentation first.

The portable construction is useful for shared classrooms. Compact equipment is easier to move and store, particularly when a teacher cannot leave technology permanently installed on one desk.

The adjustable overhead format also gives it more flexibility than simply placing a standard webcam beside a computer. The camera can be positioned specifically around the teaching material rather than forcing the material to fit around a face-oriented camera.

The reason we place this visualiser at number seven is the stronger and more clearly defined feature sets offered by the six products above it. Our number one JOYUSING combines an 8MP camera with WiFi, USB, VGA and HDMI connectivity plus a 7200mAh battery.

The IPEVO V4K at number two offers an 8MP sensor with resolution up to 3264 by 2448 pixels and a multi-jointed stand. Those specifications give teachers a clearer idea of the level of detail and positioning flexibility available.

The INSWAN and HUE options higher in our ranking also provide useful extras such as webcam functionality, autofocus, built-in microphones or flexible camera supports. The JOJOCY adds document-oriented features such as automatic deskewing and multilingual recognition.

This model takes a simpler approach. That gives it fewer standout features compared with the higher ranked cameras, particularly for users who need wireless operation, direct display connections or more advanced document processing.

For straightforward classroom use, however, simple can be perfectly workable. A teacher who mainly needs to display worksheets, handwriting, books and small objects may not use advanced wireless or OCR features often enough for them to matter.

That is why we believe this Classroom Visualiser Portable Document Camera deserves the number seven position in our Best Document Camera ranking. It falls behind our higher ranked choices in advanced connectivity and specialized presentation features, but its adjustable overhead capture, portable construction and straightforward classroom focus make it a positive final option for teachers who mainly want a simple way to put physical lesson material onto a larger screen.

Start with what the audience needs to see

A document camera is useful when you need to show a physical page, demonstrate a small object or write while other people watch. The best choice depends less on a headline resolution number than on whether your material fits the view, remains readable and reaches your actual audience through the software you use. Start with three representative tasks: a full worksheet, a page of smaller print and a live demonstration. A device that handles one comfortably may need different positioning or software settings for the others.

Measure the largest material you expect to show. Include the space needed around a book, a hand or an object rather than recording only the sheet dimensions. Think about portrait and landscape orientation, the desk area available and where the laptop will sit. A stable base is helpful only if the arm can reach the useful area without crowding your writing position. Check the exact model's capture-area specifications and setup instructions before assuming that an overhead-looking camera covers a particular paper size.

Separate live presentation from document archiving. If your main goal is searchable files from stacks of paperwork, the scanner guide for receipts and documents addresses a different workflow. A document camera may support still capture, but scanning, automatic feeding and text recognition depend on the exact hardware and software rather than the category name.

Check field of view and working distance together

Field of view is the area visible at a particular camera position. Working distance is the separation between the camera and your material. Raising a head may show more of the desk but reduce the apparent size of the writing; lowering it may make small details larger while cutting off page edges. Look for the manufacturer's supported positions and focusing distances. Do not assume the arm's maximum height equals its useful full-page capture position.

Test a whole page with all four corners visible, then look at the smallest information the audience must read. Move the material within the supported capture area and check the corners as well as the center. A page that looks sharp directly below the lens may be less readable near its edges. For bound books, examine the curved area near the spine without forcing the binding flat. Use an appropriate support only when it does not destabilize the camera or obstruct your work.

Digital zoom is not the same as moving closer within the supported focusing range or using a model's documented optical zoom. Cropping can make an area occupy more of the shared screen without revealing additional detail. Ask for a demonstration with material resembling yours, not only a colorful object. Record the tested orientation, camera height and application settings so you can reproduce the usable view later.

Articulated document camera beside a blank sheet and closed notebook on a cream desk
Conceptual editorial illustration; not a photograph or test of a ranked product.

Treat focus as part of the live workflow

Autofocus can be convenient when switching from a flat page to an object, but its behavior varies. A moving hand or a reflective surface may cause the image to change while you are explaining something. If the exact model offers a focus lock or manual focus, test how you activate it and whether it remains effective after moving the page. Those controls may be physical, software-based or absent; do not infer them from a camera's shape.

Check ordinary handwriting, small printed text and the thickness of the objects you actually plan to show. Watch what happens when you place a hand in the scene and remove it. Give the camera time to settle, then assess the audience view rather than only the local preview. A focus control that is easy to reach can be more useful in a lesson than a feature hidden several menus deep, but verify that the control works in your chosen application.

For writing demonstrations, leave comfortable hand space and use marks that remain legible in the real shared view. Keep the base stable and follow the arm's adjustment instructions. Do not overtighten joints or extend the mechanism beyond its supported range. If the setup wobbles every time you turn a page, investigate the surface, placement and permitted adjustments before blaming resolution or buying a different cable.

Verify connection, operating system and software

Start with the exact model's connection requirements. USB, HDMI, wireless links and proprietary applications are different arrangements, and not every document camera offers all of them. A USB connector does not by itself establish support for your operating system, browser or meeting software. Check the manufacturer's current compatibility list, required drivers, application versions and any restrictions on a managed work or school computer.

If you use USB, confirm that the port, cable and any adapter support the required connection. A charge-only cable will not substitute for a data connection. If an adapter or hub is part of your route, check the complete arrangement rather than assuming that connector fit proves compatibility. The USB-C hub guide for office laptops can help organize those questions, but the exact camera and computer documentation remain decisive.

Test camera selection inside the application you intend to use. One workflow may choose the document camera as the meeting video input; another may share a window from a camera application. These are not interchangeable for every platform or account policy. Confirm orientation, output size and controls in that route. Close competing applications if they prevent access, following their guidance, and check whether permission prompts require an administrator before a scheduled session.

Build even lighting and test reflective materials

Place your material on a stable, uncluttered surface and test the light before the audience arrives. Uneven illumination can leave one corner difficult to read even when the center looks good. Move a permitted desk lamp or reposition the material to reduce your own shadow, without placing the lamp where it blocks the camera or creates unstable equipment. Built-in lighting, when offered, needs its own test; it is not a guarantee that glossy material will be glare-free.

Try the paper finishes you use most. Glossy worksheets, laminated pages and shiny objects can reflect a bright source toward the lens. A small change in the light's angle or the material's placement may help, but remain within the camera's supported capture arrangement. Avoid balancing objects precariously to achieve a cleaner image. The architect desk lamp guide provides another lighting format to compare, not a promise that any listed lamp will solve your particular glare problem.

Check exposure and color with the actual application controls, if available. Brightness corrections can affect how ink and pale pencil appear. Mixed daylight and room light may also look different through the shared feed than to your eyes. Make adjustments while a participant checks the remote view, and record a simple repeatable position rather than relying on memory at the next session.

Document camera above an open blank book with a desk lamp and laptop nearby
Conceptual editorial illustration; not a photograph or test of a ranked product.

Rehearse motion, audio and the audience view

A still preview cannot show whether a live demonstration is comfortable to follow. Turn a page, write a short line and move the object at your normal teaching pace. Ask a participant whether motion and details remain usable through the real connection. Frame rate, application processing and network conditions can all affect the result. Do not assume a listed capture mode is the mode your meeting software will actually transmit.

Select the microphone separately. Some document cameras include audio features and others do not; even when a microphone exists, its suitability depends on distance, room sound and software selection. Test speech with your normal desk arrangement and confirm which input is active. If you switch between a face camera and the document view, rehearse the transition so you do not accidentally change the microphone or share the wrong window.

Assess the view on a typical audience screen, not only your largest monitor. A full page may fit but still be too small to read on a laptop. Show one relevant area at a time when necessary, explaining the transition rather than moving the page continuously. If a participant needs a separate readable copy, distribute one only when you have permission to share the material and the chosen delivery method meets your organization’s requirements.

Make privacy part of setup and shutdown

Clear the capture area before enabling the feed. Remove personal letters, student names, account details and unrelated paperwork, including items just outside the page that could enter view when the camera moves. A wide overhead view can expose more of a desk than expected. Use a blank practice sheet when configuring the setup, then verify the actual shared area before introducing sensitive material. Do not treat a local preview alone as proof that the meeting is not recording.

Check permissions for the camera application, meeting service and any cloud features you intend to use. Recording, screenshots, OCR and cloud upload are separate capabilities with separate policies. Confirm whether files are stored locally or sent elsewhere, who can access them and how long they are retained. If the documentation does not answer those questions, use your organization’s approved process rather than assuming that a USB connection guarantees local-only handling.

At the end, stop the share and recording as applicable, close the application and disconnect or otherwise disable the camera according to its instructions and your policy. Verify the audience feed has stopped. Turning a camera head toward a bare desk can change what it sees, but is not a substitute for ending capture. Store recorded material only where authorized and remove temporary practice files through the approved method.

Compact document camera beside a blank practice sheet, closed folder, closed laptop and unplugged USB cable
Conceptual editorial illustration; not a photograph or test of a ranked product.

Choose with a realistic acceptance checklist

Before deciding to keep a camera, run the same short session you expect to repeat. Fit the largest page, focus on the smallest required text, test hand movement and check a reflective sample. Use the actual computer, connection, application and account permissions. Confirm that setup is practical without borrowing an administrator or a special cable every time. Check the seller's current return conditions separately; a buying guide cannot guarantee a return window or availability.

For shared classrooms or offices, document the arm position, light placement and software input selection in a brief setup note. Include the approved shutdown and storage steps. A consistent routine can reduce avoidable troubleshooting, but allow for different page sizes and presenters. Protect the lens and joints during transport according to the manufacturer rather than assuming a folding form is automatically durable.

Your final comparison should connect features to tasks: capture area for the largest material, focus behavior for changing depth, stable placement for writing, verified software support for delivery and appropriate privacy controls for your setting. Keep claims conditional until tested on the exact model. The useful document camera is the one that makes your real material readable through your real workflow, with manageable setup and responsible handling of what enters the frame.

Document camera FAQs

Will every document camera show a full page?

No. The visible area depends on the exact model, supported camera position, working distance and page orientation. Check capture-area specifications and test all page corners with the material you intend to show.

Is autofocus always better for live writing?

Not necessarily. Autofocus behavior varies, and moving hands or reflective material can affect it. Test the actual workflow and verify whether the model offers usable focus lock or manual focus in your chosen application.

Can I use a document camera in meeting software?

Only when the exact camera and connection are supported by your computer, operating system and application. Test whether you will select it as a video input or share a camera-application window, including any permission restrictions.

Does a document camera replace a scanner?

It may support still capture, but automatic document feeding, searchable text and archival output depend on the exact hardware and software. For recurring stacks of paperwork, compare a dedicated scanning workflow.

How can I reduce glare on a glossy page?

Try adjusting the light angle or material position within the supported setup and assess the actual audience view. Built-in lighting does not guarantee glare-free results; keep equipment stable and avoid blocking the lens.

Does USB mean my document images stay private?

No. Storage and transmission depend on the camera application, meeting service, permissions and features you enable. Verify recording, cloud upload, access and retention policies, and follow your organization's approved process.


Back to blog