


- Electric coil inserter speeds up repetitive spiral binding work.
- Manual punch handles up to 20 sheets per cycle.
- All 46 punching dies can be individually disengaged.
- Adjustable depth margins support different document thicknesses and formats.
- Includes 100 starter coils plus dedicated crimping pliers.

The S25A gets the parts of coil binding right that actually slow people down
The PrintFinish S25A takes our number one position for Best Book Binding Machine because it combines a substantial manual punch with an electric coil inserter. That combination makes sense for offices, schools, print rooms, and small businesses producing presentations, manuals, reports, notebooks, and training documents regularly.
The punching mechanism handles up to 20 sheets of 20 lb bond paper in one cycle. That is useful capacity for a tabletop machine because a 100-page document can be punched in manageable batches rather than feeding only a few sheets through at a time.
The full-width handle can be operated left-handed, right-handed, or with both hands. It sounds like a small design detail, but the long handle makes repetitive punching easier when you have several documents waiting on the desk.
Once the pages are punched, the electric coil inserter handles the repetitive part of feeding the plastic spiral through the holes. You start the coil manually, bring it against the powered roller, and let the rotating inserter move it through the document.
That is where the S25A starts feeling more suitable for repeated office work than a completely manual coil binder. Manually twisting a long coil through one document is manageable, but doing it repeatedly across a batch of reports gets slow.
The machine uses standard 4:1 pitch plastic coils, meaning four holes per inch. It creates 46 holes across its maximum punching width, with hole spacing of approximately 6.35 mm.
The adjustable dies are what make this much more flexible
All 46 punching dies can be disengaged individually. This is a major advantage when binding documents that do not perfectly match the machine's standard punching width.
If the final hole would land awkwardly near the edge of a custom-size page, that die can be switched off. Disengageable dies prevent unwanted edge holes and give you much more control over how the finished document looks.
This becomes useful when producing booklets, presentations, calendars, reference manuals, or other material that is not always standard Letter or A4 size. Fixed-die machines give you less control because every punch remains active regardless of the paper width.
The S25A also uses an open-throat design. That allows larger documents to be punched progressively rather than limiting every project to material that fits completely inside the punching throat in one pass.
There is some technique involved when punching oversized material. Alignment needs to remain accurate between passes, otherwise the spacing can become inconsistent where the two punching sections meet.
Test unusual sizes on scrap paper first. That simple step can save an expensive printed cover or presentation from being ruined by a badly positioned row of holes.
The depth margin is adjustable to approximately 2.5, 4.5, and 6.5 mm. This controls how far the holes sit from the edge of the paper.
Thin documents can generally use a shallower margin because the coil does not need to wrap around a very thick stack. A thicker book benefits from moving the holes farther inward so there is more paper surrounding each punched hole.
Choosing the wrong depth can affect durability. Punch too close to the edge on a thick document and the narrow strip of paper around the holes receives more stress as pages are turned.
Match the margin to document thickness rather than automatically leaving the machine at the same setting for every project.
The side-margin adjustment handles another part of alignment. Before punching an entire document, set the guide and run a few scrap sheets through the machine.
Fold or stack those samples exactly as the final document will sit. Check that the first and last holes look balanced rather than having one hole almost touching an edge.
This is especially important with covers. A misplaced hole in ordinary internal paper is annoying, but making the same mistake on an expensive transparent or printed cover wastes more material.
The S25A can work with documents up to approximately 11.8 inches wide in its standard punching area. That comfortably covers common office document formats while the open-throat arrangement gives additional flexibility for unusual projects.
Why we gave the PrintFinish S25A the number one position
The electric coil inserter is the feature that changes the workflow most. After punching and aligning the pages, select a coil diameter appropriate for the finished document thickness and manually feed the first portion through several holes.
The electric roller can then continue the insertion. Powered insertion saves time on larger batches, particularly compared with twisting every coil through the complete document by hand.
Do not rush the first few holes. If the pages are misaligned when insertion begins, the coil can miss a hole or start feeding incorrectly.
Square the punched pages carefully before inserting the spiral. Covers should be aligned with the internal pages at this point as well.
The manufacturer states that the S25A can accommodate coil-bound documents up to 2 inches thick when the correct coil is used. That gives the machine considerable flexibility beyond thin presentations.
The included starter coils are 8 mm and are intended for documents around 52 sheets. Different document thicknesses require different coil sizes, so the free coils should be treated as a useful starter supply rather than the only size you will ever need.
A coil that is too small makes pages difficult to turn and can compress the document. A coil that is excessively large works, but the finished book feels loose and unnecessarily bulky.
Measure or estimate the completed stack after the covers have been added. Select the coil around the finished thickness rather than the number of pages alone because paper weight and cover material change the total thickness.
The package also includes a crimping tool. This is important because inserting the spiral is not the final step.
After the coil has passed through the complete document, trim and crimp both ends. Proper crimping keeps the coil secured and reduces the chance of it gradually rotating out of the document during use.
There is a little technique involved. Coil crimping pliers cut the excess material and bend the end at the same time, so orientation matters.
Practice on one of the included coils before finishing an important client presentation. Once the motion is familiar, the finishing process becomes quick.
The machine includes a box of 100 8 mm coils, which means you can actually start binding smaller documents without immediately ordering consumables. That is a useful inclusion for someone buying their first spiral book binding machine.
The starter kit is genuinely usable, because the crimper and coils are both necessary parts of producing a finished coil-bound document.
The manual punch itself does not mean you should force 20 sheets through regardless of paper type. The 20-sheet rating is based on 20 lb bond paper.
Heavier paper, laminated material, plastic covers, or thicker stock should be punched in smaller quantities. Trying to force too much material through the dies can produce incomplete holes, jams, or unnecessary wear on the mechanism.
This is one of the most common mistakes with any binding machine. People see the maximum sheet rating and treat it as a requirement rather than a limit.
Reduce the batch for heavier materials. Punching a few additional cycles is much faster than clearing a jam or damaging an important printed project.
Covers should often be punched separately from the internal pages. A thick clear cover behaves differently from normal copier paper, and separating it gives you more control over alignment.
The waste tray needs attention too. Every punching cycle produces paper chips, and eventually those chips have to go somewhere.
Empty the tray periodically rather than waiting until it is packed. An overfilled chip tray can contribute to messy operation and punching problems.
Routine cleaning keeps punching more consistent, particularly in an office where the machine may process hundreds of pages in one session.
The S25A weighs around 21 pounds, or approximately 9.5 kilograms. That is substantial enough to give the machine a stable tabletop presence while remaining movable within an office or print room.
Give it enough workspace around the sides before beginning a large job. You need room for unpunched pages on one side, completed punched sections on another, and enough clearance to handle coils without bending them unnecessarily.
A binding machine can have a fairly modest physical footprint while the actual workflow consumes much more desk area. Planning that space first makes batch work noticeably easier.
Organize documents before punching anything. Once several nearly identical page stacks are sitting around the machine, mixing sections between reports is surprisingly easy.
For a 150-page training manual, for example, divide the document into consistent punching batches while maintaining page order. Punch the front cover separately, work through the paper, then finish with the rear cover.
After everything has been punched, tap the complete stack against a flat surface to align it. Then insert the appropriately sized coil through the first few holes before moving to the electric roller.
This workflow is much more reliable than punching random stacks and immediately feeding each one onto a coil. You want the complete document checked and aligned before final binding.
Page order should be verified before coil insertion, because correcting a mistake afterward means cutting or removing the coil and binding the document again.
One of the practical advantages of plastic coil binding is that finished documents can open flat on a desk. Pages can also fold back around the coil, which is useful for manuals, workbooks, training material, cookbooks, reference documents, and notebooks.
That is different from some binding formats where the spine restricts how comfortably the pages can fold behind one another. For documents used while someone is actively working, the ability to fold pages back can be genuinely useful.
Plastic coils are also available in different diameters and colors. An office can use different colors to distinguish departments, document types, years, or client projects if that helps organization.
The S25A's 4:1 pitch needs to be remembered when ordering supplies. Buy coils that match the 4:1 pattern, because coil pitch and punch pattern have to correspond.
Do not order binding supplies simply because the diameter looks correct. Pitch describes the hole spacing, while diameter relates to how thick a document the coil can accommodate.
Both need to be right. A correctly sized coil with the wrong pitch will not properly align with the punched holes.
The electric inserter should also be treated as an insertion aid rather than something that fixes badly punched documents. If the holes are not aligned or the coil is bent, the roller can struggle to feed it cleanly.
Good punching makes insertion much easier, which is why setting margins and aligning paper before each punch matters so much.
When a coil stops feeding smoothly, do not force it aggressively against the roller. Check whether the pages have shifted or whether the coil itself has become distorted.
Correct the alignment first. A few seconds spent fixing the stack can prevent damaged holes or a visibly uneven finished document.
The full handlebar is another feature we like for repeated punching. Users can choose the hand position that feels most comfortable rather than being forced to operate a small lever from one side.
Two-handed operation can also help when punching near the machine's maximum recommended paper capacity. The force is distributed more naturally across the handle.
The manual punch keeps operation straightforward, while the electric inserter handles the part of coil binding where motorization provides a particularly noticeable time saving.
This hybrid approach is one reason the S25A works well in a small office. A fully automatic production binding system would be unnecessary for occasional reports, while a completely manual machine becomes slower when several documents need to be completed.
The S25A sits between those two situations. You still control the punching process directly, but coil insertion is assisted electrically.
That makes it suitable for schools too. Teachers or administrative staff can produce course packs, workbooks, classroom manuals, and presentation material without sending every small binding job to a commercial printer.
In-house binding gives you more control over last-minute revisions because a document can be reprinted and rebound immediately rather than sent out again.
For a small business, the same applies to proposals and client presentations. If one page changes ten minutes before a meeting, the document can be corrected and rebound on site.
Coil binding also creates a finished result that looks more deliberate than stapling a thick stack of paper. Front and rear covers can be added, and the pages remain contained along the full binding edge.
The 46 disengageable dies are particularly important for those professional-looking results. If the paper width leaves an awkward final hole, simply disengage the appropriate punch rather than accepting an uneven edge.
That control separates it from simpler machines, especially fixed-die binders that give the operator fewer options with custom document sizes.
The depth-margin settings also become more important as coil diameter increases. A thick book puts more movement around the binding edge as pages rotate around the coil.
Moving the holes slightly farther from the edge gives the paper more material around each hole. This can improve durability on documents that will be handled regularly.
Do not move the holes excessively far inward either. That can reduce usable page area and make the binding edge feel unnecessarily wide.
The correct setting is a balance. Use scrap sheets to confirm alignment before punching a complete print run.
The machine carries a two-year manufacturer warranty for defective parts. That is reassuring for equipment containing both a mechanical punching assembly and an electric insertion system.
Normal maintenance still matters. Keep paper chips cleared, avoid liquids around the electric components, and do not exceed the recommended punching capacity.
Place the machine on a stable, level work surface. Punching applies downward force through the handle, so a shaky folding table is not an ideal permanent location.
A stable surface improves punching control, particularly when processing larger batches close to the 20-sheet limit.
There are a few limitations worth understanding. Punching remains manual, so somebody producing hundreds of bound books every day would probably want a more automated commercial system.
The 20-sheet punch capacity is good for an office machine but still means a thick manual needs several punching cycles. That is normal for this category rather than a defect.
There is also a learning curve around coil sizing and crimping. The first few books may take longer while you work out the correct coil diameter and become comfortable finishing the ends.
The process becomes much faster with repetition. Once the margins are set and the operator knows the workflow, producing consistent documents is fairly straightforward.
The free 8 mm coils are useful for learning because mistakes during the first few attempts do not mean wasting separately purchased premium supplies. Practice punching, inserting, and crimping with ordinary test pages first.
Then move onto the actual presentation or manual. This is especially worthwhile when the final document uses expensive covers or professionally printed pages.
We believe the PrintFinish S25A deserves the number one ranking out of seven for Best Book Binding Machine because the feature set is unusually complete for a tabletop coil binder. It combines a 20-sheet manual punch, electric coil inserter, 46 individually disengageable dies, adjustable side and depth margins, an open-throat design, 4:1 pitch compatibility, and support for documents up to approximately 2 inches thick.
The included crimping pliers and 100 starter coils make the package more useful immediately, while the two-year manufacturer warranty adds some reassurance for longer-term office use. It is not a fully automatic commercial production machine, but that is not what most offices, schools, and small print environments need.
Use the correct coil diameter, reduce punching batches for heavier stock, test custom margins on scrap paper, empty the waste tray regularly, and crimp both coil ends properly after insertion. Set up that way, the S25A delivers a professional binding workflow with enough flexibility and speed to justify its number one position in this seven-machine comparison.

- Punches up to 15 sheets of 80gsm paper.
- Binds up to 130 sheets with 5/8-inch wire.
- Thirty-four disengageable dies support customized punching layouts.
- Adjustable depth margins improve results across different projects.
- Heavy-duty all-metal construction supports frequent office binding.
The 34 adjustable dies are what make this machine genuinely useful
The RAYSON TD-1500B34 takes the number two position in our Best Book Binding Machine comparison because it gives you far more control over punching than a basic fixed-pattern binder. It uses a 3:1 pitch wire binding system with 34 square-hole punching dies, and those dies can be individually disengaged when a particular document size needs a different hole pattern.
The machine can punch up to 15 sheets of 80gsm paper in one operation and bind documents containing up to approximately 130 sheets when using a 5/8-inch wire spine. That is enough capacity for reports, training manuals, presentations, notebooks, calendars, proposals, and other medium-sized documents.
The 34 disengageable punching dies are the feature I would pay the most attention to. Fixed punching patterns are fine until you work with a page size where the final hole lands awkwardly close to the edge.
With the TD-1500B34, individual dies can be switched off. This gives you more control over the first and last holes and makes the machine useful for custom notebooks, calendars, and documents that do not always follow one standard format.
The machine produces square holes using a 3:1 pitch pattern. That means you need compatible 3:1 wire binding spines rather than buying coils or wires based only on their diameter.
Pitch and spine size are separate measurements. The 3:1 pitch determines the spacing of the holes, while the wire diameter determines how thick a finished document can be.
The 15-sheet punch is enough for real office work if you use it properly
Fifteen sheets per punch is a practical capacity for a manual desktop binding machine. A 120-page report still requires several punching cycles, but the batches are large enough that the job does not become painfully repetitive.
The important detail is that the maximum specification applies to standard 80gsm paper. Thicker cardstock, plastic covers, and other dense materials need smaller batches.
The machine is rated to punch up to two sheets of 0.2mm plastic binding cover at once. Heavy covers should be punched separately rather than being forced through together with a full stack of ordinary paper.
This is a common mistake with book binding machines. Someone sees a 15-sheet rating, adds 15 pages plus two covers, and then applies more force when the handle does not move normally.
More force is not the answer. Reduce the stack and punch another batch.
Overloading can create incomplete holes, jams, rough edges, or unnecessary stress on the punching mechanism. A few additional punching cycles take far less time than dealing with a damaged project.
The adjustable depth margin is another useful control. The TD-1500B34 provides margin settings around 2.5mm, 3.5mm, and 4.5mm, allowing the row of holes to sit closer to or farther from the paper edge.
That adjustment matters because a thin presentation and a 130-sheet manual place different demands on the binding edge. With a thicker document, placing the holes slightly farther inward leaves more paper surrounding each hole.
For a small booklet, an excessively deep margin can look awkward and consume usable page space. The correct setting depends on the thickness and format of the finished project.
Before punching an expensive printed document, use several scrap sheets. Set the side guide, choose the depth margin, engage the required dies, and make one test punch.
Check both ends of the hole pattern. You want the first and last holes to look intentional rather than having one sitting almost against the page edge.
This test becomes especially important with custom-size documents. One wasted sheet of copier paper costs almost nothing compared with ruining a printed cover or a completed presentation.
The wire-closing stage also requires the correct wire size. A wire that is too small compresses the pages and makes them difficult to turn, while one that is much too large leaves the finished book unnecessarily loose.
For its maximum binding specification, the machine handles up to approximately 130 sheets of 80gsm paper using a 5/8-inch wire. Smaller documents should use appropriately smaller wire spines.
Choose wire size from finished thickness, including the front and rear covers. Do not estimate only from the number of internal sheets because heavier covers change the total stack thickness.
The built-in wire closer is where some practice helps. The punched pages need to sit correctly on the wire before it is compressed into its final closed shape.
If the wire is positioned badly, closing can become uneven. Do not immediately assume the machine is defective if the first attempt looks slightly inconsistent.
Practice with spare paper and inexpensive wire first. After a few documents, it becomes much easier to judge placement and pressure.
Wire binding has a short learning curve, but the finished result can look considerably more professional than a stapled report or basic plastic comb document.
Why the RAYSON finishes second instead of taking our top position
The all-metal construction is one of the reasons this machine ranks so highly. It weighs around 20 pounds and measures roughly 18.1 inches wide, 10.2 inches deep, and 13.8 inches high, giving it a substantial tabletop presence rather than the lightweight feel of some basic plastic binders.
That weight is useful during punching. Pulling a manual punch handle applies a meaningful amount of force, and a stable machine is easier to operate when it is not shifting around the desk.
The metal frame suits repeated office use, especially for schools, home businesses, administrative offices, and small print environments producing bound documents regularly.
Place it on a solid, level surface. A folding table that moves every time the punching handle comes down makes alignment harder and turns a straightforward job into a frustrating one.
The two-handle layout also separates punching and wire-closing functions. This makes the workflow easier to understand once several documents are being processed at the same time.
A sensible workflow is to prepare the entire document first. Check page order, separate the covers, and divide the internal pages into punching batches.
Punch the front cover, work through each paper batch, then punch the rear cover. Keep everything stacked in sequence.
Verify page order before adding wire. Discovering that pages 43 and 44 are reversed after the wire has been closed means reopening or replacing the binding.
Once all pages are punched, align the stack carefully and insert the appropriate 3:1 wire. Make sure every punched hole has properly engaged with the wire before using the closing mechanism.
This is where the square holes produce the characteristic wire-bound appearance. The finished document can open flat, which is useful for manuals, workbooks, notebooks, calendars, and reference material.
Wire binding also allows facing pages to remain relatively flat on a desk. That can be more practical than a tightly glued document when somebody needs both hands free while reading instructions.
Flat-opening documents are useful for working material, not simply for appearance. Training manuals and instructional documents are good examples because users frequently need the page to remain open without holding it.
Calendars are another strong application for the disengageable dies. Custom punching lets you avoid placing holes where another feature needs to sit, and wire binding creates a clean finished edge.
The machine's adjustable paper guide should be set before starting a batch. Once the first test page is correct, keep the guide fixed so subsequent stacks enter at the same position.
Inconsistent feeding is one of the easiest ways to produce a document where the punched holes shift slightly from section to section. That becomes visible after the pages are assembled.
Consistency matters more than punching quickly. Taking another second to square each stack against the guide produces a cleaner final book.
The paper scrap drawer also needs regular attention. Every punched hole creates a small piece of waste, and those scraps gradually collect underneath the punching mechanism.
Empty the drawer before it becomes packed. A full waste tray can interfere with clean operation and makes maintenance unnecessarily messy.
New punching dies may also carry a little protective manufacturing oil. If you notice residue on initial test sheets, run scrap paper through the machine until the punching area is clean before using an important printed document.
Always make initial punches on scrap paper. It checks alignment, clears possible manufacturing residue, and confirms that the selected dies are engaged correctly.
The TD-1500B34 includes starter binding spines, so basic test projects can be produced without immediately ordering every accessory separately. Longer-term use will obviously require additional 3:1 wire supplies in the diameters appropriate for your documents.
Keep several common sizes if the machine is used for different projects. A 30-page presentation and a 120-page manual should not be forced into the same diameter wire.
For offices producing branded reports, wire color can also become part of the presentation. Black, white, silver, or other compatible wire finishes can be matched with covers and document designs.
The binding becomes part of the finished presentation, which is why wire binding remains popular for proposals, portfolios, calendars, and client-facing documents.
The machine is also useful for short-run notebook production. Print the internal pages, add heavier front and rear covers, punch the complete set in appropriate batches, and close it with a correctly sized wire.
This can be useful for small businesses creating planners, training workbooks, journals, or internal forms without outsourcing every short print run. A revision can be printed and rebound immediately.
The 130-sheet limit does need to be respected. If your project regularly exceeds that thickness, this particular wire format may become restrictive.
Very thick books need another binding approach, or the document may need to be divided into multiple volumes. Trying to force too many sheets into a smaller wire produces poor page movement and an unprofessional finish.
The biggest difference between this RAYSON and our first-ranked PrintFinish S25A is the workflow. The S25A adds an electric coil inserter and can handle substantially thicker coil-bound documents, which gives it an advantage for repeated production and larger projects.
The RAYSON remains fully manual and uses twin-loop wire binding. That means more operator involvement, particularly during the closing stage.
This is the main reason it finishes second rather than first. The PrintFinish provides a faster production workflow for users processing multiple coil-bound documents, while this RAYSON prioritizes customizable wire binding.
There is an argument in the RAYSON's favor, though. Wire binding has a distinctive professional appearance that many people prefer for presentations, calendars, portfolios, and formal reports.
The 34 disengageable dies also provide excellent control over custom layouts. For someone producing unusual page sizes, that flexibility may matter more than having an electric coil inserter.
So the ranking depends partly on workflow. Our number-one machine is the stronger overall package, while the TD-1500B34 is particularly good when custom wire binding is the priority.
Another advantage is that there are no complex electronic components involved in normal punching and closing. The mechanism is direct and mechanical, which suits users who prefer straightforward equipment.
That does not mean maintenance can be ignored. Keep the punching area clean, empty paper scraps, avoid overloading the dies, and store the machine somewhere dry.
If the punching handle suddenly requires much more force than normal, stop. Check the paper stack and alignment rather than applying more pressure.
Forcing a jam can damage the mechanism, while removing a few sheets usually solves an overloaded punch immediately.
The machine's 15-sheet capacity should be treated as a maximum for standard paper, not the ideal batch size for every material. With 100gsm or heavier stock, reduce the number accordingly.
The same applies to laminated covers. Test one sheet first and check that the holes are clean before attempting a second layer.
For large binding sessions, organize the work surface into three areas: unpunched material, punched material, and completed documents. This prevents finished and unfinished stacks from becoming mixed together.
A simple workflow reduces expensive mistakes, especially when several nearly identical reports are being produced for different clients.
Label each stack before punching if necessary. Once covers are removed and pages are divided into batches, several documents can look almost identical.
For a school or training department, the RAYSON can be useful for course packs, assessment booklets, manuals, and workbooks. Wire-bound documents can withstand repeated opening while maintaining a relatively clean presentation.
For a design studio, it can handle portfolios and client proposals. The square-hole pattern and twin-loop wire produce a more formal finish than many inexpensive comb-bound documents.
The finished appearance is one of its strengths, and that matters when the document itself represents a business or professional service.
The machine also works well for calendars because pages turn cleanly around the wire. Custom die selection can help with nonstandard layouts where fixed-hole machines become awkward.
The main limitation is that producing perfect wire closure takes more practice than simply feeding a plastic comb through punched pages. Closing pressure and wire positioning need to be consistent.
Do a few practice documents first. It is better to waste inexpensive test wire than to learn on a presentation that has already been professionally printed.
Once the closing technique is learned, the TD-1500B34 becomes much faster and more predictable to operate.
We believe the RAYSON TD-1500B34 deserves the number two ranking out of seven for Best Book Binding Machine because it combines a 15-sheet punch capacity, 130-sheet binding capacity, 3:1 twin-loop wire compatibility, 34 disengageable square-hole dies, adjustable punching margins, and durable all-metal construction.
It falls just short of our first-ranked PrintFinish S25A because the RAYSON lacks the electric insertion assistance and larger binding flexibility that make the S25A particularly efficient for repeated production. The wire-closing stage also has a little more of a learning curve.
For users who specifically want professional twin-loop wire documents, though, this is a very capable machine. Set the margins carefully, test the punching pattern on scrap paper, choose the correct 3:1 wire diameter, stay within the punching capacity, and practice the closing mechanism before working on expensive projects.
Used that way, the TD-1500B34 produces clean professional bindings for reports, calendars, manuals, notebooks, presentations, and specialty projects, making it a strong second-place choice in our seven-machine comparison.

- Punches up to 22 sheets of 80gsm paper.
- Binds documents up to approximately 400 sheets thick.
- Twenty-one disengageable blades support different document widths.
- Three depth margins provide better control over hole placement.
- Separate punching and binding handles simplify repetitive workflows.
The 400-sheet capacity is where this RAYSON starts making sense
The RAYSON SD-220B takes the number three position in our Best Book Binding Machine comparison because it handles considerably thicker documents than many small desktop binders. It can punch up to 22 sheets of 80gsm paper per cycle and bind documents containing around 400 sheets with an appropriately sized plastic comb.
That combination works well for offices, schools, print rooms, training departments, and small businesses producing manuals or reports in-house. The 400-sheet binding capacity means you are not restricted to thin presentations when a much larger reference document needs to stay together.
The machine uses the familiar 21-hole plastic comb format for A4-size and smaller paper. It creates rectangular 3 x 8 mm holes with approximately 14.25 mm between hole centers.
Plastic comb binding has one practical advantage that gets overlooked. The comb can be reopened, so pages can be added, removed, or replaced later without destroying the complete binding.
Imagine producing a staff training manual in January and changing five procedures in March. Instead of throwing away the whole book, you can reopen the comb, replace the outdated pages, and close it again.
Reusable combs make revisions much easier, particularly for internal manuals, policies, course materials, and documents that are expected to change.
The 21 disengageable blades give you much better punching control
The SD-220B uses 21 punching blades, and each can be disengaged. That matters when the paper being bound is narrower than standard A4 or when the normal hole pattern would leave an awkward partial hole near an edge.
Instead of accepting an ugly final punch, you can disable the unnecessary blade. This makes the machine much more useful for custom booklets, small manuals, reports, and other projects where page width changes.
Disengageable blades prevent bad edge holes, and that is one of the features separating this model from simpler comb binders with fixed punching patterns.
The machine also provides three depth-margin settings of approximately 3mm, 5mm, and 7mm. Depth margin determines how far the holes sit from the binding edge of the paper.
That setting should change depending on the document. A thin report can use holes closer to the edge, while a very thick manual generally benefits from moving the punching line farther inward.
The reason is basic durability. If a thick book has holes punched extremely close to the paper edge, there is less material surrounding each hole while hundreds of pages are being turned.
Thicker books need stronger hole margins, so having three positions is genuinely useful rather than being an adjustment most users can ignore.
Before punching the real document, use scrap paper. Set the side guide, choose the required depth, select the punching blades, then punch two or three test sheets.
Look at the first and final holes carefully. They should appear reasonably balanced rather than having one hole sitting awkwardly close to the side of the sheet.
This is particularly important when using printed covers. A mistake on an ordinary internal page costs almost nothing, while ruining a professionally printed front cover is much more irritating.
Always test the alignment first, especially when switching between paper sizes.
The 22-sheet punching capacity is generous for a manual comb binder. A 200-page document can be processed in roughly ten punching batches if standard 80gsm paper is being used and the machine is operated near its rated capacity.
That does not mean 22 sheets should be forced through regardless of material. Cardstock, laminated sheets, clear plastic covers, and heavier paper create more resistance than ordinary copier paper.
Reduce the number of sheets when using thicker materials. If the handle suddenly requires much more force than normal, stop rather than leaning harder on it.
The maximum capacity is a limit, not a target that every stack needs to reach.
Overloading a punch can produce incomplete holes or jams and puts unnecessary stress on the punching mechanism. Taking an extra few cycles is quicker than dealing with a damaged document.
The SD-220B uses two separate handles. One controls punching while the other opens and closes the plastic binding comb.
This separation makes the workflow fairly easy to understand. Punch the pages first, place the correct comb onto the binding mechanism, open it, load the punched pages, then close the comb.
Separate handles keep the workflow clear, especially when several books are being assembled during the same session.
Plastic comb selection matters here. The machine supports comb sizes from around 6 mm up to 51 mm, which corresponds to a very broad range of document thicknesses.
A small 6 mm comb is intended for roughly 2 to 20 sheets, while the largest 51 mm size can accommodate approximately 361 to 410 sheets depending on paper thickness. The correct comb should be selected around the completed document rather than guessed from appearance.
Using a comb that is too small compresses the pages and makes them difficult to turn. Using one that is excessively large makes a thin document feel loose and unfinished.
Match comb diameter to document thickness, including front and rear covers rather than counting only the internal pages.
Why we placed the SD-220B third instead of first or second
The all-metal construction is one of the strongest reasons to consider this machine for repeated office use. RAYSON specifies a metal body measuring approximately 460 x 250 x 380 mm.
A substantial base matters because punching 22 sheets manually creates downward and rotational force. A machine that moves across the desk every time the handle is pulled becomes frustrating very quickly.
Place it on a stable work surface with enough room for unpunched pages, completed punched stacks, combs, and finished documents. Binding needs more desk space than expected once a large project has been separated into multiple punching batches.
For a 300-page training manual, I would organize the complete document before touching the punch. Confirm the page order, separate the front and rear covers, and divide the internal pages into manageable batches.
Punch each stack in sequence and immediately return it to the correct position. Do not create ten identical-looking piles around the machine and assume you will remember which one comes next.
Once everything is punched, check the page sequence again. Fix mistakes before loading the comb, because correcting page order afterward means reopening the binding.
The ability to reopen plastic combs does make corrections easier than some permanent binding methods. That is one reason comb binding remains practical for business documents that may need revisions.
A company handbook is a good example. If a policy changes, the affected pages can be reprinted, punched, and inserted without recreating the complete book.
That makes comb binding less permanent-looking than twin-loop wire, but more flexible. The right choice depends on whether presentation or future editing matters more.
Comb binding is particularly good for editable manuals, reference documents, course material, and internal business reports.
The SD-220B also includes a paper waste tray. Every punching cycle creates 21 small rectangular pieces of paper, and a large binding project creates hundreds of them surprisingly quickly.
Empty the tray periodically. RAYSON specifically recommends clearing waste paper in time rather than allowing the compartment to become completely packed.
A full waste tray creates unnecessary mess and can eventually interfere with clean operation. It takes seconds to empty, so there is little reason to postpone it.
Regular cleaning keeps punching more consistent, especially when the machine is used for several large documents in one session.
The manufacturer also recommends using the supplied oil-removing paper for the initial punches. New punching blades may carry a small amount of protective oil from manufacturing.
Run the cleaning sheet or scrap paper through first. You do not want the first pages punched by a new machine to be the expensive covers of an important presentation.
This is a small setup detail, but useful. Test punching also confirms that the dies, paper guide, and margin position are configured correctly.
Scrap paper should be the first test, not the finished client document.
The manual design has another advantage. There is no electrical power requirement, so the machine can be placed wherever there is enough workspace rather than needing to sit beside an outlet.
There are also fewer electronic components involved in normal operation. Punching and comb opening are controlled mechanically by the two handles.
The tradeoff is speed. Every punching cycle still requires physical operation, and opening the binding comb is manual as well.
Large production runs remain labor intensive, particularly if hundreds of books rather than hundreds of pages are being produced.
This is one of the reasons the SD-220B does not take our number-one position. The PrintFinish S25A adds an electric coil inserter, giving repeated binding jobs a more assisted workflow.
Our second-ranked RAYSON TD-1500B34 also creates twin-loop wire documents, which can provide a more polished presentation for portfolios, calendars, and formal client-facing reports.
The SD-220B instead prioritizes high-capacity plastic comb binding. That gives it a different advantage: very thick documents can remain editable after binding.
The 400-sheet capacity is its biggest strength, particularly for manuals and large reference books where a smaller wire binder may reach its limit much earlier.
The machine is also useful in schools. Teachers can bind workbooks, course notes, assessment materials, and classroom manuals without sending small jobs to an outside print shop.
A student workbook can be reopened later if an updated worksheet needs to be added. That is much easier than rebuilding a permanently bound document.
Small businesses can use the same flexibility for employee manuals, product catalogs, procedure books, reports, and presentation packs. Short runs can be produced as needed rather than ordering large quantities in advance.
In-house binding makes revisions much faster, especially when a document changes frequently.
The 21-hole pattern should be considered when ordering supplies. Use compatible plastic combs and make sure the spine diameter matches the document thickness.
RAYSON's manual provides a useful range. A 12 mm comb suits roughly 46 to 80 sheets, 19 mm around 121 to 140 sheets, 25 mm around 171 to 200 sheets, and larger sizes continue upward toward the machine's maximum capacity.
Those figures assume standard paper. Heavier paper and covers increase thickness more quickly, so physical stack thickness still matters.
Do not choose combs by page count alone, especially when using cardstock dividers or heavy covers.
The punched hole size is approximately 3 x 8 mm. These rectangular holes are designed around plastic comb binding rather than coil or wire systems.
That means this is not a universal machine for every binding spine. If you specifically need spiral coil documents, use a coil binding machine.
Likewise, if twin-loop wire is required for a particular presentation style, our second-ranked TD-1500B34 is the more appropriate RAYSON model. Buying the correct binding system matters more than choosing the machine with the largest capacity.
Comb, coil, and wire are different systems, even though the machines can look fairly similar in product photographs.
Plastic combs are particularly useful when editing is expected. Wire offers a more permanent professional appearance, while coil allows excellent page rotation and durability.
The SD-220B therefore makes the most sense when capacity and editability are higher priorities than having the most premium-looking spine.
For very thick documents, test page turning before completing a full production run. A book may technically fit inside a large comb while still feeling cumbersome if the comb size is poorly matched.
Make one finished sample first when producing multiple identical manuals. Check page movement, margins, cover alignment, and comb size before binding the remaining copies.
This can save a surprising amount of wasted work. If the comb needs to be one size larger, discovering that after the first book is much better than after twenty.
The machine's depth-margin adjustment also becomes increasingly important on those thicker books. Moving the holes farther from the edge provides more paper around each rectangular opening.
For thinner presentations, a shallower margin keeps the binding edge compact. There is no reason to use the deepest setting automatically.
The side guide should also remain fixed once the test sheet is correct. Repeatedly changing it between punching batches creates inconsistent hole placement.
Consistency creates a cleaner finished spine, particularly when hundreds of pages need to line up on the same comb.
Another advantage of plastic comb binding is that pages can be photocopied or replaced fairly easily. Open the comb, remove the required section, make the change, then close it again.
This can be valuable for regulated workplaces where procedures are updated periodically. Instead of discarding a 300-page manual because six pages changed, replace the relevant section.
The savings become more noticeable when many copies of the same manual are maintained. Paper, printing time, and staff effort are all reduced.
Editable binding works well for living documents, which is a practical reason to choose comb binding beyond its lower consumable cost.
There are limitations. Plastic combs do not normally provide the same premium appearance as metal wire, and a comb-bound document does not rotate completely around its spine in the same way as many coil-bound books.
The machine is also manual, so a print shop producing very high daily volumes may want an electric punch or more automated finishing equipment.
For office-scale production, though, those compromises are reasonable. The machine gives you substantial punching and binding capacity without the cost and complexity of commercial production equipment.
It sits comfortably between light and industrial use, which is why it ranks strongly in this comparison.
Maintenance is straightforward. Keep the waste tray clear, avoid punching inappropriate materials, and store the machine in a dry office environment.
The manual specifically warns against punching materials such as wet paper, fabric, glass, or metal. The punching mechanism is designed around appropriate paper and compatible binding covers.
Do not experiment with unsuitable material just because it physically fits into the slot. Damaged dies are far more expensive than using the correct tool for another material.
Use the punch only for suitable media, and reduce batch size whenever material is thicker than standard 80gsm paper.
We believe the RAYSON SD-220B deserves the number three ranking out of seven for Best Book Binding Machine because it combines a 22-sheet punching capacity, approximately 400-sheet maximum binding capacity, 21 disengageable blades, three adjustable depth margins, dual independent handles, metal construction, and support for plastic combs from around 6 mm to 51 mm.
It ranks below the PrintFinish S25A because that model provides electric coil insertion and a more efficient workflow for repeated spiral binding. It also sits behind the RAYSON TD-1500B34 because wire binding provides a more polished finish for certain professional presentations, while that machine retains excellent custom punching control.
The SD-220B still has a clear advantage for large editable documents. If your work involves thick manuals, reports, training books, course packs, or documents that may need pages replaced later, its high comb capacity is extremely practical.
Set the margins using scrap paper, keep punching batches within the 22-sheet rating for standard 80gsm stock, choose the correct comb diameter, empty the waste tray regularly, and verify page order before closing the spine. Used properly, the SD-220B delivers dependable high-capacity comb binding and earns a strong third-place position in our seven-machine comparison.

- Electric coil inserter speeds up repetitive spiral binding jobs.
- Punches up to 20 sheets per manual cycle.
- Uses standard 4:1 pitch plastic binding coils.
- Three adjustable depth margins improve document hole positioning.
- Includes crimping pliers and 100 starter coils.
The electric inserter is the feature that makes the S20 worth considering
The PPE S20 takes the number four position in our Best Book Binding Machine comparison because it combines a manual 20-sheet punch with an electric coil inserter. It is designed around 4:1 pitch plastic coils and can produce spiral-bound reports, presentations, workbooks, manuals, notebooks, and other documents without requiring a separate coil insertion machine.
The punch is rated for up to 20 sheets of 20 lb paper at once. That is a useful capacity for an office or school because a 100-page document can be divided into relatively large punching batches instead of feeding only a few pages through each time.
The electric coil inserter saves time once all of those pages have been punched. Rather than twisting the complete plastic spiral through dozens of holes by hand, you start the coil through the first few holes and use the powered roller to continue feeding it through the document.
This becomes more important when several copies of the same report need to be finished. Manually inserting one spiral is manageable, but repeating the process across ten or twenty books gets slow.
The S20 creates 46 holes across its standard punching width and uses 4:1 pitch coils. That means there are four punched holes per inch, so replacement binding supplies need to match that pitch.
Coil pitch and coil diameter are different. The 4:1 pitch determines the hole spacing, while the diameter determines how thick a document the plastic coil can comfortably hold.
The adjustable margins give you useful control over thicker books
The S20 provides three adjustable punching-depth positions at approximately 2.5, 4.5, and 6.5 mm. This changes how far the row of holes sits from the edge of the paper.
A thinner presentation generally does not need the holes positioned particularly far inward. A thicker manual can benefit from a deeper margin because more paper remains between each punched hole and the edge.
Margin depth affects binding durability, especially when a thick book will be opened and closed repeatedly. Punch too close to the edge and the paper around each hole has less material available to resist wear.
Do not automatically use the deepest setting either. Moving holes farther inward consumes more of the page margin and can make a thin presentation look unnecessarily heavy around the binding edge.
The sensible approach is to make a test punch first. Take several scrap sheets matching the final page dimensions, set the side guide and depth margin, then inspect the result before punching the real project.
Look closely at the first and final holes. Test alignment before punching expensive covers, because replacing one scrap sheet costs almost nothing compared with ruining a professionally printed front cover.
The full-width punching handle can be operated with the left hand, right hand, or both hands. This gives the operator more flexibility than a short lever positioned permanently on one side.
Two-handed operation can be useful when punching closer to the machine's rated capacity. The downward force can be applied more naturally across the handle rather than through one wrist.
The 20-sheet specification is based on ordinary 20 lb paper. Heavier cardstock, laminated covers, or plastic sheets should be processed in smaller batches.
Do not force the maximum capacity when the material is substantially thicker than standard paper. If the handle suddenly requires excessive force, reduce the stack instead of pushing harder.
This is one of the easiest ways to extend the useful life of any manual book binding machine. An extra punching cycle takes seconds, while clearing a jam or dealing with damaged punching components takes much longer.
For a presentation with clear plastic covers, I would punch those covers separately. They behave differently from ordinary paper and usually require more punching force.
The same applies to heavy cardstock dividers. Smaller batches give the dies a cleaner opportunity to cut through the material.
Clean holes make coil insertion easier, because poorly punched or partially cut openings can catch the plastic spiral as it travels through the document.
The electric inserter is straightforward once the document has been aligned properly. Feed the first few turns manually through the punched holes, then position the coil against the powered roller.
The roller rotates the plastic coil and continues insertion across the binding edge. Keep the pages aligned while this happens rather than allowing individual sheets to move out of position.
If the coil stops feeding smoothly, do not force it aggressively against the roller. Check whether one of the pages has shifted or whether the coil has become bent.
Correct page alignment before continuing. The electric roller helps with insertion, but it cannot correct a badly prepared document.
The S20 can work with coil-bound documents up to approximately 2 inches thick when an appropriately sized plastic coil is used. That gives the machine enough range for substantially thicker manuals as well as ordinary reports.
Coil diameter needs to increase as the document becomes thicker. A small coil wrapped tightly around a large page stack makes pages difficult to turn and puts unnecessary pressure around the punched edge.
An oversized coil creates the opposite problem. The pages turn freely, but the finished document feels loose and the spine looks larger than necessary.
Choose the coil from finished thickness, including the front and rear covers. Page count alone is not enough because heavier paper and covers change the total thickness considerably.
The included starter package contains 100 plastic coils plus a crimping tool. That is useful because coil insertion is only part of the finishing process.
Once the spiral has been inserted completely, the excess coil needs to be trimmed and both ends crimped. The bent ends prevent the spiral from gradually rotating out of the document during normal use.
Crimping takes a little practice. The pliers need to be oriented correctly so they cut and bend the plastic in the intended direction.
Practice crimping on a spare coil before finishing an important presentation. After a few attempts, the movement becomes much easier to repeat consistently.
Why the S20 finishes fourth rather than reaching our top three
The S20 is a capable spiral binding machine, but the products above it offer stronger overall combinations for this particular seven-machine comparison. Our first-ranked PrintFinish S25A provides a more upgraded coil-binding package, while the higher-ranked RAYSON machines offer particularly strong wire and high-capacity comb binding capabilities.
The S20 remains appealing because its workflow is straightforward. Punch the pages manually, organize the completed stack, insert the coil using the powered roller, then trim and crimp both ends.
It covers the complete coil workflow without requiring a separate electric inserter to sit beside the punching machine. For a smaller office, that saves both money and workspace.
The machine weighs around 20.1 pounds and measures approximately 17.75 by 14 by 9 inches. It is substantial enough to sit firmly on a work surface while remaining movable if the binding station needs to be relocated.
Give it more workspace than the machine's physical dimensions suggest. A binding project also needs room for unpunched pages, punched pages, covers, coils, tools, and completed books.
For a 150-page training manual, prepare the entire document before beginning. Verify page order, separate the covers, and divide the internal paper into manageable punching batches.
Keep every punched batch in sequence. Once several stacks of nearly identical pages are sitting around the machine, accidentally swapping two sections becomes surprisingly easy.
Punch the front cover separately, then work through the internal pages and finish with the rear cover. Once everything has been punched, tap the completed stack against a flat surface to square the pages.
Check the page sequence again before inserting the coil. Finding a missing page after the spiral has been crimped means cutting or removing the binding and starting that part again.
Plastic coil binding does have a useful advantage after the book is completed. Pages can turn through a full rotation around the spine, allowing the document to fold back on itself.
Coil-bound books can lie very flat, which makes the format particularly useful for workbooks, instruction manuals, reference documents, recipes, training material, and notebooks.
Someone following instructions can keep one page visible without needing to hold the book open. That is a practical advantage over binding styles that constantly try to close.
Plastic coils also handle repeated page turning reasonably well. They are flexible and available in many diameters and colors.
Color can be useful for organization. A school might use one coil color for each subject, while an office could separate departments, project types, or client reports visually.
Just remember that replacement coils must use 4:1 pitch. A coil with the correct diameter but incompatible pitch will not line up with the holes punched by the S20.
The machine's 46-hole punching pattern is suited to common document formats within its working width. For unusual paper dimensions, test the alignment carefully before committing to the final print run.
The S20 is less flexible here than machines where every punching die can be independently disengaged. That is one reason it does not move higher in our ranking for users frequently producing unusual custom sizes.
For standard office documents, though, that limitation matters much less. Letter-size presentations, manuals, school material, and similar projects fit the machine's intended workflow well.
Standard documents are where the S20 works best, particularly when the same format is being produced repeatedly.
The electric coil inserter also introduces another component that needs to function correctly. If your binding workload is occasional, manual coil insertion remains possible, but the electric roller is one of the main reasons to choose this model.
That means it is worth testing the roller as soon as the machine arrives. Run a practice document through the complete process rather than waiting until an important production job.
Check that the roller rotates consistently and feeds the coil properly. If anything is wrong, dealing with it immediately is better than discovering the problem on a deadline.
Test the electric inserter immediately, especially because it is the S20's main productivity feature.
The manufacturer backs the machine with a two-year warranty against defective parts. Keep the purchase information and relevant documentation available in case support is needed.
Routine maintenance is fairly simple. Empty the paper waste tray regularly and keep scraps away from the punching mechanism.
Every punched sheet produces dozens of small pieces of paper. During a large binding session, those scraps accumulate much faster than expected.
Do not let the waste tray overfill. Regular clearing keeps the work area cleaner and reduces the chance of paper debris interfering with operation.
The machine should sit on a stable, level surface. Pulling down on the full-width handle applies considerable force, particularly when punching a larger stack.
A shaky table makes accurate feeding harder and can cause the machine to move between punching batches. That affects consistency.
Use the paper guide each time rather than aligning sheets by eye. Once the first test punch looks correct, keep the guide in the same position for the entire project.
Consistent alignment creates a cleaner spine, because all 46 holes need to line up when the coil begins moving through the finished stack.
The S20 can be useful in schools where teachers produce workbooks, lesson material, classroom manuals, and student project books. Short runs can be completed in-house rather than sent to a print shop.
Small businesses can use it for proposals, presentations, training manuals, procedure books, and reports. If one page changes shortly before a meeting, the document can be reprinted and rebound without waiting for an external finishing service.
That ability becomes valuable with frequently updated documents. You control the timing and quantity rather than ordering more finished copies than you actually need.
In-house binding works well for short runs, particularly when revisions happen regularly.
For home use, the machine can produce planners, journals, family books, educational material, and other spiral-bound projects. The electric inserter is probably more capability than an occasional hobby user needs, but it becomes useful as project volume increases.
One thing coil binding does not offer as conveniently as plastic comb binding is easy page replacement after the coil has been cut and crimped. A document can still be rebound, but it usually requires removing or replacing the spiral.
If constant document revision is the priority, a comb binder such as the higher-ranked RAYSON SD-220B can be more convenient. Plastic combs can be reopened and closed again.
Binding format should match the document, rather than assuming one system is automatically best for every project.
Coil is particularly strong when durability, full page rotation, and flat opening matter. Comb is strong when documents need frequent editing, while wire provides a polished appearance for formal presentations.
The S20 therefore earns its place through a useful combination of punching capacity and powered spiral insertion. It is not simply a hole punch with a binding slot added to the side.
The full-width handle is another positive detail during longer sessions. Left-handed users are not forced into an awkward operating position, and two-handed punching remains possible when desired.
Ambidextrous operation improves comfort, especially when dozens of punching cycles are needed for a large batch.
Do not punch stacks that contain staples or paper clips. Check every document before feeding it into the machine.
A forgotten staple can damage punching dies and stop a production job immediately. This is particularly easy to miss when rebinding documents that were previously stapled.
Fan through the pages first. It takes seconds and can prevent expensive damage.
The same caution applies to unsuitable materials. Only punch materials the machine is designed for, and reduce batch size for anything thicker than standard paper.
If producing several identical books, finish one complete sample before processing the entire batch. Punch it, insert the coil, crimp it, and test how the pages turn.
Check whether the coil diameter feels correct and whether the margins look balanced. If something needs adjustment, change the setup before creating the remaining copies.
This is particularly important with thicker manuals. A small difference in coil diameter can change how comfortably hundreds of pages turn.
One finished sample can prevent batch mistakes, which is valuable when paper and printing costs are already invested in the project.
The S20's fourth-place position mainly reflects the fact that our top three machines offer greater flexibility or stronger capacity in specific areas. The PrintFinish S25A is the more complete upgraded coil solution, while RAYSON's wire and comb machines excel in different professional workflows.
There are also some user reports on marketplace listings describing electric roller problems, so testing that component during the return or warranty period is sensible. Other owners report straightforward operation and good results, so this appears to be something to verify on the individual unit rather than assuming it affects every machine.
That does not remove the value of the design. The electric inserter remains a major convenience when it is working correctly, and the 20-sheet punching capacity is useful for normal office production.
The included crimper and starter coils also reduce the number of accessories needed on day one. A new user can learn the complete punching, insertion, and finishing workflow with the supplied materials.
We believe the PPE S20 deserves the number four ranking out of seven for Best Book Binding Machine because it combines a 20-sheet manual punch, 46-hole 4:1 pitch pattern, electric coil insertion, three adjustable depth margins, ambidextrous full-width handle, support for documents up to approximately 2 inches thick, and a useful starter package with crimping pliers and 100 coils.
It ranks below the first three because the higher choices provide stronger overall flexibility, upgraded coil functionality, professional wire finishing, or substantially higher comb-binding capacity. The S20 is also most comfortable with standard document formats rather than unusual custom punching layouts.
For offices, schools, and small businesses that specifically want spiral coil binding, though, it remains a capable machine. Stay within the punch capacity, reduce batches for heavy covers, use 4:1 pitch coils, test the electric roller early, choose coil diameter around the completed document, and crimp both ends correctly.
Used that way, the S20 provides a practical coil-binding workflow for presentations, manuals, reports, notebooks, workbooks, and short production runs, making it a solid fourth-place choice in this seven-machine comparison.

- Electric coil inserter speeds up repetitive spiral binding work.
- Punches up to 20 sheets of 80gsm paper.
- Forty-six disengageable pins allow customized hole placement.
- Three adjustable margins improve alignment across different document thicknesses.
- Includes 100 starter coils and dedicated crimping pliers.
The electric inserter and 46 adjustable pins give this machine real flexibility
The TIANSE BM-S2050A takes the number five position in our Best Book Binding Machine comparison because it combines a substantial manual punching system with an electric coil inserter. It is designed for 4:1 pitch plastic coils and can handle reports, notebooks, training manuals, presentations, planners, workbooks, and other spiral-bound documents.
The manual punch handles up to 20 sheets of 80gsm paper at one time. That is enough capacity for regular office or school production without turning every medium-sized document into dozens of tiny punching batches.
The electric coil inserter saves considerable time once the punching is finished. Instead of manually twisting a long plastic spiral through every hole, you start the coil through the first few holes and then use the powered rubber roller to continue feeding it across the document.
This feature becomes more valuable as the workload increases. Inserting one coil manually is not difficult, but completing ten training manuals or presentation books one after another is different.
The BM-S2050A uses 46 disengageable punching pins. Each pin can be controlled individually, which gives the operator much more freedom when working with unusual paper dimensions.
Disengageable pins prevent awkward edge holes when a document width does not align perfectly with the standard punching pattern. Instead of accepting a partial hole near the edge, you can simply disengage the corresponding pin.
The punching controls are unusually good for custom documents
The TIANSE supports Letter, A4, and A5 formats directly. The standard layouts produce 42 holes for Letter, 46 holes for A4, and 33 holes for A5, while the disengageable dies and open-throat design provide additional flexibility for custom projects.
That open-throat construction matters when working with material wider than the normal punching area. Larger pages can be repositioned and punched progressively rather than being completely blocked by a closed machine body.
There is more technique involved with oversized documents. Test unusual page sizes on scrap paper because the second punching position needs to continue the first pattern accurately.
The machine also provides three paper-margin settings of 2.5mm, 4.5mm, and 6.5mm. These determine how far the punched holes sit from the edge of the sheet.
A thin booklet can usually work with a shallower margin. A thick manual benefits from moving the holes farther inward because there is more paper surrounding each punched opening.
Margin depth should match document thickness. Using the same setting for a 30-page presentation and a 400-page manual is convenient, but it is not necessarily the best way to produce a durable finished document.
The adjustable side guide handles horizontal positioning. Set it before beginning the project and punch several scrap sheets first.
Check both ends of the hole pattern. The first and final holes should look intentional and balanced rather than having one almost touching the edge.
This is particularly important when punching printed covers. A misaligned sheet of ordinary copier paper is cheap to replace, but a custom cover may have already gone through expensive printing or finishing.
Test alignment before punching final covers. It takes less than a minute and can prevent a complete reprint.
The 20-sheet punching specification is based on 80gsm paper. Do not assume the machine should punch 20 sheets regardless of material thickness.
Heavy cardstock and PVC covers place more resistance on the dies. The manual specifies up to two PVC covers at a time rather than treating them like ordinary sheets.
If the punching handle suddenly requires excessive force, reduce the stack. Do not lean harder on the handle just because the material physically fits into the paper inlet.
Overloading the punch creates unnecessary wear and can result in incomplete holes or a jam. Another punching cycle is quicker than dealing with a damaged project.
The full-width handle is comfortable for repeated operation because it can be used left-handed, right-handed, or with both hands. That is more flexible than a short punch lever fixed permanently to one side.
Two-handed operation can be useful near the normal punching limit. The force is distributed more naturally across the handle.
The machine itself weighs approximately 8.78 kg and uses a metal construction. That gives it enough mass to remain fairly stable on a solid work surface during manual punching.
A stable table improves punching consistency. If the machine shifts every time the handle moves, maintaining the same alignment across several page batches becomes harder.
The BM-S2050A can bind documents up to approximately 500 sheets when using a suitable 2-inch coil. That is a substantial maximum capacity for a desktop spiral binding machine.
There is an important detail, though. The electric inserter is intended for smaller coils than the absolute 2-inch maximum binding diameter, while the largest coils may need to be inserted manually.
This means the 500-sheet specification and electric insertion capability should not be interpreted as the same thing. Very large coils require more manual handling, which matters if extremely thick books are your normal workload.
For everyday reports and manuals, the electric inserter remains the more useful workflow. Start the coil through several holes by hand, activate the rubber roller, and guide the coil gently against it.
The roller rotates the plastic spiral and moves it through the remaining holes. Keep the pages square while the coil travels through the stack.
If insertion stops suddenly, check alignment. One page shifted slightly out of position can prevent the coil from finding the next hole.
Do not force a misaligned coil. Correcting the page stack first reduces the chance of stretching the holes or bending the plastic spine.
Why the TIANSE lands at number five in our ranking
The BM-S2050A includes 100 black 5/16-inch PVC coil spines and a pair of coil crimping pliers. That gives a first-time buyer the essential supplies needed to practice the complete binding process without ordering a separate starter kit.
The included coils are suitable for relatively thin documents. Thicker books need larger coil diameters, so additional sizes will eventually be necessary if the machine is used for varied projects.
Choose coils from the finished document thickness, including the covers. A 100-page book made from heavy stock may need a different coil from 100 pages of lightweight paper.
A coil that is too small compresses the pages and makes turning difficult. One that is excessively large leaves the finished document loose around the spine.
Once the coil has passed completely through the book, it needs to be cut and crimped at both ends. This is what prevents the spiral from gradually rotating back out during use.
The supplied crimping pliers perform both jobs. They cut the excess coil and bend the remaining end inward.
Proper crimping finishes the binding securely, but there is a small learning curve. Practice on a spare coil before working on an important client document.
Coil binding has a useful advantage once finished. Pages can turn through 360 degrees and the document can lie flat or fold back on itself.
This makes spiral binding useful for instructional manuals, notebooks, cookbooks, training material, planners, music books, and workbooks. The user does not need to hold the document open while following the page.
The flexible plastic spine is also suitable for documents that will be handled frequently. Unlike a rigid spine, the coil can flex without immediately losing its shape.
Coil binding works well for working documents, particularly when people need to keep one page visible while using both hands for something else.
The 4:1 pitch specification needs to be remembered when ordering additional supplies. Pitch describes the spacing of the holes and coil turns.
Do not order a coil only because its diameter looks correct. A different pitch will not properly match the hole pattern created by this machine.
The 46 disengageable pins are one of the strongest reasons to choose this TIANSE over a simpler spiral binder. They make custom paper sizes much easier to handle cleanly.
For example, imagine producing a small custom planner. A fixed-die machine might create a final hole only a few millimeters from the edge.
With the BM-S2050A, the unwanted pin can be disengaged. That produces a cleaner custom binding edge rather than forcing every project into one predetermined punching pattern.
The open-throat design extends that flexibility further. It allows larger or nonstandard documents to be repositioned for progressive punching.
This can be useful for creative projects, calendars, presentation boards, or specialty documents that do not fit conventional Letter or A4 dimensions.
Again, test first. Oversized punching requires more careful alignment because the document is moved between punching cycles.
Custom work rewards careful setup, while standard A4, A5, and Letter projects are much more straightforward.
The waste drawer underneath the punching mechanism also deserves regular attention. Forty-six holes per A4 sheet means a surprising amount of paper debris during a large project.
Empty the drawer before it becomes packed. Accumulated paper chips can make cleanup harder and may eventually interfere with smooth operation.
The machine arrives lubricated around the punching mechanism. The manual recommends making several initial punches through scrap or oil-absorbing paper before beginning a finished project.
Initial scrap punches remove lubricant residue, helping prevent marks from transferring onto an expensive cover or presentation page.
This initial testing also gives you a chance to learn the handle pressure and verify the paper guide. There is no reason the first sheet through a new machine should be part of an important project.
The BM-S2050A measures approximately 43.48 by 20.5 by 33.48 cm. The machine itself does not consume an enormous workstation, but the binding process needs additional surrounding space.
You need somewhere for unpunched pages, punched batches, covers, coils, the crimping tool, and completed books. A cluttered binding station makes page-order mistakes much easier.
Organize the workflow before punching, particularly when several copies of the same document are being produced.
For a 200-page training manual, divide the pages into sensible batches while preserving their sequence. Punch the front cover separately, then work through the internal pages and finish with the rear cover.
Once every page is punched, square the complete document against a flat surface. Check the page order again before inserting the coil.
A missing or reversed page discovered after crimping means removing the coil and repeating part of the binding process. That is avoidable with a quick final check.
Verify page order before coil insertion, especially for reports containing numbered sections or chapters that look similar when stacked.
The machine also supports A5 directly, which is useful for notebooks and smaller manuals. Smaller paper formats can be economical when the document does not need a full-size page.
For Letter-size documents, the machine uses 42 holes rather than the full 46-hole A4 pattern. The adjustable pins make those format changes possible without leaving unwanted partial holes.
That is one area where the TIANSE is stronger than many entry-level machines. The operator has meaningful control over the punching layout rather than simply accepting whatever pattern the machine produces.
Its customization options are genuinely useful, not adjustments added only to make the specification list longer.
There are still reasons it ranks fifth rather than entering our top four. The machines above it offer stronger overall combinations in this comparison, including upgraded coil workflows, professional twin-loop wire binding, or very high-capacity editable comb binding.
The TIANSE also shares many of its core characteristics with other 20-sheet electric-inserter coil machines. That makes it capable, but less distinctive against the strongest options in the group.
The maximum 500-sheet capacity sounds excellent, but remember that the electric inserter does not handle the very largest 2-inch coil in the same effortless way as smaller diameters. Very thick books require more manual work.
The electric inserter is best for normal coils, while the largest binding projects rely more heavily on the operator.
Another limitation is that this machine is specifically designed around plastic coil binding. It does not close twin-loop wire and it does not use reopenable plastic combs.
That is not a defect, but binding format matters. Coil, wire, and comb each solve different problems.
Wire can give formal presentations a particularly clean professional appearance. Plastic comb is convenient for manuals that need pages added or replaced later.
Coil is strongest when page rotation, durability, and flat opening are important. Choose the binding format around the document, not just around which machine has the largest capacity number.
The TIANSE is particularly suitable for schools. Teachers can produce workbooks, revision notes, course material, and classroom manuals without outsourcing every small binding job.
Small businesses can use it for procedure manuals, proposals, presentation books, reports, and training material. Short production runs can be completed as needed.
A document revised at the last minute can be reprinted and rebound immediately. That is one of the biggest advantages of having a capable book binding machine inside the office.
In-house binding reduces turnaround time, especially for documents that change frequently or are produced in small quantities.
Creative users can make planners, journals, notebooks, reference books, and other custom projects. The disengageable pins become particularly valuable here because custom paper dimensions are common.
For repeated production, finish one complete sample before punching the entire batch. Check the coil size, margin depth, cover alignment, page movement, and crimped ends.
If anything needs changing, correct the setup before producing the remaining copies. This can save a large amount of wasted printing.
One completed sample prevents batch mistakes, especially when covers and internal pages have already been professionally printed.
Maintenance is straightforward. Empty the waste drawer, keep the exterior dry, and unplug the electric inserter before cleaning or maintenance.
The manufacturer specifies paper and PVC covers as the intended punching materials. Do not experiment with metal, fabric, or other unsuitable materials simply because they fit into the opening.
Also keep hands and loose clothing away from the electric roller while it is operating. Powered insertion is convenient because the roller moves continuously once activated.
Use the electric roller as intended, guiding the coil rather than placing fingers close to the moving surface.
The machine weighs close to 8.8 kg, so it is portable enough to move around an office but substantial enough that most users will probably give it a permanent location. A dedicated binding station works well if the machine is used regularly.
Keep coils sorted by diameter nearby. Labeling the sizes can save time because plastic coils can look surprisingly similar when several diameters are stored together.
The crimping pliers should stay with the machine too. A fully inserted coil is not properly finished until both ends have been secured.
Keep the complete binding kit together, including spare coils, covers, crimper, and scrap test paper.
The manufacturer documentation lists a lifetime warranty for this model, which is notable for equipment containing both mechanical punching components and an electric insertion system. Keep proof of purchase and warranty information available in case support is needed.
We believe the TIANSE BM-S2050A deserves the number five ranking out of seven for Best Book Binding Machine because it combines a 20-sheet manual punch, 4:1 pitch spiral binding, 46 individually disengageable pins, three adjustable margin depths, electric coil insertion, open-throat punching, and support for documents reaching approximately 500 sheets with appropriately sized coils.
It ranks below our first four because those machines provide stronger advantages in overall workflow, finishing style, high-capacity comb binding, or upgraded coil operation. The electric inserter also cannot provide the same assistance with the largest 2-inch coils as it does with more typical document sizes.
Still, this is a flexible and well-equipped spiral binder. Stay within the 20-sheet punching limit for 80gsm paper, reduce batches for heavier covers, use 4:1 pitch coils, test custom layouts on scrap paper, and crimp both ends after insertion.
Used that way, the BM-S2050A provides capable professional coil binding for manuals, presentations, notebooks, workbooks, planners, and short production runs, making it a solid fifth-place choice in this seven-machine comparison.

- Punches up to 12 sheets of 80gsm paper.
- Binds wire documents containing up to 120 sheets.
- Creates 32 precise square holes across Letter-size pages.
- Three adjustable depth margins improve punching position control.
- Supports wire, click, and compatible 3:1 coil spines.
This is a smaller manual binder, but the 3:1 system gives it useful flexibility
The RAYSON TD-132 takes the number six position in our Best Book Binding Machine comparison because it is a compact manual binder built around a versatile 3:1 pitch punching system. It can punch up to 12 sheets of 80gsm paper at once and wire-bind documents containing up to approximately 120 sheets.
That capacity makes the TD-132 better suited to reports, presentations, calendars, portfolios, notebooks, training documents, and smaller manuals than very thick reference books. It is not trying to compete with 400 or 500-sheet binding machines.
The 3:1 pitch system adds flexibility because the machine works with compatible wire binding spines, click-style spines, and 3:1 spiral coil supplies. That gives an office more options than a machine designed around only one consumable format.
For traditional wire binding, the TD-132 supports wire sizes from approximately 1/4 inch through 9/16 inch. The maximum wire-bound document is around 120 sheets of standard 80gsm paper.
The machine punches 32 square holes across Letter-size paper. Each hole measures approximately 4 x 4mm, creating the regular square pattern associated with this type of 3:1 binding system.
Letter-size documents are its natural format, which is worth understanding before buying. If most of your work is standard North American office reports and presentations, that is fine, but people regularly producing larger or unusual documents may prefer a more adjustable machine.
The adjustable margins matter more than the 12-sheet number suggests
The TD-132 provides three punching depth settings at approximately 2.5mm, 3.5mm, and 4.5mm. These determine how far the punched holes sit from the edge of the paper.
This is useful because a thin presentation and a 120-sheet report should not necessarily use exactly the same punching position. A thicker book can benefit from placing the holes slightly farther inward, leaving more paper around the binding edge.
Depth adjustment helps protect punched pages from unnecessary stress as the document becomes thicker. Punching too close to the edge leaves a narrow strip of paper around each square opening.
For a thin report, however, an excessively deep margin can look bulky. The binding edge starts consuming more of the usable page than necessary.
Before punching the actual project, use scrap paper. Set the paper stopper, select the margin depth, insert a few test sheets, and check how the 32-hole pattern sits across the page.
The first and final holes should look properly positioned. If something appears wrong, fix the guide before putting a printed cover into the machine.
Testing first prevents expensive mistakes, especially when the final document uses custom covers, photographs, coated stock, or professionally printed pages.
The 12-sheet punching capacity is based on standard 80gsm or 20 lb paper. RAYSON also specifies a much smaller capacity for heavier cover material, around two sheets of 230gsm cardboard or 0.2mm plastic cover at a time.
That distinction matters. Twelve ordinary sheets and twelve plastic covers create completely different loads on the punching dies.
If the handle suddenly requires much more force than normal, reduce the stack. Do not keep pushing harder simply because the material physically fits into the feed opening.
The rated capacity is a maximum, not something every punching cycle needs to reach. Smaller batches are completely normal with heavier materials.
The long metal operating handle helps with manual punching. Because this is not an electric punch, leverage matters when several sheets need to be processed repeatedly.
A 100-page report would require roughly nine punching cycles if you stayed around the maximum standard-paper capacity. That is manageable for occasional office work, although it becomes noticeably slower when dozens of books need to be produced.
This is one reason the TD-132 sits lower in our ranking. Higher-ranked machines offer 15, 20, or 22-sheet punching capacities, and some add electric coil insertion.
Manual operation suits smaller production runs much better than high-volume commercial binding. If you are producing several hundred finished books every week, a more automated system makes sense.
For occasional reports and presentations, the manual approach is straightforward. There is no powered punching mechanism to configure, and the machine can sit on a normal office work surface.
RAYSON uses durable metal and ABS construction, with the complete machine weighing roughly 11.6 pounds. That keeps it reasonably portable while providing enough mass to remain stable during normal punching.
Place it on a firm, level surface. A machine moving every time the handle comes down makes consistent alignment harder.
Stable positioning improves punching accuracy, particularly when a document is divided across several separate punching batches.
Why the TD-132 finishes sixth instead of moving higher
The strongest feature here is versatility within the 3:1 format. The TD-132 is not limited strictly to one wire spine, and that can be useful for offices experimenting with different finished document styles.
Wire binding is particularly good for presentations, calendars, portfolios, and professional reports. The finished document can open relatively flat, and the metal spine gives the binding edge a clean appearance.
Click-style binding offers a different advantage when compatible supplies are used. The document can be easier to edit later compared with permanently closed wire.
Different spines suit different documents, so having a machine built around a broadly supported 3:1 punching pattern gives the user options.
Coil can also provide excellent page rotation. A coil-bound notebook or manual can fold back on itself, which is useful when the document needs to stay open while somebody works.
Consumable compatibility still needs attention. Do not buy a binding spine simply because its diameter appears correct.
The pitch needs to match the punched pattern. A 4:1 coil, for example, is not interchangeable with a 3:1 punching pattern just because both products are called spiral binding supplies.
Always match supplies to 3:1 pitch when using the TD-132. This avoids one of the most common mistakes new binding-machine owners make.
For wire binding, selecting the correct diameter is equally important. A wire that is too small squeezes the document and restricts page turning.
A wire that is much too large leaves excessive empty space around the pages and makes the finished report feel loose. Select the spine based on the completed document thickness, including covers.
The TD-132 includes an adjustable wire-closing system. Set the closer according to the wire diameter before compressing the spine.
Correct wire closure takes some practice. If the closer is set incorrectly or the document is positioned badly, the finished wire may close unevenly.
Use scrap paper and inexpensive wire for the first attempts. It is better to learn the pressure and positioning on a test document than on a finished client proposal.
When assembling a real document, prepare everything before closing the wire. Punch the front cover, internal pages, and rear cover while keeping every batch in sequence.
Then check the page order one more time. A missing page discovered after wire closure means reopening or replacing the binding.
Verify the complete document before closing, especially when several reports with similar-looking pages are being produced together.
The paper scrap tray underneath the punch should also be emptied regularly. Every Letter-size punching cycle creates 32 small square paper pieces.
After a large project, that becomes a surprising amount of waste. Letting the tray become completely packed can contribute to messy operation and clogging around the punching mechanism.
RAYSON recommends clearing debris regularly and operating the handle through a complete cycle. Keeping the punching area clean helps maintain consistent holes.
Simple maintenance prevents avoidable jams, and it only takes a few seconds between larger projects.
Another useful setup detail concerns the punching blades when the machine is new. Protective oil may be present around the dies to reduce corrosion during storage and shipping.
Run the supplied oil-removing paper or ordinary scrap sheets through the punch before using an important document. This helps remove residue that could otherwise mark the first finished pages.
Do not make the front cover of an expensive presentation the first thing you ever punch. A few test sheets give you a chance to clean the dies and confirm alignment simultaneously.
Scrap paper should come first, particularly when a new binding machine has just been unpacked.
The TD-132 has pre-marked guides for common formats including Letter, Junior Legal, and B5, while smaller formats such as A5 or Half Letter can be manually centered. This adds some flexibility, although the machine's maximum sheet size remains Letter.
Custom formats therefore require more attention from the operator. You need to center the material carefully rather than relying entirely on a pre-marked guide.
Again, test punching is the sensible approach. Once the position is correct, keep the guide unchanged throughout that document.
Consistent feeding creates consistent holes, which becomes very obvious after all the separate punched batches are placed onto one binding spine.
The 120-sheet maximum is another reason this model ranks sixth. Our higher-ranked machines can handle substantially thicker books, including comb and coil systems reaching several hundred sheets.
That does not mean 120 sheets is inadequate. Many professional presentations and office reports never approach that thickness.
A 50-page proposal, 80-page training booklet, or 100-page portfolio sits comfortably within the TD-132's intended range. For these documents, the smaller capacity may never become a practical limitation.
The machine works best with medium documents, rather than thick reference manuals or large educational workbooks.
Its manual 12-sheet punch is also slower than the 20 and 22-sheet machines above it. A single report is easy enough, but the difference becomes noticeable during repeated production.
Imagine producing twenty 100-page training manuals. At around nine punches per manual, the TD-132 requires roughly 180 punching cycles before the binding stage is even considered.
A 20-sheet machine reduces that workload significantly. This is why punching capacity matters even when every machine technically completes the same finished document.
Higher volume changes what feels efficient. A perfectly reasonable manual machine for occasional use can feel slow in a production environment.
The TD-132 makes more sense in a home office, school department, administrative office, or small business where documents are produced periodically rather than continuously.
For example, an accountant could bind client reports at the end of each month. A teacher could produce course material several times per term.
A designer could use wire binding for client presentations and portfolios. In those situations, the machine's compact size and manual operation are not major disadvantages.
Occasional professional binding is its sweet spot, particularly when 3:1 wire is the preferred finishing style.
The machine can also be useful for calendars. Wire binding allows pages to turn cleanly, and the square hole pattern gives the finished edge a professional appearance.
For notebooks, coil may be more attractive if full page rotation is important. The TD-132's compatibility with different 3:1 accessories gives users room to experiment.
Just remember that wire closing capacity is limited to the supported wire sizes. RAYSON specifies wire spines from approximately 1/4 inch through 9/16 inch.
Click and coil binding may allow different practical document arrangements because those spines are finished differently. Follow the specifications of the actual consumable rather than assuming the wire capacity applies identically to every binding style.
Binding capacity depends on the spine type, paper weight, covers, and actual finished thickness.
The built-in corner rounder is another useful detail associated with this model. Rounded cover corners can make notebooks and presentation books look more finished and reduce sharp cover points.
It is not the reason to buy the machine, but it can eliminate the need for a separate small corner-rounding tool on some projects.
Use it consistently. If one cover corner is rounded, the other matching corners should normally receive the same treatment for a deliberate finished appearance.
For professional documents, these little finishing details matter. Clean finishing improves the final presentation even when the printed pages themselves have not changed.
The TD-132's compact dimensions are approximately 15.75 inches wide, 9.06 inches deep, and 14.57 inches high. It is easier to accommodate than some larger binding machines.
That can matter in a home office where the machine shares space with a printer, paper cutter, laminator, and normal computer equipment. A binder that is too large may end up stored away and therefore used less often.
The roughly 11.6-pound weight also makes moving it easier. It can be brought out for a binding session and stored afterward if a permanent finishing station is not available.
Compact equipment suits occasional workflows, and this is one area where the TD-132's smaller capacity actually comes with a practical benefit.
For repeated production, though, I would leave it on a dedicated surface. Constantly moving any punching machine around creates unnecessary setup work and increases the chance of damaging guides or accessories.
Keep compatible wire, coil, or click supplies nearby and clearly label their pitch and sizes. Binding consumables can look very similar once removed from their original packaging.
Mixing 3:1 and 4:1 supplies is an easy mistake if several machines are used in the same office. Store them separately.
Label consumables by pitch and diameter, especially in a shared print room where more than one person operates the equipment.
One advantage of manual operation is that there are no electric punching motors or coil rollers to maintain. The machine relies on direct mechanical leverage.
This makes operation straightforward and means there is no need for a power outlet. It can be used anywhere there is a solid enough table and sufficient working space.
The tradeoff remains physical effort. Long production runs require repeated handle operation.
If hand or shoulder fatigue becomes an issue, reduce batch size or take breaks rather than forcing the process. Manual equipment still needs sensible ergonomics, particularly when dozens of documents are being processed.
We believe the RAYSON TD-132 deserves the number six ranking out of seven for Best Book Binding Machine because it offers a useful but more modest combination than the five products above it. The 12-sheet punch and 120-sheet wire binding capacity are lower than several competing machines in our ranking.
It also lacks the electric coil insertion available on some higher-ranked models and does not provide the very large editable-document capacity of RAYSON's own SD-220B comb binder. Those differences become important for larger workloads.
Still, the TD-132 has a clear purpose. Its 3:1 pitch compatibility, 32 square holes, three adjustable margin depths, wire-closing capability, long manual handle, durable metal and ABS construction, and support for multiple compatible binding spine styles make it a flexible compact machine.
Use scrap paper for the initial punches, stay within the 12-sheet rating for standard 80gsm paper, reduce batches for heavy covers, choose the correct 3:1 supplies, and empty the waste tray regularly. Used that way, the TD-132 remains a capable compact binder for reports, portfolios, calendars, presentations, and other medium-size professional documents despite its sixth-place ranking.
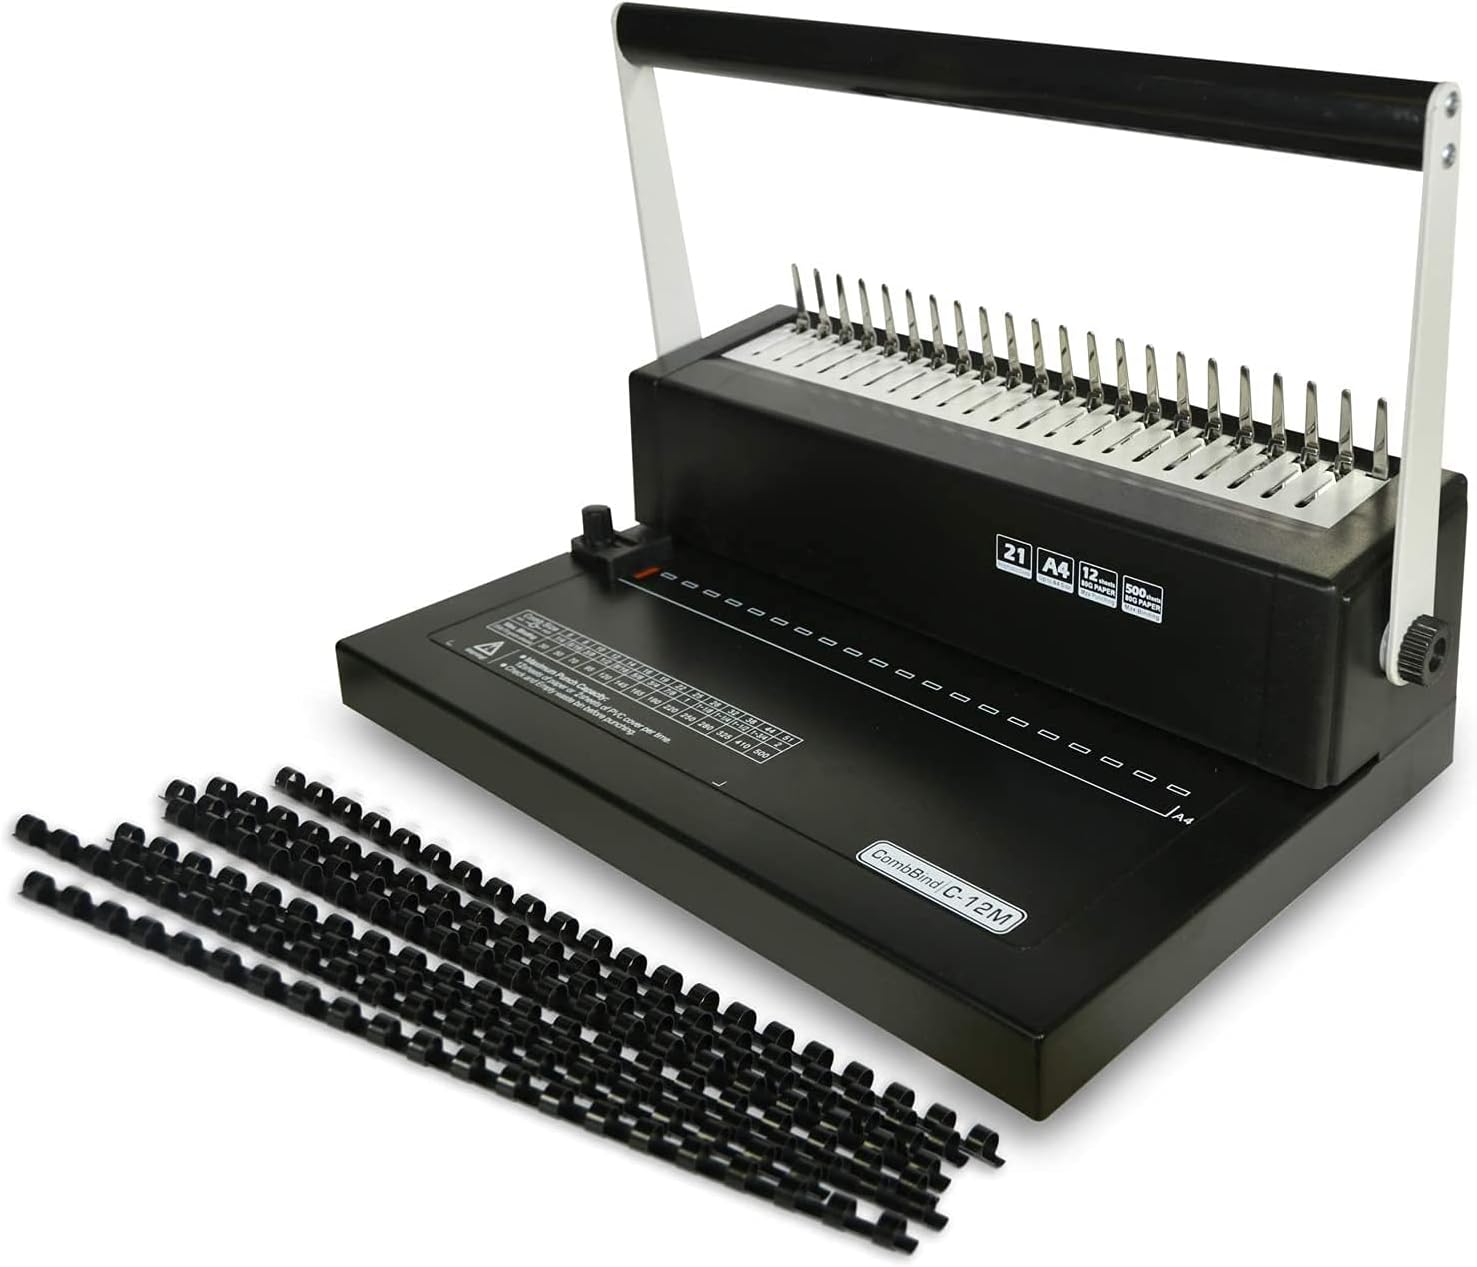
- Punches up to 12 sheets of paper per cycle.
- Binds documents containing up to approximately 500 sheets.
- Twenty-one-hole comb system supports common office document formats.
- Full-width handle works comfortably for left or right-handed users.
- Includes 100 starter comb spines for immediate binding projects.
This is a simple comb binder, but the 500-sheet capacity is useful
The PPE C-12 takes the number seven position in our Best Book Binding Machine comparison because it focuses on straightforward manual comb binding rather than advanced punching controls or powered insertion. It uses a 21-hole punching pattern, handles up to 12 sheets of standard paper per punching cycle, and can bind documents containing up to approximately 500 sheets when an appropriately sized comb is used.
That maximum binding capacity is substantial for a compact desktop machine. It means the C-12 can move beyond thin presentations and handle larger manuals, training documents, reports, course material, and reference books when the correct plastic comb size is selected.
The 500-sheet binding capacity is probably the most interesting specification here. The punching capacity is relatively modest, but once the pages are prepared, the comb system can accommodate a surprisingly thick finished document.
The machine comes with 100 pieces of 5/16-inch plastic comb binding spines. Those starter combs are intended for relatively thin projects, so larger documents will require bigger compatible combs purchased separately.
This is an important distinction. The included comb size does not represent the maximum thickness the machine can bind.
Different documents need different comb sizes, and choosing the right diameter has a noticeable effect on how easily the pages turn after binding.
The 12-sheet punch works well if you do not overload it
The C-12 manually punches up to 12 sheets of 80gsm or 20 lb paper at once. For occasional office binding, that is workable, although it requires more punching cycles than the 15, 20, and 22-sheet machines higher in our ranking.
Take a 120-page report as an example. At the full rated capacity, you are looking at roughly ten punching cycles before dealing with covers and the actual binding stage.
For one report, that is not a major problem. For twenty identical reports, the difference between a 12-sheet punch and a 20-sheet punch becomes much more noticeable.
Punching capacity matters during batch production, which is one of the main reasons this machine finishes seventh rather than higher.
The 12-sheet figure also assumes normal paper. Heavier cardstock, transparent covers, and other thick materials create considerably more resistance.
Do not force twelve heavy sheets through simply because twelve sheets of ordinary paper are supported. Reduce the batch whenever the material feels substantially thicker.
If the handle suddenly requires excessive pressure, stop and remove several sheets. Applying more force is not a good substitute for using an appropriate punching batch.
Smaller batches protect the punching mechanism and can produce cleaner holes through heavier materials.
The C-12 creates 21 holes for plastic comb binding. This is a common format for office documents and works with Letter, A4, A5, and smaller page sizes according to the product information.
That gives the machine useful flexibility for ordinary reports, presentations, workbooks, and educational material. Smaller documents can also be bound as long as the paper is positioned correctly before punching.
Use scrap paper when changing document sizes. A test punch lets you see where the first and final holes land before committing an expensive printed cover to the machine.
Always check alignment on scrap paper, particularly when moving away from the page format you use most often.
The full-width handle is another useful design choice. It can be operated from different hand positions rather than forcing the user to pull a small lever mounted on one side.
That makes the machine more comfortable for both left and right-handed operators. Using both hands can also make punching a full paper batch feel more controlled.
The machine itself weighs around 10 pounds. It is light enough to move between work areas without much trouble, but still substantial enough for normal manual punching on a stable surface.
The compact design suits smaller offices, classrooms, home workspaces, and places where the binder cannot permanently occupy a large finishing table.
A stable surface is still important. Pulling the punching handle applies force through the machine, and a desk that moves underneath it makes consistent paper alignment harder.
Keep enough space around the binder for the actual workflow too. The machine may be compact, but a large document quickly creates several stacks of unpunched pages, punched pages, covers, combs, and finished material.
For a 200-page manual, organize everything before starting. Verify the page order and divide the document into manageable punching batches.
Keep punched pages in their original sequence. Several stacks of nearly identical printed pages become surprisingly easy to mix up during repetitive work.
Why the C-12 finishes seventh in our seven-machine comparison
The plastic comb system does have a major practical advantage. Unlike many wire bindings, a plastic comb can be reopened so pages can be added, removed, or replaced later.
That makes the C-12 useful for employee manuals, course notes, policy documents, training material, and other publications that change periodically. Instead of printing an entirely new 300-page manual because six pages changed, you can replace the affected pages.
Comb binding works well for editable documents, especially internal material where easy revision matters more than having the most premium-looking spine.
The process is fairly simple. Punch the pages first, place an appropriately sized comb onto the machine's binding mechanism, open the comb, load the punched document onto the exposed fingers, then close the comb.
Page order should be checked before the comb is closed. The good news is that if a mistake is discovered later, plastic comb binding is much easier to reopen than permanently crimped wire.
The included 5/16-inch combs are useful for learning the process. You can practice punching, loading pages, and operating the comb mechanism without immediately buying a large supply of additional consumables.
The 100 starter combs add real value, particularly for a school or small office purchasing its first binding machine.
Those 5/16-inch combs are intended for smaller documents. As page count increases, use a larger diameter rather than forcing more pages into the starter comb.
A comb that is too small squeezes the paper and restricts page movement. It can also make closing the binding unnecessarily difficult.
An excessively large comb creates the opposite problem. The document feels loose and the oversized spine can look awkward relative to the page stack.
Match the comb to finished thickness, including any heavy front and rear covers rather than estimating only from the number of internal sheets.
One reason the C-12 ranks below our sixth-place RAYSON TD-132 is the level of finishing control. The RAYSON provides three adjustable depth margins and supports multiple compatible 3:1 binding styles.
The machines higher in the list become even more capable. Some provide individually disengageable dies, larger punching capacities, powered coil insertion, or specialized wire closing.
The C-12 is more basic. That is not necessarily a problem for somebody who simply wants to make plastic-comb reports, but it gives the machine fewer advantages in a direct seven-product comparison.
This machine prioritizes simplicity over adjustment, and that is probably the clearest way to understand its seventh-place position.
The 12-sheet punch is another limitation compared with the higher-ranked machines. Our number-three RAYSON SD-220B, for example, handles up to 22 sheets per punching cycle while retaining very high comb-binding capacity.
For occasional projects, the difference may not matter much. If you bind a few reports each month, another handful of punching cycles is hardly a major issue.
High-volume work changes the calculation. A print room producing documents throughout the day benefits much more from higher punching capacity and electric assistance.
The C-12 is better for occasional production than for an environment where binding is a constant daily task.
For a teacher, though, it can make good sense. Classroom workbooks, student reference material, project books, and lesson documents can be assembled without outsourcing small jobs.
The same applies to a home office. Reports, financial documents, reference material, planners, and personal projects can be turned into organized bound documents fairly quickly.
Small businesses can use the C-12 for procedure manuals and internal training books. The reopenable comb is particularly useful when those documents need regular updates.
Short-run office documents suit comb binding, because the finished books can be modified without replacing the complete binding system every time.
One practical example would be an employee handbook. A company could produce twenty copies using large plastic combs and then replace only the affected pages when one policy changes.
That saves paper and printing time. It also avoids storing a large quantity of outdated manuals simply because the company ordered too many finished copies.
Comb binding is less ideal when the goal is a premium client-facing presentation. Twin-loop wire generally has a cleaner, more formal appearance.
Coil binding also has an advantage when 360-degree page rotation is important. A spiral-bound manual can fold completely back on itself, which is useful for instructional documents.
Each binding format solves a different problem. The C-12 makes the most sense when affordability, editability, and large document capacity are higher priorities than premium finishing.
The 21-hole system is straightforward, but paper needs to remain properly aligned between punching batches. If one stack enters several millimeters farther to the side than the previous stack, the holes will not line up cleanly when the complete document is placed on the comb.
Use the paper guide rather than aligning everything by eye. Once the first test punch looks correct, keep the guide in that position throughout the project.
Square each stack before pulling the handle. Pages that enter at slightly different angles can create uneven punching even when the side guide itself is correctly positioned.
Consistent feeding creates cleaner bindings, particularly on documents containing hundreds of pages.
The paper waste compartment also needs regular attention. Every punching cycle produces 21 small pieces of paper per sheet.
A large manual can therefore generate thousands of tiny scraps. Empty the waste tray periodically rather than waiting until it is completely full.
This is basic maintenance, but it keeps the work area cleaner and reduces the chance of paper debris building up around the punching mechanism.
Routine cleaning helps maintain smooth operation, especially when the machine is used for several projects during the same session.
When the machine is new, make the first punches using scrap paper. Punching dies may have small amounts of protective manufacturing lubricant around them.
A few test cycles help clear possible residue while simultaneously giving you a chance to check the alignment. There is no reason to use an expensive cover as the first test.
Inspect the punched holes before moving onto the final project. They should be clean and complete rather than partially cut.
Incomplete holes usually mean something needs attention, whether that is excessive paper thickness, poor alignment, or debris around the punch.
The full handlebar also needs to complete its normal movement. Do not stop halfway through because the paper looks punched.
A complete stroke helps ensure every die passes fully through the stack. Return the handle to its normal position before removing or inserting another batch.
For heavier covers, punch them separately. This gives you better control and avoids adding unnecessary resistance to a full paper stack.
Transparent plastic covers can also be slippery. Feed covers carefully against the guide so they do not shift before the punch is completed.
The included 100 combs can cover a surprisingly large number of initial projects if the documents are thin enough for the supplied size. Schools and offices can start producing basic booklets immediately.
Eventually, though, it is worth keeping several comb diameters nearby. Label the sizes clearly rather than mixing loose combs together in one drawer.
Plastic combs can look similar when their dimensions are close. Having them organized saves time during a busy binding session.
Keep common comb sizes beside the machine, especially if the binder is shared by several employees.
The C-12's portability is another positive feature. At roughly 10 pounds, it can be moved to a conference room, classroom, or shared office work area without much difficulty.
This is useful when there is no permanent print-finishing station. The machine can be stored on a shelf and brought out when a binding job appears.
The tradeoff is that repeated setup takes time. If the machine is used every day, giving it a permanent location makes more sense.
Keep enough clearance around the handle when storing it on a desk. The machine needs working space when punching, not merely enough room for its base.
The metal construction is another useful point. A manual punch experiences repeated mechanical load every time the handle is operated, so a solid frame is preferable to a very lightweight housing for regular work.
That said, this is still a desktop office machine rather than industrial production equipment. High-volume commercial binding calls for a different class of hardware.
If a business produces hundreds of finished documents every day, an electric punch can reduce both time and physical effort. The C-12 is aimed at a much more moderate workload.
Match the machine to actual production volume, rather than choosing solely from maximum page capacity.
A 500-sheet binding capacity sounds impressive, but remember that those pages still need to be punched in groups of up to 12. A maximum-size project can therefore require more than forty punching cycles before binding begins.
That is perfectly possible, but it is not fast. This distinction between punching capacity and binding capacity matters when comparing machines.
The C-12 can hold a thick finished document, but the operator still has to prepare those pages manually. That is another reason it ranks below more productive machines.
High binding capacity does not equal high production speed, and buyers should consider both numbers.
For occasional large manuals, this arrangement is reasonable. You gain the ability to bind a thick document without paying for a commercial electric punch that might sit unused most of the year.
The machine also has no electric coil roller or powered punch to maintain. Operation is entirely manual and straightforward.
That can be an advantage in a small office. There is no need for a power outlet, and the machine can be moved wherever there is a suitable work surface.
Manual operation keeps setup uncomplicated, although the tradeoff is more physical work during large projects.
When producing multiple identical books, finish one complete sample first. Check the comb diameter, punching alignment, cover fit, page movement, and overall appearance.
If the comb feels too tight, move up a size before completing the remaining copies. If the pages are shifting around excessively, the chosen comb may be larger than necessary.
This single sample can prevent an entire batch from being bound poorly. The time spent checking it is small compared with reopening twenty finished documents.
One test book can save a whole batch, particularly when the printing itself has already cost money.
The seventh-place ranking should therefore be understood in context. This PPE machine can absolutely produce useful professional-looking comb-bound documents.
It simply has fewer advanced controls and a lower punching capacity than the strongest machines in our list. There is no electric insertion, no higher-capacity punch, and less custom punching control than models with disengageable dies.
For straightforward comb binding, though, those missing features may not matter. A user producing standard Letter, A4, or A5 office documents can work within the C-12's design without needing complex adjustments.
Simple jobs do not always need complex equipment, which is why this machine can still make sense despite its final ranking.
We believe the PPE C-12 deserves the number seven ranking out of seven for Best Book Binding Machine because its 12-sheet manual punch and basic 21-hole comb system are less productive and adjustable than the six machines above it.
Its strengths are still useful: support for documents up to roughly 500 sheets, compatibility with common office paper sizes, a full-width ambidextrous handle, durable metal construction, portability, reopenable plastic comb binding, and 100 starter 5/16-inch combs included in the package.
Stay within the 12-sheet punching limit for standard paper, reduce batches for heavy covers, test alignment on scrap sheets, choose the correct comb diameter, and keep the waste tray clear. Used that way, the C-12 remains a practical entry-level comb binder for schools, home offices, reports, manuals, presentations, and other occasional document-binding work.